
When it comes to maintaining a vehicle, understanding its various components and how they work together is essential. One critical part of a car’s engine system is the belt, which plays a crucial role in powering various accessories. For owners of the 2009 Hyundai Elantra, knowing the belt diagram is important to ensure proper maintenance.
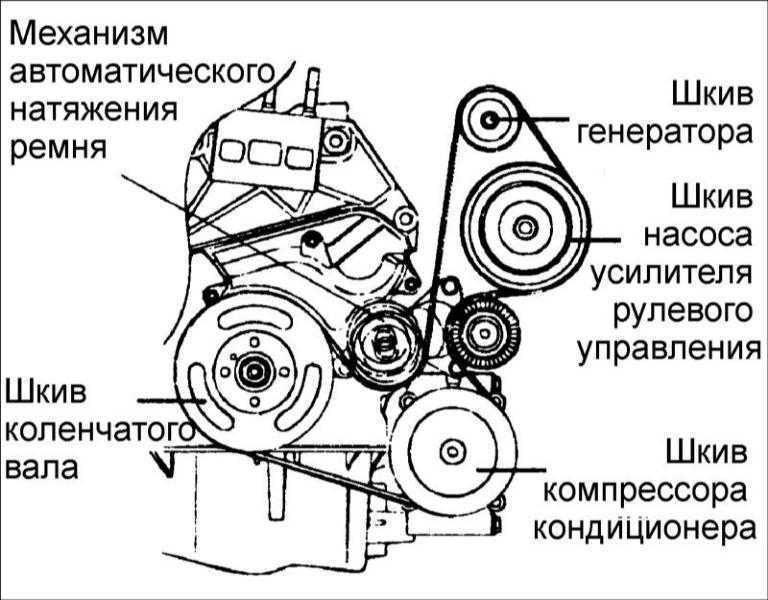
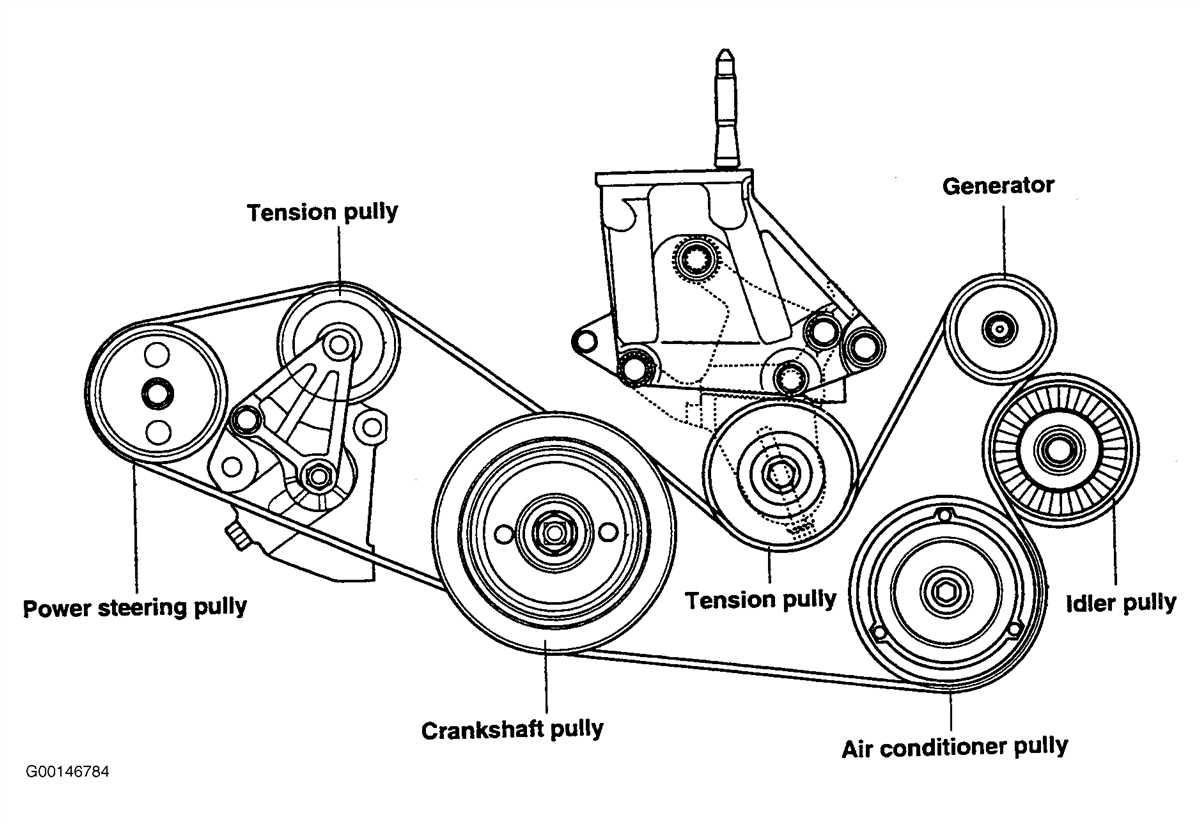
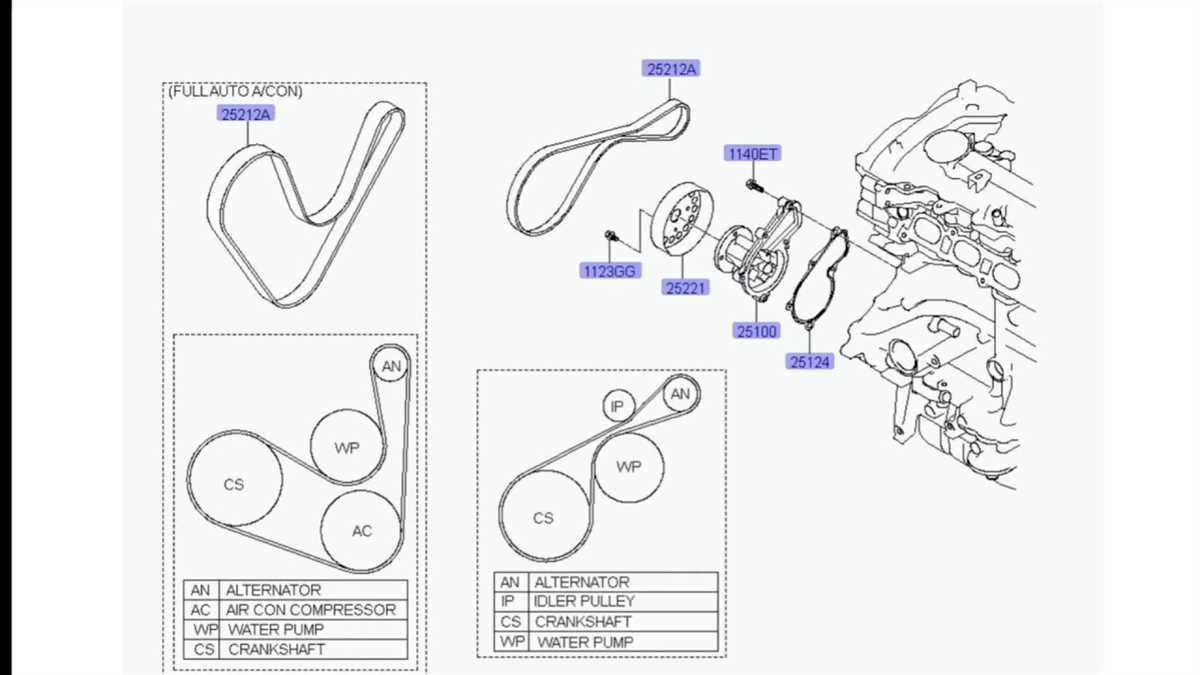
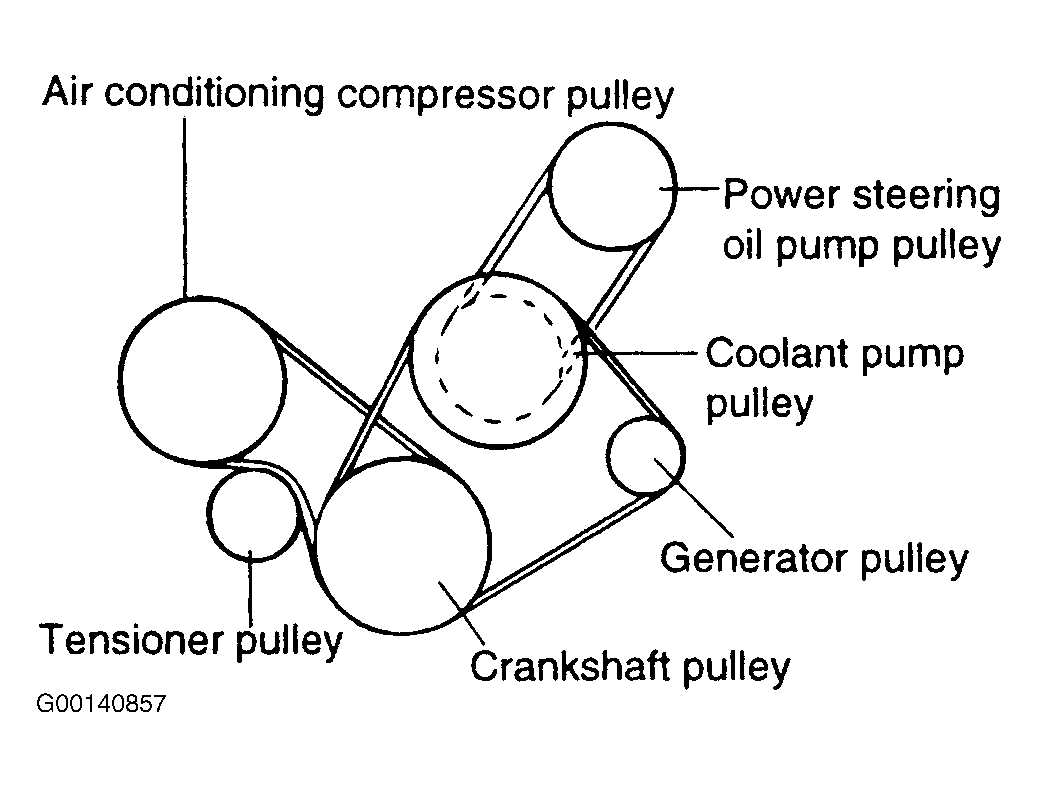
The belt diagram for the 2009 Hyundai Elantra shows the routing of the engine belts, including the serpentine belt and the accessory belts. These belts drive components such as the alternator, power steering pump, and air conditioning compressor. It is important to understand the correct routing of the belts to avoid any issues or damage to the engine system.
By referring to the belt diagram, owners can easily identify the correct path for the belts and ensure that they are properly tensioned. This diagram serves as a visual guide, outlining the order in which the belts run around the various pulleys and ensuring that they are correctly aligned.
Knowing the correct belt routing for the 2009 Hyundai Elantra can also be helpful in case of any belt-related issues. If a belt becomes loose or breaks, understanding the diagram can assist in identifying the problem and replacing the belt promptly. Additionally, following the correct belt routing can help prevent premature wear and tear, ensuring the longevity of the engine and its components.
What is a belt diagram?
A belt diagram, also known as a serpentine belt diagram, is a visual representation that shows the routing and arrangement of the belts in a vehicle’s engine. It is a helpful tool for mechanics and car owners to understand how the belts connect various components of the engine.
The belt diagram provides a clear view of the path the belt takes around different pulleys, including the crankshaft pulley, alternator pulley, power steering pump pulley, and air conditioning compressor pulley, among others. It also indicates the correct tension for each belt, ensuring optimal performance and longevity.
A belt diagram is essential when replacing or inspecting belts in a vehicle. It helps identify the correct belt size, length, and type required for a specific vehicle model. Additionally, it ensures the belt is routed correctly, preventing any potential damage or malfunction caused by incorrect installation.
Without a belt diagram, it can be challenging to visually determine the correct routing of the belts, especially in modern vehicles with complex engine layouts. The diagram serves as a reference guide, saving time and frustration during belt replacement or repair tasks.
In summary, a belt diagram is a useful visual representation that illustrates the correct routing and arrangement of belts in a vehicle’s engine. It helps ensure proper installation, routing, and tensioning of belts, contributing to the overall performance and reliability of the vehicle.
The Importance of a Belt Diagram in a Car
A belt diagram in a car is a visual representation of how the belts in the engine are routed, helping to ensure that they are installed correctly. Belts are an essential component of a car’s engine system, as they help to drive various parts such as the alternator, power steering pump, and air conditioning compressor. Without the belts functioning properly, these essential parts would not work effectively, leading to potential issues with the vehicle’s performance.
Having a belt diagram is crucial when it comes to replacing or repairing the belts in a car. It provides a clear illustration of the correct placement and alignment of the belts, making the installation process easier and more efficient. It is important to note that different car models and engine configurations may require different belt arrangements, so having a specific diagram for your vehicle is essential.
A belt diagram also serves as a handy reference for maintenance and troubleshooting purposes. If a belt becomes loose or starts to make strange noises, referring to the diagram can help identify the source of the problem and guide you in making the necessary adjustments or repairs. It can save time and prevent potential damage to other engine components.
Additionally, a belt diagram can be useful when it comes to routine inspections and preventative maintenance. By regularly checking the condition and tension of the belts, and comparing them to the diagram, you can detect any signs of wear or damage early on and take appropriate action. This can help prevent unexpected belt failures and costly repairs down the line.
In conclusion, a belt diagram in a car is an important tool for proper installation, maintenance, and troubleshooting of belts in the engine system. It ensures that belts are correctly routed, helps with identifying problems, and allows for proactive maintenance. Whether you are a car owner or a professional technician, having access to a belt diagram specific to your vehicle is essential for keeping your car running smoothly and efficiently.
How to Find a Belt Diagram for a 2009 Hyundai Elantra
If you are looking for a belt diagram for your 2009 Hyundai Elantra, there are a few places you can check to find the information you need. The belt diagram illustrates the routing of the various belts in your engine, including the serpentine belt, which drives multiple components such as the alternator, power steering pump, and air conditioning compressor. Having a diagram is helpful when replacing a belt or troubleshooting any issues related to the belt system of your Elantra.
One of the first places you can check for a belt diagram is in the owner’s manual that came with your 2009 Hyundai Elantra. The owner’s manual typically includes diagrams and information about the various components and systems of your vehicle, including the belt routing. Look for a section specifically dedicated to the belt system or diagrams in the index or table of contents of the manual.
If you don’t have access to the owner’s manual or can’t find the information you need, another option is to search online. Hyundai has an official website where you can find resources and information about their vehicles. Visit the Hyundai website and navigate to the “Owner’s” section. Look for a link or section related to manuals or technical information. You may be able to download a digital copy of the owner’s manual, which would include the belt diagram for your 2009 Elantra.
Additionally, there are automotive forums and websites that specialize in providing repair and maintenance information for specific vehicle models, including the Hyundai Elantra. These forums often have dedicated sections for sharing diagrams, instructions, and troubleshooting tips. Search for forums or websites that focus on Hyundai Elantra owners and enthusiasts. Join the community and ask for a belt diagram specifically for your 2009 Elantra. The members of the forum may be able to provide you with the information you need or direct you to a reliable source.
When looking for a belt diagram for your 2009 Hyundai Elantra, be sure to gather as much information about your vehicle as possible. This includes the engine size, trim level, and any additional options or modifications. Having this information readily available will help you ensure that you are looking at the correct diagram for your specific vehicle.
Checking the owner’s manual
When it comes to the 2009 Hyundai Elantra and its belt diagram, one of the first resources you should consult is the owner’s manual. The owner’s manual provides detailed information about the various components of the vehicle, including the belt system. It is important to familiarize yourself with this information in order to properly maintain and troubleshoot any issues that may arise.
The owner’s manual typically includes a diagram or illustration of the belt routing for the specific vehicle model. This diagram shows the path that the belt takes around various pulleys and accessories, such as the alternator and power steering pump. It also indicates the tensioner pulley, which is responsible for maintaining the proper tension on the belt.
Why is checking the owner’s manual important?
- Ensures correct belt installation: The owner’s manual provides the correct belt routing diagram for your specific vehicle, ensuring that you install the belt correctly.
- Aids in troubleshooting: If you are experiencing issues with your belt system, such as squealing or slippage, the owner’s manual can provide troubleshooting tips and guidance.
- Prevents damage to other components: A misaligned or improperly tensioned belt can cause damage to other components in the engine, such as the pulleys or the belt itself. Consulting the owner’s manual can help prevent this potential damage.
How to access the owner’s manual
The owner’s manual can usually be found in the glove compartment of the vehicle. If it is not there, you may be able to download a digital copy from the manufacturer’s website. Alternatively, you can contact a Hyundai dealership for assistance in obtaining a copy of the owner’s manual.
Overall, checking the owner’s manual for the belt diagram is an essential step in properly maintaining and troubleshooting the belt system of your 2009 Hyundai Elantra. It provides valuable information that can help ensure correct installation, prevent damage to other components, and troubleshoot any issues that may arise.
Using online resources
When it comes to finding information and resources for your 2009 Hyundai Elantra belt diagram, the internet can be a valuable tool. With a quick search using the right keywords, you can access a wealth of information from various sources.
Official manufacturer websites: One of the best places to start your search is the official website of Hyundai or specifically the section dedicated to owner’s manuals and diagrams. These websites often provide downloadable versions of the owner’s manual, which may include the belt diagram you are looking for. Additionally, official manufacturer websites may have forums or online communities where you can interact with other Hyundai Elantra owners who have dealt with similar issues.
Online automotive forums and communities: There are numerous online communities and forums dedicated to automotive enthusiasts and DIY enthusiasts. These platforms can be a great resource for finding information and diagrams related to specific car models like the 2009 Hyundai Elantra. You can post your question or search through existing threads to see if someone has already discussed the topic. The community members often provide helpful suggestions, tips, and even visual illustrations.
Third-party repair manuals and websites: Many third-party websites and services specialize in providing repair manuals, diagrams, and other automotive resources. These websites often require a subscription or a fee to access their content, but they can provide detailed and accurate information specifically tailored to your car model. Some websites may offer a free trial or limited access to their resources, allowing you to get the information you need without committing to a paid subscription.
Video tutorials and online guides: In addition to written instructions and diagrams, video tutorials and online guides can be a helpful resource for visual learners. Websites like YouTube often have videos created by automotive enthusiasts or professional mechanics that walk you through specific tasks, including belt replacement. These videos can provide step-by-step instructions and visual demonstrations that make it easier to understand and follow along.
Manufacturer-specific online forums and groups: Aside from general automotive communities, there may be forums and groups specifically dedicated to Hyundai Elantra owners. These platforms can be a goldmine of information as they often have discussions, FAQs, and resources that are specific to your car model. Joining these communities can provide you with access to a network of knowledgeable individuals who have firsthand experience with the 2009 Hyundai Elantra and its belt system.
Overall, utilizing online resources can greatly assist in finding the belt diagram for your 2009 Hyundai Elantra. Whether it’s official manufacturer websites, online forums, third-party repair manuals, video tutorials, or manufacturer-specific communities, the internet offers a plethora of options to help you navigate the process of replacing or repairing your car’s belt system. Remember to verify the credibility of the sources and cross-reference information to ensure accuracy and safety.
Understanding the different types of belts in a 2009 Hyundai Elantra
The 2009 Hyundai Elantra utilizes several different types of belts to drive various components within the vehicle. These belts play a crucial role in maintaining proper functionality and performance. It is important to understand the function of each belt to ensure proper maintenance and timely replacements.
1. Serpentine Belt: The serpentine belt, also known as the drive belt, is the primary belt that powers multiple components in the engine. It connects the crankshaft pulley to various accessories like the alternator, power steering pump, air conditioning compressor, and water pump. This belt is typically made of durable rubber material with grooves on one side to fit onto the pulleys.
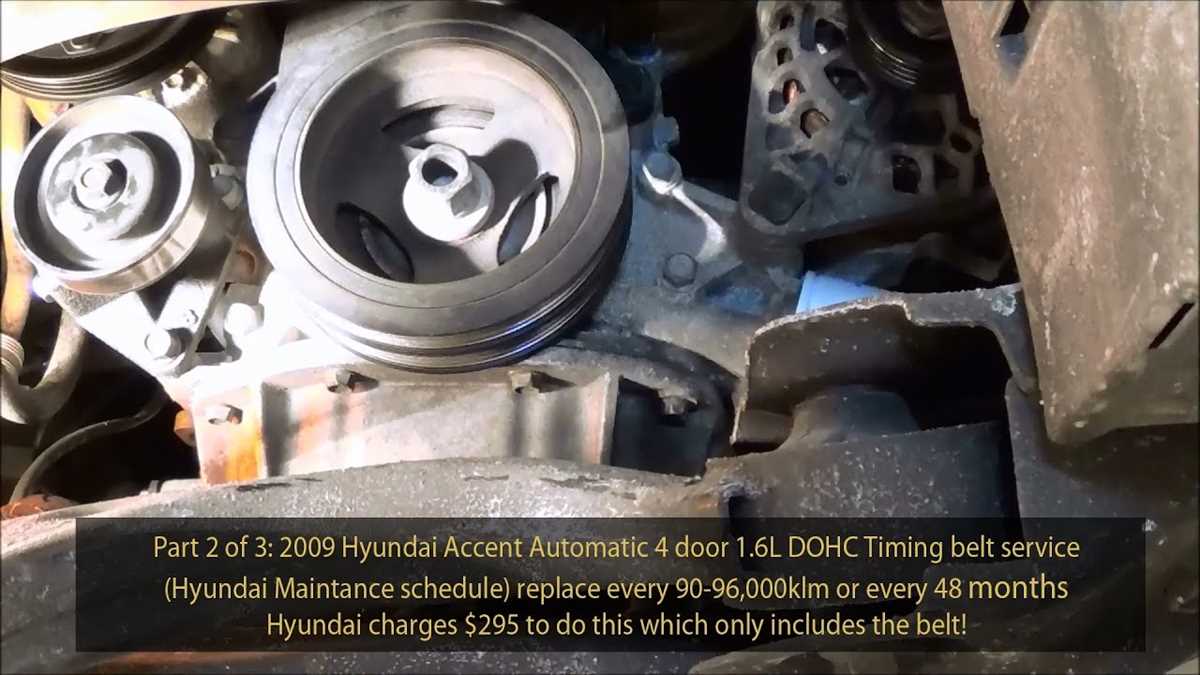
2. Timing Belt: The timing belt is a crucial component in the engine that synchronizes the rotation of the camshaft and the crankshaft. It ensures the proper opening and closing of the engine’s valves. A damaged or worn timing belt can cause serious engine damage. It is important to follow the manufacturer’s recommended replacement intervals for the timing belt.
3. A/C Belt: The A/C belt is responsible for driving the air conditioning compressor. It ensures that the compressor functions correctly, which is crucial for proper air conditioning performance. If the A/C belt becomes worn or damaged, it may result in a loss of cooling capability.
4. Power Steering Belt: The power steering belt connects the power steering pump to the engine. It allows for smooth and effortless steering by assisting in the operation of the power steering system. A worn or loose power steering belt can lead to difficulty in steering or even complete power steering failure.
5. Alternator Belt: The alternator belt drives the alternator, which charges the vehicle’s battery and powers the electrical system while the engine is running. A malfunctioning alternator belt can result in a dead battery and various electrical failures.
Regular inspection and maintenance of these belts are essential to prevent unexpected failures. It is important to check for signs of wear, such as cracks, fraying, or stretching. If any issues are detected, it is advisable to replace the belt promptly to avoid potential damage to vital engine components and ensure the longevity of the 2009 Hyundai Elantra.
Drive Belts
Drive belts, also known as serpentine belts or v-belts, are a vital component of a vehicle’s engine system. They are responsible for driving various engine accessories, such as the alternator, water pump, power steering pump, and air conditioning compressor. Drive belts are typically made of rubber and reinforced with materials like polyester or Kevlar for added strength and durability.
One of the most important functions of drive belts is to transfer power from the engine to the different components that require it. As the engine rotates, the drive belt spins along with it, transmitting power to the accessory pulleys. This allows the alternator to generate electricity, the water pump to circulate coolant, the power steering pump to assist with steering, and the air conditioning compressor to provide cool air.
It is crucial to regularly inspect and replace drive belts as they can wear out over time due to constant exposure to heat, friction, and the strain of tension. Signs of a worn or damaged drive belt include squealing or chirping noises, vibrations, difficulty in starting the engine, and loss of power to the accessories. A broken or malfunctioning drive belt can result in engine overheating, battery drain, loss of power steering, and a malfunctioning air conditioning system.
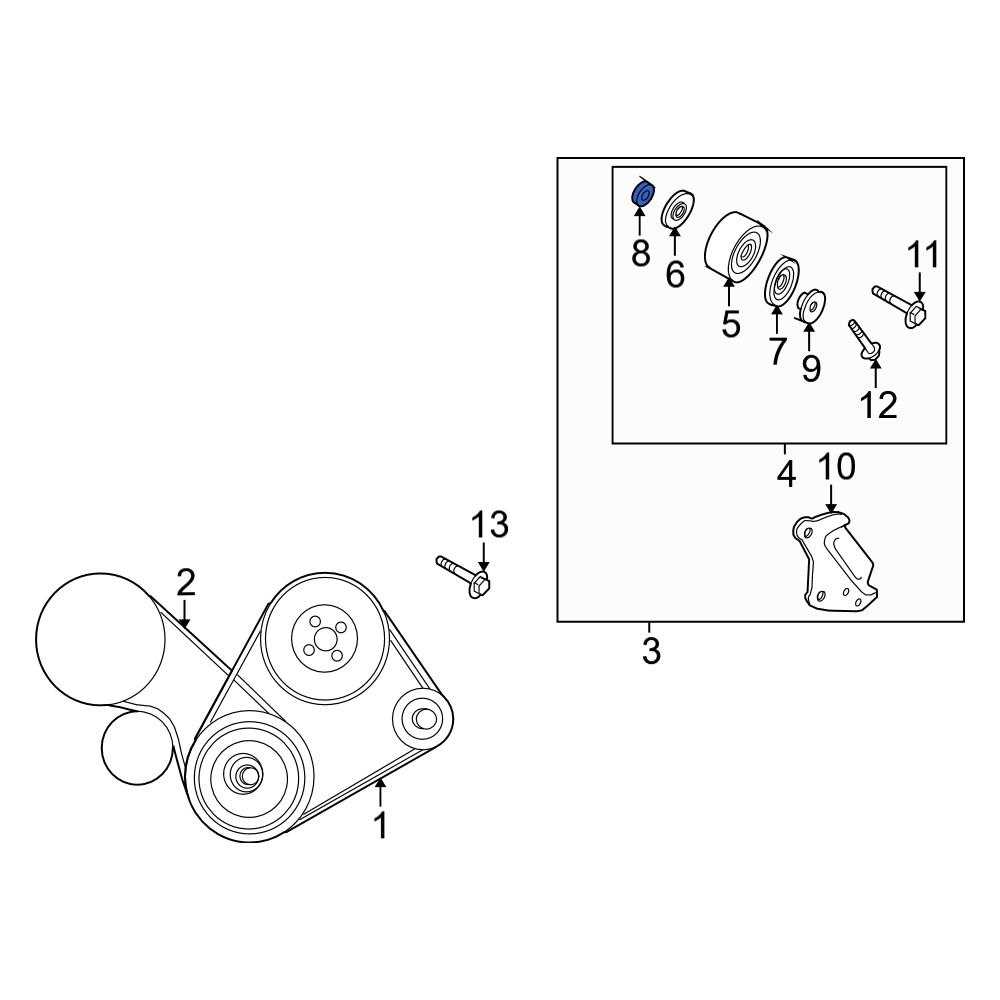
To ensure the proper functioning of your vehicle’s engine system, it is recommended to follow the manufacturer’s recommendations for belt replacement intervals and to have the belts inspected during routine maintenance. Replacing a drive belt typically involves releasing tension from the belt tensioner, removing the old belt, and installing the new one according to the correct routing diagram.
Overall, drive belts play a crucial role in the operation and performance of a vehicle’s engine system. Regular maintenance and replacement of drive belts can help prevent breakdowns and ensure the longevity of the engine’s accessory components.
Timing Belts
Timing belts are an essential component in the engine of a vehicle, responsible for synchronizing the rotation of the crankshaft and the camshaft. They are made of high-strength rubber, reinforced with fibers, and have teeth on the inner side that engage with corresponding gears on the camshaft and crankshaft.
A timing belt ensures that the valves open and close at the appropriate time during the engine’s combustion cycle, allowing for the proper intake of air and fuel, as well as the expulsion of exhaust gases. If the timing belt breaks or jumps a tooth, it can lead to serious engine damage, as the valves may collide with the pistons, causing bent valves or even a complete engine failure.
It is crucial to replace the timing belt according to the manufacturer’s recommended schedule, typically around 100,000 miles or every 7-10 years. Regular inspections are also necessary to check for signs of wear or damage, such as cracks, fraying, or stretching. If any issues are detected, the timing belt should be replaced immediately to avoid potential engine damage.
When replacing a timing belt, it is important to follow the manufacturer’s instructions carefully and use high-quality replacement parts. Additionally, it is recommended to replace other components that are typically replaced along with the timing belt, such as the tensioner and idler pulleys, to ensure optimal performance and prevent future maintenance issues.
Overall, timing belts play a vital role in the proper functioning of an engine. Regular maintenance and timely replacement can help ensure the longevity and reliability of the engine, preventing costly repairs and breakdowns. It is essential for vehicle owners to understand the importance of timing belt maintenance and to follow the recommended guidelines to keep their engines running smoothly.