
When it comes to keeping your Cub Cadet Enforcer performing at its best, understanding the belt system is essential. The belt system in your Cub Cadet Enforcer plays a critical role in transferring power from the engine to the various components that make your machine run smoothly. Without a properly functioning belt system, your Enforcer may not operate as efficiently or effectively as it should.
But fear not! With the help of a Cub Cadet Enforcer belt diagram, you can navigate the complex system that drives your machine and keep it operating at its peak. A belt diagram provides a visual representation of how the belts in your Enforcer connect and work together to power the machine. It identifies each belt, its designated path, and any pulleys or idler arms it passes through. Armed with this knowledge, you have the power to diagnose and resolve any belt-related issues that may arise.
Whether you’re a seasoned Enforcer owner or a newcomer to the world of lawn care, understanding the belt system is key to keeping your machine running smoothly. By referencing a Cub Cadet Enforcer belt diagram, you can gain a deeper understanding of how the belts in your machine function and work together. With this knowledge, you’ll be better equipped to identify and resolve any problems that may arise, ensuring your Enforcer remains a reliable workhorse for years to come.
Cub Cadet Enforcer Belt Diagram
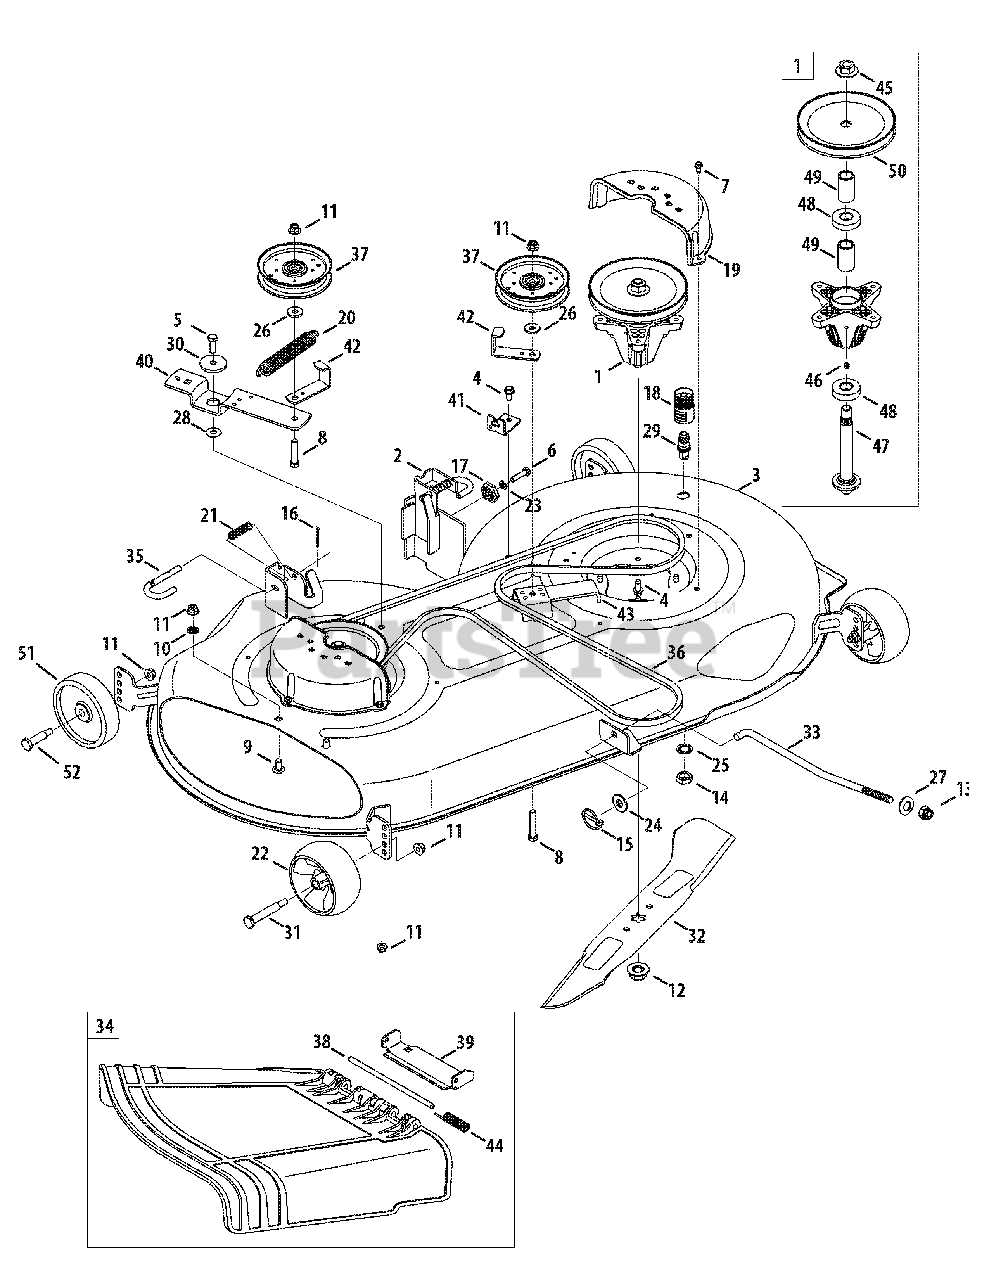
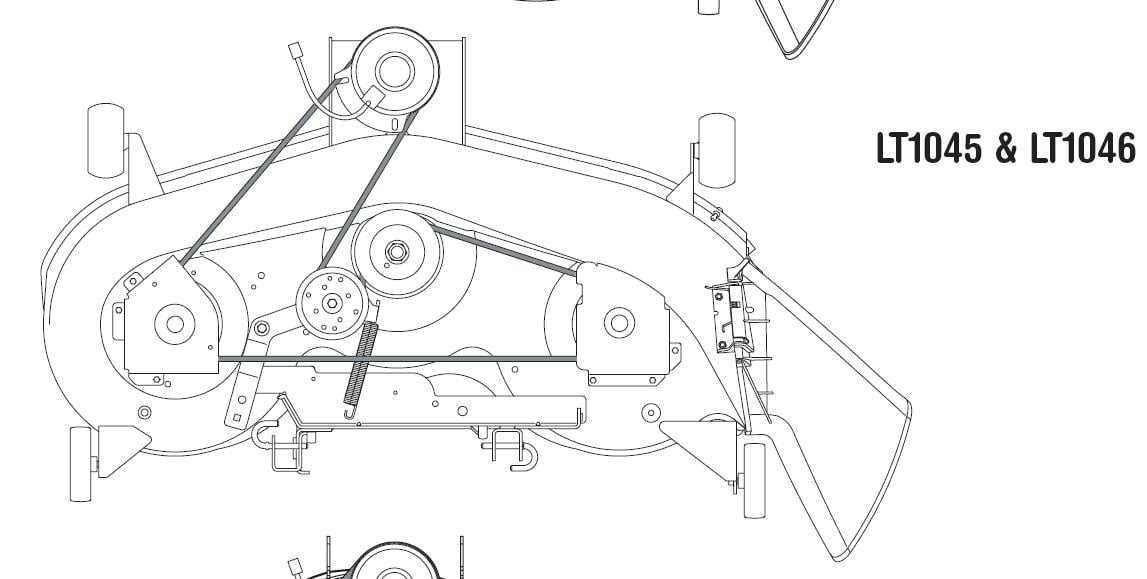
If you own a Cub Cadet Enforcer mower and need to replace the belt, it’s important to have a diagram to guide you through the process. The belt diagram shows the placement and path of the drive belts, allowing you to correctly install a new belt for optimal performance. Here is a breakdown of the various components and their placement in the belt diagram:
- Drive pulley: This is the pulley attached to the engine crankshaft and is responsible for transferring power to the drive belt.
- Idler pulleys: These pulleys provide tension to the drive belt and help keep it in place.
- Deck pulleys: Depending on the specific model of the Cub Cadet Enforcer, there may be one or more deck pulleys that are responsible for driving the blades.
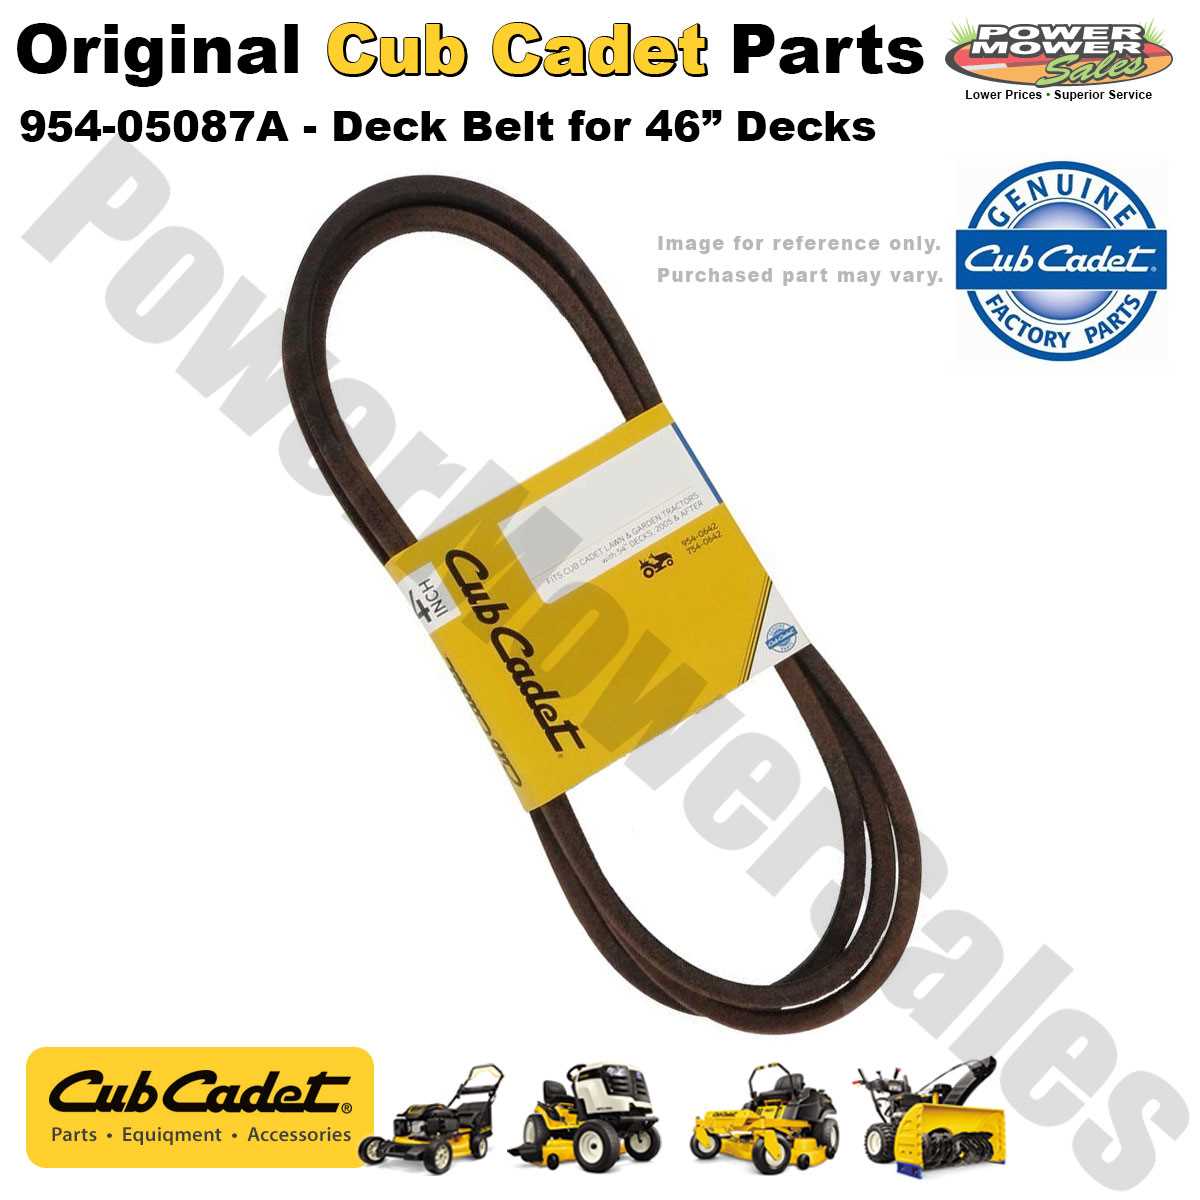
- Deck belt: The deck belt connects the engine pulley to the deck pulleys, allowing the blades to rotate for cutting grass.
- Drive belt: The drive belt connects the engine pulley to the transmission, allowing the mower to move forward or backward.
When replacing the belt on your Cub Cadet Enforcer mower, it’s important to follow the belt diagram closely to ensure proper installation. Start by removing the old belt and inspecting it for any signs of wear or damage. Then, refer to the belt diagram to identify the correct path and placement of the new belt.
In some cases, the belt diagram may be located on a sticker under the hood of the mower or in the owner’s manual. If you are unable to locate the diagram, you can also try searching online or contacting Cub Cadet customer support for assistance. Remember to always refer to the specific model and serial number of your Cub Cadet Enforcer mower when seeking a belt diagram.
What is a Cub Cadet Enforcer Belt Diagram?
The Cub Cadet Enforcer belt diagram is a visual representation of the belt routing on a Cub Cadet Enforcer mower. It shows the path that the belt takes around various pulleys and components on the mower, ensuring that it is properly installed and functioning correctly. The diagram includes labels and arrows to indicate the direction in which the belt should be threaded.
Having a belt diagram is important because it helps to eliminate guesswork and ensures that the belt is installed correctly. If the belt is not properly routed, it can cause problems such as belt slipping, reduced cutting performance, or even damage to the mower’s components.
The Cub Cadet Enforcer belt diagram is typically found in the mower’s owner’s manual or can be obtained from the manufacturer’s website. It is essential to refer to the specific diagram for your mower model, as different models may have different belt routing configurations.
When replacing or adjusting the belt on a Cub Cadet Enforcer mower, it is crucial to follow the instructions provided in the belt diagram to ensure proper installation. This diagram serves as a valuable reference tool for both professional mechanics and DIY enthusiasts working on their mower’s belt system.
- Key features of a Cub Cadet Enforcer belt diagram:
- – Clear and detailed illustration of the belt routing
- – Labels and arrows indicating the direction of belt threading
- – Specific to the mower model and configuration
- – Found in the owner’s manual or manufacturer’s website
- – Important for proper belt installation and functionality
The Importance of a Belt Diagram for Cub Cadet Enforcer
When it comes to maintaining and repairing your Cub Cadet Enforcer, having a belt diagram can be incredibly useful. The belt diagram provides a visual guide that shows the routing and configuration of the belts on your mower. This diagram is crucial in ensuring that the belts are correctly installed and functioning properly, as any misalignment or incorrect installation can result in poor performance or even damage to the mower.
Having a belt diagram also makes it easier to replace or repair a belt on your Cub Cadet Enforcer. Instead of guessing or trying out different configurations, you can refer to the diagram to ensure that the new belt is installed correctly. This can save you time and frustration, as well as prevent any further damage to your mower.
Key phrases:
- Cub Cadet Enforcer
- belt diagram
- visual guide
- routing and configuration
- correctly installed
- poor performance
- damage to the mower
- replace or repair a belt
- save you time and frustration
Furthermore, the belt diagram can help you identify any parts or accessories that may be missing or damaged. By comparing the diagram to the actual state of your mower, you can easily identify any inconsistencies or abnormalities. This allows you to promptly replace or fix any components that are necessary for the proper functioning of the belts and the overall performance of your Cub Cadet Enforcer.
In addition, the belt diagram serves as a valuable reference for future maintenance and troubleshooting. By keeping a copy of the diagram or accessing it online, you can quickly refer to it whenever you need to inspect or replace the belts on your mower. This can help you save time and effort, as you won’t have to search for information or consult the manual every time you need to work on the belts.
In conclusion, a belt diagram for your Cub Cadet Enforcer is an essential tool for proper maintenance and repair. It provides a visual guide for the correct installation and configuration of the belts, helps identify missing or damaged parts, and serves as a reference for future troubleshooting and maintenance. Investing in a belt diagram can ultimately save you time, effort, and potentially costly repairs.
How to Read and Understand a Cub Cadet Enforcer Belt Diagram
When it comes to maintaining your Cub Cadet Enforcer, understanding the belt diagram is essential. This diagram shows the routing and configuration of the belts in your mower, helping you identify the correct installation and replacement process.
1. Identify the Belt Paths: The first step is to locate the belt diagram for your specific model of Cub Cadet Enforcer. This diagram is typically found in the owner’s manual or maintenance guide. Once you have the diagram, take a close look at it to identify the different belt paths. Each belt will have a specific route it needs to follow.
2. Determine Belt Sizes: The diagram will also provide information about the sizes of the belts used in your mower. This is important when it comes to purchasing replacement belts, as you will need to ensure you choose the correct size. The diagram will usually specify the length and width of each belt.
3. Follow the Arrows: The belt diagram will typically include arrows that indicate the direction in which the belts should be routed. Pay close attention to these arrows and ensure that you follow the correct routing sequence. Improper belt routing can lead to inefficiencies or even damage to your mower.
4. Note Attachment Points: The belt diagram will also highlight the various attachment points where the belts are secured. These attachment points are essential in ensuring the belts stay in place and maintain proper tension. Refer to the diagram to identify and understand these attachment points.
5. Use the Correct Tension: Proper belt tension is crucial for the optimal functioning of your Cub Cadet Enforcer. The diagram may provide information on the correct tension for each belt. Follow these guidelines to ensure that the belts are tightened appropriately, preventing slippage or excessive wear.
6. Consult a Professional if Needed: If you are unsure about reading or understanding the belt diagram, it is always best to consult a professional or contact Cub Cadet customer support. They will be able to guide you through the process and answer any specific questions you may have about your particular model.
By carefully reading and understanding the Cub Cadet Enforcer belt diagram, you can ensure that you install and replace the belts correctly, leading to optimal performance and longevity of your mower. Regularly referring to the diagram during maintenance will help you maintain the efficiency and reliability of your Cub Cadet Enforcer.
Steps to Replace the Belt on a Cub Cadet Enforcer
If you are experiencing issues with the belt on your Cub Cadet Enforcer, such as slippage or damage, it may be necessary to replace the belt. Here are the steps you can follow to replace the belt and ensure proper operation of your Cub Cadet Enforcer.
1. Prepare for the Replacement
Before beginning the replacement process, it is essential to gather the necessary tools and materials. You will need a wrench or socket set for removing the belt cover, a replacement belt specifically designed for your Cub Cadet Enforcer model, and any additional tools specified in your owner’s manual.
2. Disconnect the Spark Plug
Prior to working on any part of your Cub Cadet Enforcer, it is crucial to disconnect the spark plug wire to prevent accidental starting. Locate the spark plug, usually on the engine’s side, and carefully remove the wire connection.
3. Remove the Belt Cover
Using the appropriate wrench or socket set, remove the screws or bolts securing the belt cover in place. Once the cover is removed, you will have access to the belt and pulleys.
4. Release Tension and Remove the Old Belt

Identify the belt tensioner, usually located near the engine or drive pulley. Using a suitable tool, release the tension on the belt and carefully remove it from the pulleys. Pay attention to the belt’s routing path, as you will need to reinstall the new belt in the same manner.
5. Install the New Belt
Take the replacement belt designed for your Cub Cadet Enforcer and carefully thread it onto the pulleys according to the routing path you observed during belt removal. Make sure the belt is correctly aligned and properly positioned on all pulleys.
6. Restore Belt Tension
Using the belt tensioner or adjustment mechanism specified in your owner’s manual, apply tension to the belt until it is taut. Check the tension to ensure it is within the recommended range specified by Cub Cadet.
7. Reattach the Belt Cover
Once the new belt is properly installed and tensioned, reattach the belt cover onto the Cub Cadet Enforcer. Secure it in place using the screws or bolts you removed earlier. Double-check that all connections are tight and secure.
8. Reconnect the Spark Plug
Finally, reconnect the spark plug wire to the spark plug. Ensure it is tightly connected, and verify that no other tools or parts obstruct the engine or moving belts. This step is crucial for safety and to prevent accidental starting.
Following these steps will help you replace the belt on your Cub Cadet Enforcer and restore proper functionality to your equipment. If you have any questions or encounter difficulties during the process, consult your owner’s manual or consider seeking assistance from a qualified technician.
Troubleshooting Common Belt-related Issues on a Cub Cadet Enforcer
When it comes to maintaining your Cub Cadet Enforcer’s belt, it’s important to be aware of common issues that may arise. Proper maintenance and troubleshooting can help prolong the life of your belt and ensure optimal performance. Here are some common belt-related issues you may encounter with your Cub Cadet Enforcer and how to troubleshoot them.
1. Belt Slippage:
If you notice that the belt on your Cub Cadet Enforcer is slipping or not engaging properly, it could be due to incorrect belt tension. Start by checking the tension of the belt and adjusting it if necessary. The correct tension should allow the belt to move smoothly without slipping. Additionally, inspect the belt for any signs of wear or damage. A worn-out or damaged belt may also cause slippage and should be replaced.
2. Belt Misalignment:
If the belt on your Cub Cadet Enforcer is misaligned, you may experience issues with the mower deck or other attachments. Check that the belt is properly aligned with all pulleys and guides. Misalignment can cause the belt to wear unevenly or even become damaged. Adjust the belt alignment as needed to ensure smooth operation.
3. Belt Breakage:
If the belt on your Cub Cadet Enforcer breaks, it can cause a complete loss of power transmission. Examine the belt for any signs of wear, fraying, or damage. Replace the belt if it appears worn or damaged. Additionally, check for any obstructions or debris that could have caused the belt to break. It’s important to keep the belt area clean and free of debris to prevent belt breakage.
4. Excessive Belt Noise:
If you notice excessive noise coming from the belt area of your Cub Cadet Enforcer, it could be a sign of a problem. Inspect the belt for any signs of wear, damage, or debris. Clean the belt area thoroughly and remove any obstructions. If the noise persists, it may be necessary to replace the belt or check for any other underlying issues such as worn pulleys or guides.
By addressing these common belt-related issues promptly and taking proactive measures to maintain your Cub Cadet Enforcer’s belt, you can ensure that it continues to operate smoothly and efficiently. Regular inspection, proper tension, and prompt belt replacement when necessary can help prevent costly repairs and keep your Cub Cadet Enforcer in optimal condition for years to come.
Tips for Maintaining and Extending the Life of the Belt on a Cub Cadet Enforcer
If you want to keep your Cub Cadet Enforcer running smoothly and efficiently, proper maintenance of the belt is essential. Here are some tips to help you maintain and extend the life of the belt on your Cub Cadet Enforcer:
Regular Inspection:
The first step in maintaining the belt is to regularly inspect it for any signs of wear and tear. Look for cracks, fraying, or any other damage that could potentially lead to a belt failure. Catching these issues early on can prevent them from causing further damage.
Cleanliness:
Keeping the belt clean is crucial for its longevity. Regularly remove any debris or grass clippings that may accumulate on the belt to prevent them from causing damage or reducing the belt’s efficiency. Clean the belt using a brush or cloth to remove any dirt or residue.
Tension Adjustment:
Check the tension of the belt regularly and adjust it if necessary. A loose or sagging belt can cause the mower to operate less efficiently, while an overtightened belt can put unnecessary stress on the motor and other components. Follow the manufacturer’s guidelines for proper tension adjustment.
Proper Storage:
When storing your Cub Cadet Enforcer, make sure to store it in a cool, dry place away from direct sunlight. Extreme temperatures and exposure to sunlight can deteriorate the belt over time. Additionally, store the mower in a position that relieves tension from the belt to prevent it from becoming stretched or distorted.
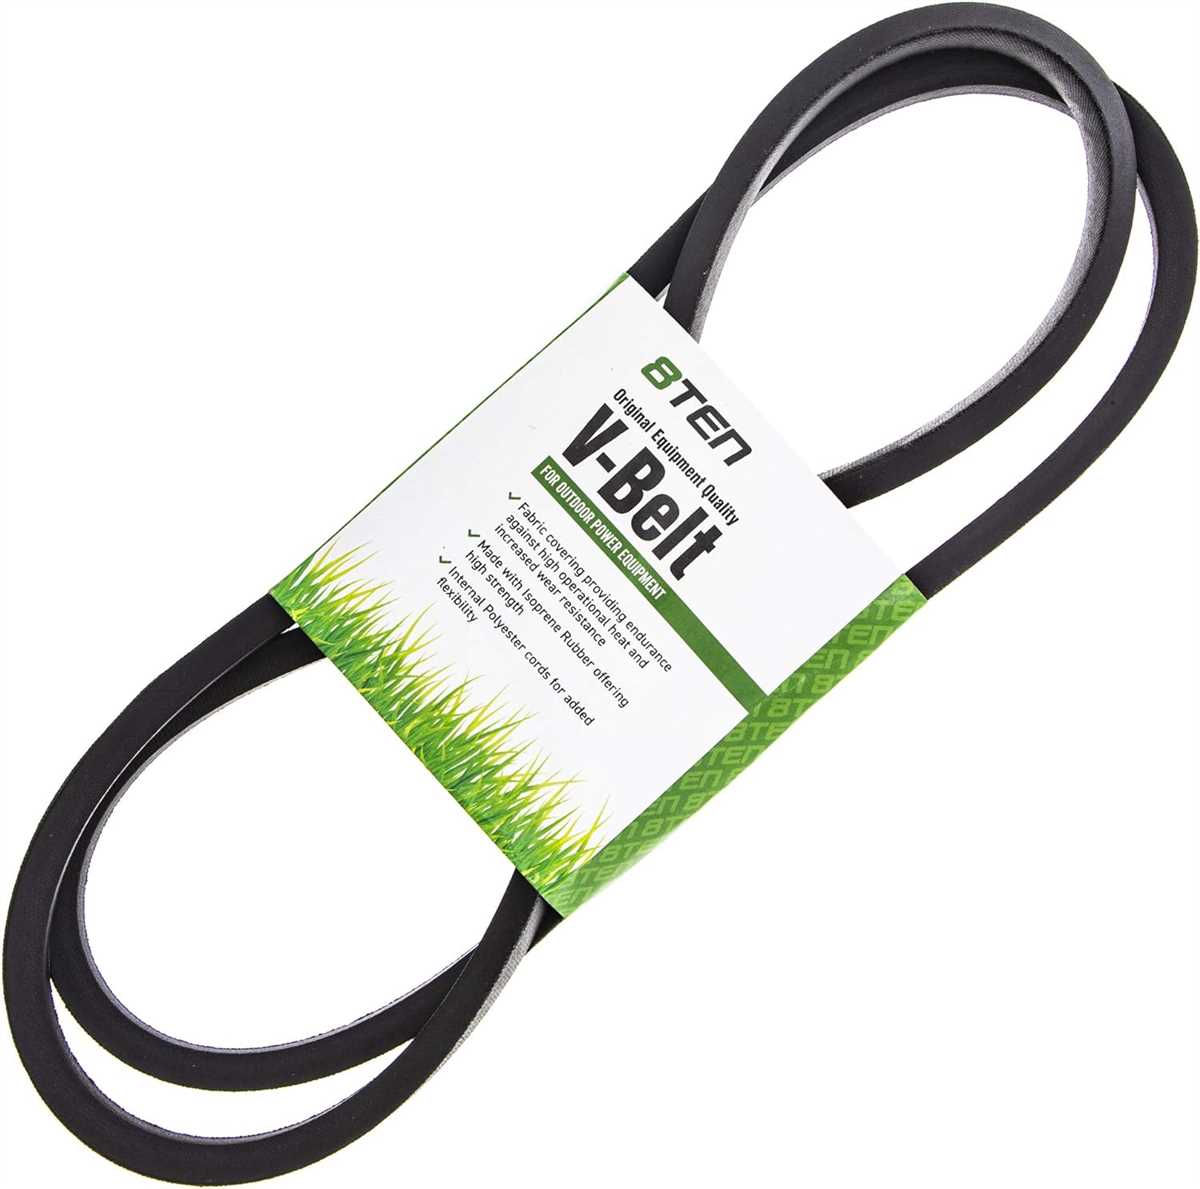
Replacement:

Even with proper maintenance, belts will eventually wear out and need to be replaced. It is important to use genuine Cub Cadet replacement belts to ensure compatibility and optimal performance. Refer to the user manual or seek professional assistance for guidance on how to properly replace the belt.
By following these tips, you can keep the belt on your Cub Cadet Enforcer in optimal condition, allowing for a smooth and efficient mowing experience. Regular maintenance and proper care will help extend the life of the belt, ultimately saving you time and money in the long run.
Disclaimer: The information provided in this article is for informational purposes only. Please refer to the user manual or seek professional assistance for specific maintenance and repair instructions for your Cub Cadet Enforcer.