
A Kenmore dryer is a valuable appliance that helps keep our clothes clean and dry. One of the key components of a dryer is the heating element, which is responsible for generating the heat necessary to dry our clothes. Understanding the Kenmore dryer diagram, particularly the heating element, can help us troubleshoot any issues that may arise and ensure that our dryer operates efficiently.
The heating element is a vital part of the drying process as it converts electrical energy into heat. It is typically located at the back of the dryer and is responsible for raising the air temperature inside the drum. As the hot air circulates, it removes moisture from the clothes, leaving them dry and ready to be worn.
The Kenmore dryer diagram provides a detailed illustration and explanation of the heating element’s components. It typically includes labels for the thermostat, thermal fuse, and heating coils. The thermostat regulates the temperature by turning the heating element on and off, while the thermal fuse acts as a safety device by cutting off power to the heating element if it becomes too hot. The heating coils, also known as coil elements, are responsible for creating the heat needed to dry the clothes.
By referring to the Kenmore dryer diagram, homeowners can easily identify and understand the different components of the heating element. This knowledge can be beneficial in troubleshooting and diagnosing any issues, such as a lack of heat or inconsistent heating. Additionally, understanding the heating element’s components can help homeowners properly maintain and clean their dryer, ensuring optimal performance and extending the appliance’s lifespan.
Kenmore Dryer Diagram Heating Element
The heating element is a crucial component in a Kenmore dryer, as it is responsible for generating the heat necessary to dry clothes. Understanding the diagram of the heating element can be helpful for troubleshooting and repairing any issues related to it. The diagram typically displays the various parts and connections involved in the heating element system.
The diagram of a Kenmore dryer heating element may include the following components: the heating element coil, thermal fuse, high-limit thermostat, cycling thermostat, and timer. The heating element coil is the main component that produces the heat. It is usually a coil-shaped wire that gets heated when an electrical current passes through it. The thermal fuse is a safety device that prevents the dryer from overheating by cutting off the power to the heating element if the temperature exceeds a certain threshold. The high-limit thermostat also serves as a safety feature and cuts off the power if the temperature reaches a critical level. The cycling thermostat, on the other hand, regulates the temperature within a certain range to ensure efficient and safe drying. The timer controls the duration of the drying cycle.
In order to understand the wiring and connections of the heating element system, it is important to refer to the specific diagram for the particular model of the Kenmore dryer. This diagram can usually be found in the user manual or online. It provides a visual representation of how the different components are interconnected and how the electrical current flows through the system. By following the diagram and using a multimeter for testing, it is possible to diagnose and fix any issues with the heating element, such as a broken coil or a faulty thermostat.
In conclusion, the diagram of the heating element in a Kenmore dryer is an essential tool for troubleshooting and repairing any heating-related problems. Understanding the various components and their connections can help in identifying and fixing issues in an efficient and safe manner. By referring to the diagram and using appropriate tools, users can maintain the functionality of their Kenmore dryer and ensure effective drying of their clothes.
The Importance of the Heating Element in a Kenmore Dryer
When it comes to drying clothes efficiently and effectively, the heating element in a Kenmore dryer plays a crucial role. The heating element is responsible for producing the heat necessary to dry your clothes by converting electrical energy into heat energy. Without a properly functioning heating element, your Kenmore dryer would not be able to provide the necessary heat to dry your clothes adequately.
The heating element in a Kenmore dryer is typically made of a coiled resistant wire enclosed in a metal housing. When you turn on your dryer, an electrical current passes through the heating element, causing the wire to heat up and produce heat. This heat is then circulated throughout the dryer drum, warming up the air and allowing it to effectively absorb moisture from the clothes.
A malfunctioning or faulty heating element can lead to a variety of issues. If the heating element is not producing enough heat, your clothes may take longer to dry, resulting in wasted time and energy. On the other hand, if the heating element is too hot, it can cause damage to your clothes or even start a fire. Therefore, it is essential to regularly inspect and maintain the heating element in your Kenmore dryer to ensure optimal performance and avoid any potential safety hazards.
To diagnose and troubleshoot heating element issues in a Kenmore dryer, it is recommended to refer to the dryer’s wiring diagram. This diagram provides a visual representation of the dryer’s electrical system, including the heating element and its connections. By following the diagram, you can easily identify any faulty components or wiring issues that may be affecting the heating element’s performance.
In conclusion, the heating element in a Kenmore dryer is a vital component for efficient and effective clothes drying. Regular maintenance and inspection of the heating element can help ensure optimal performance and prevent potential safety hazards. If you are experiencing any issues with your Kenmore dryer’s heating element, referring to the dryer’s wiring diagram can help you diagnose and troubleshoot the problem effectively.
Understanding the Components of the Kenmore Dryer Heating System
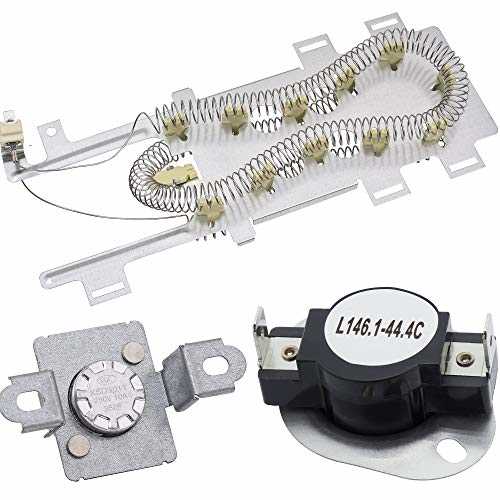
The Kenmore dryer heating system consists of several key components that work together to produce heat and dry clothes effectively. These components include the heating element, thermal fuse, thermostat, and high-limit thermostat. Understanding how these parts function can help diagnose and fix common heating issues with your Kenmore dryer.
Heating Element
The heating element is a crucial part of the Kenmore dryer heating system. It is responsible for producing the heat that dries the clothes. The heating element is usually made of coiled metal wire that heats up when an electric current passes through it. Over time, the heating element can wear out or become damaged, resulting in a lack of heat production. If your dryer is not heating up, it is important to check the heating element for any signs of damage or malfunction.
Thermal Fuse
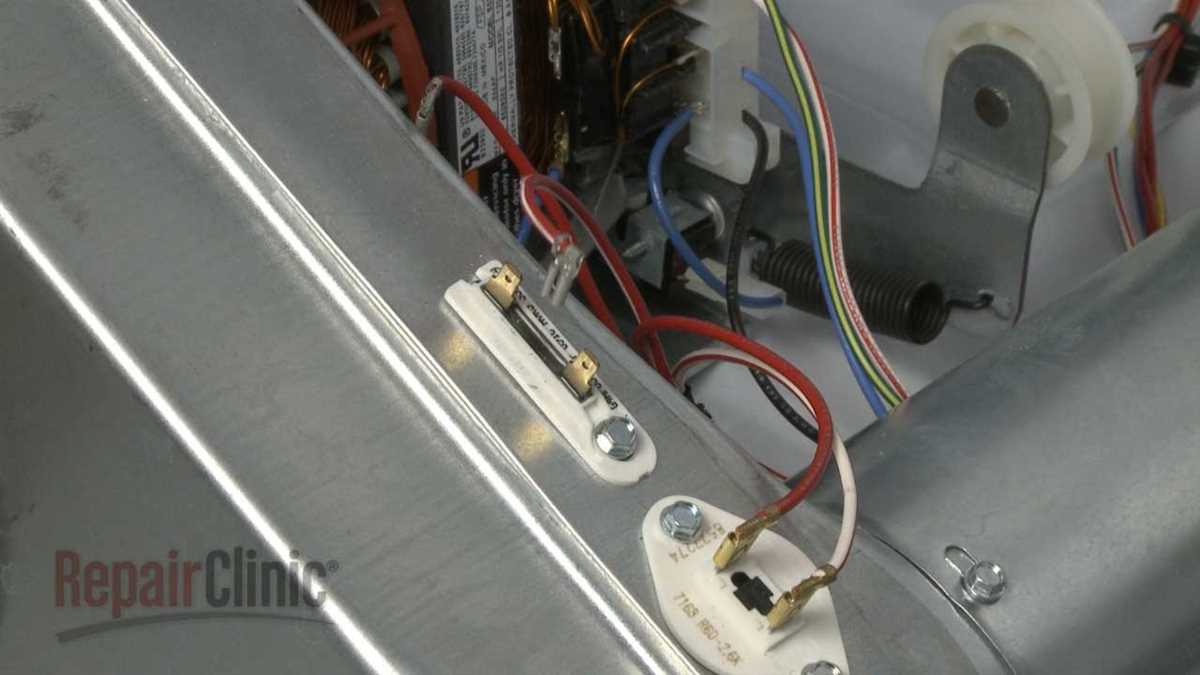
The thermal fuse acts as a safety device in the Kenmore dryer heating system. It is designed to protect the dryer from overheating by cutting off power to the heating element if the temperature exceeds a certain limit. If the thermal fuse blows, it will prevent the heating element from receiving power, resulting in a dryer that does not produce heat. Checking the thermal fuse for continuity using a multimeter can help determine if it is the cause of the heating issue.
Thermostat

The thermostat is a temperature-sensitive switch that controls the operation of the heating element in the Kenmore dryer. It is responsible for regulating the temperature inside the dryer drum. When the dryer reaches the desired temperature, the thermostat interrupts the power supply to the heating element, allowing it to cool down. If the thermostat is faulty or out of calibration, it may not signal the heating element to shut off, causing the dryer to overheat or not produce enough heat. Testing the thermostat for continuity can help determine if it is the cause of the heating problem.
High-Limit Thermostat
The high-limit thermostat, also known as the safety thermostat, is another important component of the Kenmore dryer heating system. It is designed to prevent the dryer from overheating by cutting off power to the heating element if the temperature rises above a certain threshold. If the high-limit thermostat fails, it can cause the dryer to overheat or not produce enough heat. Testing the high-limit thermostat for continuity can help determine if it is functioning correctly.
In conclusion, the Kenmore dryer heating system is comprised of the heating element, thermal fuse, thermostat, and high-limit thermostat. These components work together to produce heat and ensure the safe operation of the dryer. If your Kenmore dryer is not heating up properly, checking and troubleshooting these components can help identify and resolve the heating issue. Always exercise caution when working with electrical components and consult a professional if you are unsure how to proceed.
How to Identify a Faulty Heating Element in a Kenmore Dryer
When your Kenmore dryer is not heating properly, one of the most common causes of the issue is a faulty heating element. The heating element is responsible for generating the heat needed to dry your clothes. If it is not functioning correctly, your dryer will not be able to adequately dry your laundry. Fortunately, there are a few signs that can help you identify if your Kenmore dryer’s heating element is faulty.
1. Lack of heat
If your Kenmore dryer is running but there is no heat, this is the most obvious sign of a faulty heating element. Check the dryer settings to ensure that the heat option is selected correctly. If it is, and there is still no heat, it is likely that the heating element needs to be replaced.
2. Inconsistent heating
Another indication of a faulty heating element is inconsistent heating. If your dryer is producing some heat but not enough to effectively dry your clothes, this could be due to a partially malfunctioning heating element. Your clothes may come out damp or take longer than usual to dry. It is important to address this issue promptly to prevent further damage to the heating element or other dryer components.
3. Visible damage
Inspect the heating element for any visible signs of damage. Look for cracks, breaks, or burns on the element itself. If you notice any damage, it is a clear indication that the heating element needs to be replaced. Be sure to disconnect the power before attempting to examine or replace the heating element to avoid any electrical hazards.
If you observe any of these signs, it is recommended to contact a professional technician or the manufacturer for assistance. They will be able to diagnose the issue accurately and provide you with the necessary steps to resolve the problem. Remember to prioritize safety and always unplug the dryer before attempting any maintenance or repairs.
Step-by-Step Guide to Replacing the Heating Element in a Kenmore Dryer
Is your Kenmore dryer not producing heat? It could be due to a faulty heating element. Replacing the heating element is a relatively simple task that can be done at home with a few basic tools. Follow this step-by-step guide to get your Kenmore dryer up and running again.
1. Unplug the dryer
Safety is paramount when working on any electrical appliance. Start by unplugging the dryer from the power source to avoid any accidents.
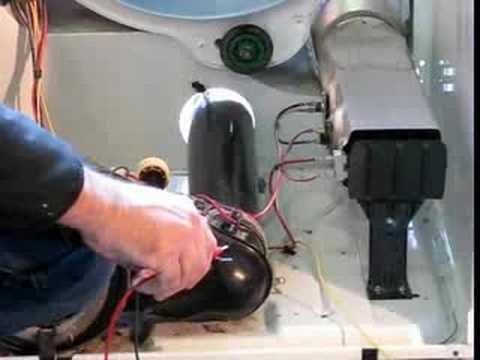
2. Access the heating element
Remove the dryer’s front panel to gain access to the heating element. This may require removing a few screws or clips, but consult your Kenmore dryer’s manual for specific instructions.
3. Disconnect the wires
Before removing the heating element, disconnect the wires connected to it. Take note of where each wire is connected so that you can easily reconnect them later.
4. Remove the old heating element
Once the wires are disconnected, you can remove the old heating element. Again, refer to your Kenmore dryer’s manual for guidance on how to do this.
5. Install the new heating element
Take the new heating element and carefully place it into the proper position. Ensure that it is securely in place before moving on to the next step.
6. Reconnect the wires
Now it’s time to reconnect the wires to the new heating element. Make sure to match the wires to their corresponding connections and tighten any screws or clips to secure them.
7. Reattach the front panel
Once the heating element is installed and the wires are connected, reattach the dryer’s front panel. Again, refer to the manual for any specific instructions on properly securing the panel.
8. Plug the dryer back in
After completing the steps above, plug the dryer back into the power source. Turn it on and check if the heating element is functioning properly. If the dryer is now producing heat, you have successfully replaced the heating element.
By following this step-by-step guide, you can easily replace the heating element in your Kenmore dryer and restore its functionality. Remember to always prioritize safety by unplugging the dryer before working on it and consult the manual for any specific instructions.
Tips for Maintaining and Extending the Lifespan of the Heating Element
Kenmore dryers are known for their durable heating elements, but like any appliance, they require regular maintenance to ensure optimal performance and extend their lifespan. Here are some tips to help you maintain your Kenmore dryer’s heating element:
- Clean the lint filter regularly: A clogged lint filter can obstruct airflow and cause the heating element to overheat. Clean the lint filter after each use to prevent lint buildup and improve the dryer’s efficiency.
- Inspect and clean the vent system: A blocked or restricted vent system can lead to overheating and potential damage to the heating element. Check the vents for any obstructions and clean them periodically to ensure proper airflow.
- Avoid overloading the dryer: Overloading the dryer can strain the heating element, leading to overheating and premature failure. Follow the manufacturer’s recommendations regarding load capacity to prevent unnecessary stress on the heating element.
- Check the power supply: Ensure that the dryer is receiving adequate power supply and that the electrical connections are secure. Any power fluctuations or loose connections can potentially damage the heating element.
- Inspect the heating element for damage: Regularly inspect the heating element for signs of wear or damage. If you notice any cracks, breaks, or discoloration, it may be time to replace the heating element to prevent further issues.
- Follow proper operating procedures: Use the dryer according to the manufacturer’s instructions and avoid using it for purposes it is not intended for. Improper use can put unnecessary strain on the heating element and reduce its longevity.
By following these tips, you can maintain your Kenmore dryer’s heating element in good condition and prolong its lifespan, ensuring that your dryer continues to provide efficient and reliable performance for years to come.
Common Issues and Troubleshooting Methods for the Kenmore Dryer Heating Element
When it comes to the Kenmore dryer heating element, there are a few common issues that homeowners may encounter. However, many of these problems can be easily diagnosed and resolved without the need for professional assistance. By understanding these common issues and knowing the troubleshooting methods, you can keep your Kenmore dryer running smoothly and efficiently.
1. Lack of Heat
If your Kenmore dryer is not producing any heat, there are a few possible causes. The first thing to check is the power supply. Make sure the dryer is plugged in properly and that the circuit breaker or fuse is in good working order. Additionally, verify that the dryer’s control settings are correctly adjusted for heat. If power and settings are not the issue, the heating element itself may be faulty and need to be replaced.
2. Insufficient Heat
Another common issue with the Kenmore dryer heating element is insufficient heat. If your dryer is producing some heat but not enough to dry your clothes effectively, there are a few steps you can take. First, make sure the lint filter is clean and free of debris. A clogged lint filter can restrict airflow and reduce the dryer’s heating ability. If the lint filter is clear, check the vent system for any obstructions. A blocked vent can also lead to insufficient heat. Lastly, ensure that the dryer is not overloaded, as this can affect its performance.
3. Burnt or Damaged Heating Element
If you notice any visible signs of damage, such as burns or breaks, on the heating element, it will likely need to be replaced. A damaged heating element cannot effectively generate heat, and attempting to use it may present safety hazards. Consult the user manual or contact a professional for guidance on how to replace the heating element properly.
Conclusion
The Kenmore dryer heating element is a crucial component that is responsible for generating the heat needed to dry your clothes. By understanding common issues such as lack of heat, insufficient heat, and burnt or damaged heating elements, you can troubleshoot and resolve problems efficiently. Remember to always prioritize safety and consult professional help if needed. Regular maintenance and proper usage can help prolong the lifespan of your Kenmore dryer heating element, ensuring it continues to function optimally for years to come.