
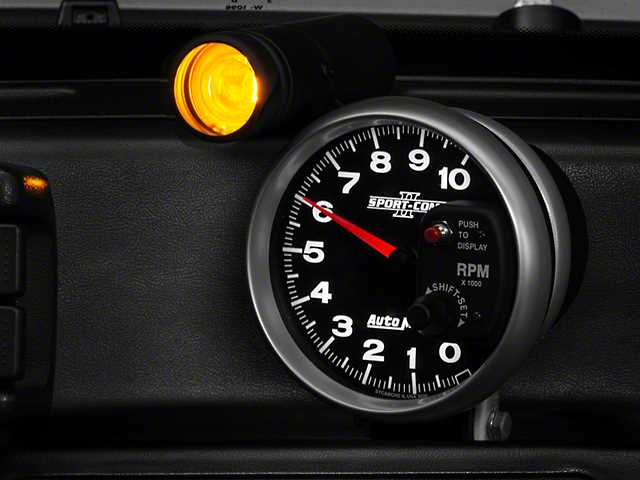
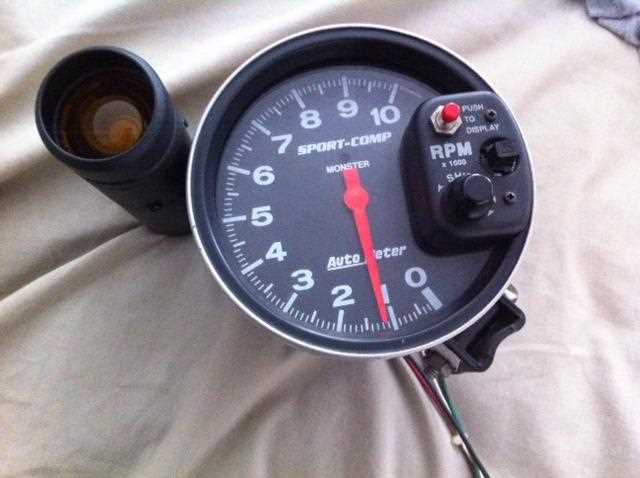
If you’re a car enthusiast or a DIY mechanic, you know the importance of having accurate and reliable gauges for monitoring your vehicle’s engine performance. One of the most popular and trusted brands in the industry is Autometer, and their Sport Comp Monster Tach is a favorite among many car enthusiasts.
The Autometer Sport Comp Monster Tach is a high-performance tachometer that provides accurate RPM readings, ensuring you’re always in tune with your engine’s performance. However, installing this powerful gauge in your vehicle can be a bit tricky if you’re not familiar with the wiring process.
In this comprehensive guide, we will walk you through the step-by-step process of wiring the Autometer Sport Comp Monster Tach. We’ll cover everything from gathering the necessary tools and materials to properly connecting the gauge to your vehicle’s electrical system. With our detailed instructions and helpful tips, you’ll have your Sport Comp Monster Tach up and running in no time.
How to Install an Autometer Sport Comp Monster Tach
If you’re looking to add a high-performance tachometer to your vehicle, the Autometer Sport Comp Monster Tach is a great option. This tachometer not only provides accurate RPM readings, but it also has a sleek and sporty design that will enhance the look of your car’s interior. Installing an Autometer Sport Comp Monster Tach is a relatively simple process, and with the right tools and a little bit of patience, you can have it up and running in no time. Here’s a step-by-step guide on how to install an Autometer Sport Comp Monster Tach.
Step 1: Gather the Necessary Materials and Tools
Before you begin the installation process, it’s important to gather all the necessary materials and tools. Here’s a list of what you’ll need:
- Autometer Sport Comp Monster Tach
- Mounting bracket
- Wiring harness
- Wire strippers
- Crimping tool
- Electrical tape
- Socket set
- Screwdriver
Step 2: Mount the Tachometer
The first step in installing the Autometer Sport Comp Monster Tach is to mount it in a suitable location. Choose a spot on your dashboard or steering column that is easily visible and within reach. Once you’ve selected a location, use the mounting bracket and screws to secure the tachometer in place.
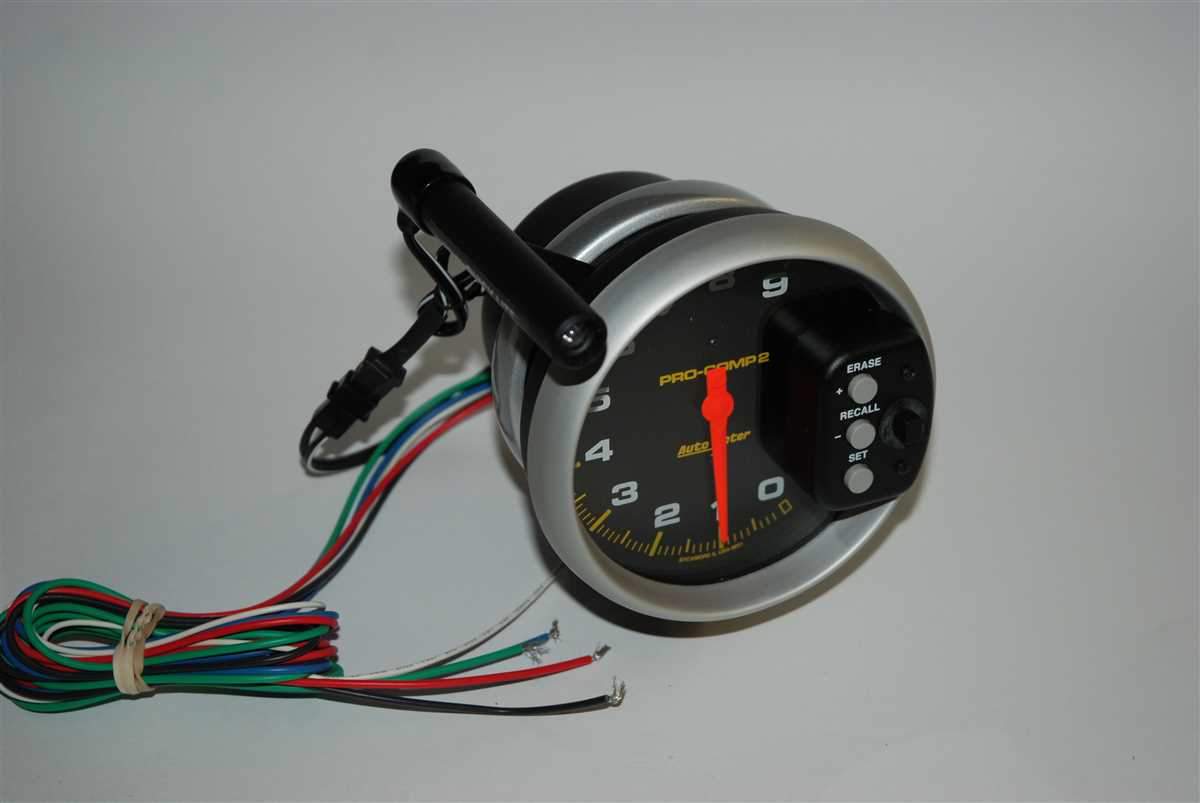
Step 3: Connect the Wiring Harness
Next, you’ll need to connect the wiring harness to the tachometer. The wiring harness should have a connector that plugs directly into the back of the tachometer. Simply insert the connector into the corresponding socket on the back of the tachometer until it clicks into place.
Step 4: Connect the Tachometer to the Ignition System
To get accurate RPM readings, the tachometer needs to be connected to the ignition system of your vehicle. Locate the coil wire or coil-on-plug connector under the hood of your car and identify the wire that provides the RPM signal. Use wire strippers to expose a small section of this wire, then use the crimping tool to attach a wire splice to connect it to the RPM signal wire on the tachometer’s wiring harness. Secure the connection with electrical tape.
Step 5: Test the Tachometer
Once you’ve completed all the wiring connections, it’s time to test the tachometer. Start your vehicle and rev the engine to different RPM levels to ensure that the tachometer is reading the RPM accurately. If the tachometer is not displaying accurate readings, double-check all the connections and make any necessary adjustments.
That’s it! You’ve successfully installed an Autometer Sport Comp Monster Tach in your vehicle. Now you can enjoy accurate RPM readings and a stylish addition to your car’s interior.
Step-by-Step Guide for Wiring the Autometer Sport Comp Monster Tach
This step-by-step guide will walk you through the process of wiring the Autometer Sport Comp Monster Tach. It is important to follow these instructions carefully to ensure proper installation and functionality of the tachometer.
Step 1: Gather the Necessary Tools and Materials
Before you start wiring the tachometer, make sure you have all the necessary tools and materials. You will need a wire stripper, crimping tool, electrical tape, and a soldering iron. You will also need wires of appropriate gauge for power, ground, and signal connections, as well as connectors and terminals.
Step 2: Locate the Wiring Points
Find the wiring points on your vehicle where you will connect the tachometer. The power wire should be connected to a switched 12V power source, such as the ignition switch. The ground wire should be connected to a clean and solid ground point. The signal wire should be connected to the tach signal output on your ignition coil or electronic ignition module.
Step 3: Connect the Power Wire
Use a wire stripper to remove a small section of insulation from the power wire. Attach a terminal to the end of the wire and secure it using a crimping tool. Connect the other end of the terminal to the switched 12V power source using a soldering iron or by using a connector that can be secured with a screw or nut.
Step 4: Connect the Ground Wire
Strip a small section of insulation from the ground wire and attach a terminal to the end. Secure the terminal to a clean and solid ground point using a screw or nut. Ensure that the connection is tight and secure to provide a good ground connection.
Step 5: Connect the Signal Wire
Strip a small section of insulation from the signal wire and attach a terminal to the end. Connect the terminal to the tach signal output on your ignition coil or electronic ignition module. Ensure that the connection is secure and tight.
Step 6: Test the Tachometer
After all the connections have been made, it is important to test the tachometer to ensure it is functioning properly. Start the engine and observe the tachometer. The RPM reading should correspond to the engine speed. If the tachometer is not displaying the correct RPM, double-check all the connections and make any necessary adjustments.
This step-by-step guide should help you wire the Autometer Sport Comp Monster Tach successfully. If you have any questions or encounter any issues during the process, consult the tachometer’s installation manual or seek assistance from a professional. Remember to always follow safety guidelines and best practices when working with electrical components.
Gather the Necessary Tools and Materials
Before you begin the process of wiring your Autometer Sport Comp Monster Tach, it’s important to gather all the necessary tools and materials. Having everything on hand will make the installation process much smoother and more efficient. Here are the tools and materials you will need:
1. Autometer Sport Comp Monster Tach
The key component of this project is the Autometer Sport Comp Monster Tach itself. Make sure you have the correct model that is appropriate for your vehicle.
2. Screwdriver
A screwdriver, preferably a Phillips head, will be needed to secure the tachometer into place.
3. Wire Strippers
Wire strippers will be necessary to remove the insulation from the wires, allowing for proper connections.
4. Electrical Tape
Electrical tape is essential for securing and insulating the connected wires, preventing any potential short circuits.
5. Crimping Tool
A crimping tool will be needed to properly connect the wires to various terminals.
6. Wire Connectors
Wire connectors, such as butt connectors or spade connectors, will be necessary to securely join the wires together.
7. Electrical Wire
You will need electrical wire to connect various components, such as the power source and the tachometer.
8. Mounting Bracket
A mounting bracket will be required to secure the tachometer in its designated location.
With all these tools and materials at your disposal, you will be well-prepared to complete the wiring process for your Autometer Sport Comp Monster Tach. Ensuring you have everything ahead of time will save you from interruptions and allow for a smooth installation.
What You Need for Installation
Before installing your Autometer Sport Comp Monster Tach, there are a few essential items you will need to ensure a proper installation. These items include:
- Automotive Wiring Kit: A wiring kit specifically designed for automotive applications will provide the necessary wires and connectors for a secure and reliable connection.
- Mounting Bracket: A mounting bracket or panel is necessary to securely attach the tachometer to your vehicle’s dashboard or steering column.
- Power Source: You will need to identify a suitable power source for the tachometer, such as the ignition switch or a dedicated power wire from the fuse box.
- Ground Wire: A solid ground connection is essential for the tachometer to function correctly. Locate a solid ground point on your vehicle’s chassis and ensure a tight connection.
- Tachometer Signal Source: Depending on your vehicle, you may need to identify the appropriate signal source for the tachometer. This could be a coil wire, distributor wire, or an electronic ignition control module.
- Wire Strippers and Crimpers: High-quality wire strippers and crimpers will make the installation process much easier and ensure a secure connection.
- User Manual: Always refer to the user manual provided with your Autometer Sport Comp Monster Tach for specific installation instructions and troubleshooting guidance.
To ensure a successful installation, it is recommended to gather all these necessary items before beginning the installation process. This will help you save time and avoid any potential issues during the installation process. Following the manufacturer’s instructions and using high-quality materials will ensure a safe and reliable installation of your Autometer Sport Comp Monster Tach.
Locate the Ideal Mounting Position
Before installing your Autometer Sport-Comp Monster Tach, it is important to determine the ideal mounting position for the tachometer. Proper placement will ensure that the tach is easily visible and functional while driving. Here are some steps to help you locate the perfect spot for your tachometer:
1. Consider visibility: The first step is to choose a location that provides a clear view of the tachometer while driving. Place it in a position where your eyes can easily glance at the tachometer without having to divert your attention too much from the road.
2. Optimal viewing angle: The tachometer should be mounted at a suitable angle for easy reading. Avoid installing it in a position where it will be obscured by the steering wheel, dashboard, or any other objects that may obstruct the view.
3. Balancing aesthetics and functionality: While it’s important to have a functional and easily visible tachometer, you should also consider the overall appearance of your vehicle’s interior. Choose a location that complements the design and layout of your dashboard, without compromising the functionality of the tach.
4. Stability and vibration: Ensure that the mounting position provides stability and minimizes vibrations. A shaky or loose mounting can affect the accuracy of the tachometer readings. Consider using vibration-dampening materials or brackets for added stability.
5. Accessibility: If you plan to adjust the tachometer settings frequently or use additional features such as shift lights or memory recalls, choose a location that allows easy access to the controls, connectors, and wiring.
Once you have determined the ideal mounting position, make sure to carefully follow the installation instructions provided by Autometer to ensure a secure and functional installation. Keep in mind that the specific mounting requirements may vary depending on the make and model of your vehicle.
Finding the Right Spot for your Autometer Sport Comp Monster Tach
In order to get the most accurate readings from your Autometer Sport Comp Monster Tach, it is essential to find the right spot to mount it in your vehicle. Here are some tips to help you locate the perfect spot:
- Visibility: Choose a location where the tachometer will be easily visible while driving. This will allow you to keep an eye on your engine RPMs without taking your attention away from the road.
- Accessibility: Make sure the tachometer is easily accessible so that you can adjust the settings and reset the memory if needed. Avoid mounting it in a spot that requires you to reach over obstacles or remove panels to access it.
- Compatibility: Ensure that the chosen spot is compatible with the size and design of the Autometer Sport Comp Monster tachometer. Consider the dimensions and shape of the tachometer, as well as any mounting brackets or accessories that may be required.
- Visibility: Choose a location where the tachometer will be easily visible while driving. This will allow you to keep an eye on your engine RPMs without taking your attention away from the road.
- Compatibility: Ensure that the chosen spot is compatible with the size and design of the Autometer Sport Comp Monster tachometer. Consider the dimensions and shape of the tachometer, as well as any mounting brackets or accessories that may be required.
- Proximity to Engine: Mount the tachometer as close to the engine as possible to ensure accurate readings. Avoid mounting it too far away, as this may result in delays or inaccuracies in the RPM readings.
Overall, the key is to find a spot that balances visibility, accessibility, compatibility and proximity to the engine. Take the time to carefully assess your options and choose a location that best meets these criteria. With the tachometer mounted in the right spot, you’ll be able to monitor your engine RPMs with confidence and precision.
Connect the Power Source
Before installing the Autometer Sport Comp Monster Tach, it is important to ensure that you have a reliable power source for the device. This will ensure proper functionality and avoid any potential issues. Here’s how you can connect the power source:
- Identify the Power Wire: Start by locating the power wire in your vehicle’s wiring harness. This wire is typically red and may be marked as “12V” or “power.”
- Prepare the Wire: Strip a small portion of insulation from the end of the power wire to expose the bare metal.
- Connect the Wire: Attach the power wire to the power terminal on the back of the tachometer. This terminal is usually labeled “BAT” or “12V.”
- Secure the Connection: Use a crimp connector or solder the wire to the terminal to ensure a secure and reliable connection. Be sure to insulate the connection with electrical tape or heat shrink tubing to prevent any shorts or electrical issues.
- Test the Connection: Once the power wire is securely connected to the tachometer, turn on the vehicle’s ignition to check if the tachometer powers up. If it does, then the power source is successfully connected.
It is important to follow these steps carefully to ensure a proper and safe connection for your Autometer Sport Comp Monster Tach. Incorrectly connecting the power source can result in damage to the device or other electrical components in your vehicle.
Wiring the Power Supply for your Tachometer
Now that you have connected the necessary wires for your Autometer Sport Comp Monster Tach, it’s time to wire the power supply. This step is crucial as it ensures that your tachometer functions properly and accurately measures your engine’s RPM. Follow these steps to correctly wire the power supply for your tachometer:
- Locate the power source for your tachometer. The ideal power source is the ignition switch, as it provides a reliable and stable voltage. You can use a test light or a multimeter to identify the power wire that receives voltage when you turn on the ignition.
- Once you have located the power wire, connect a length of wire to it using a butt connector or a soldered connection. This wire will serve as the power supply for your tachometer.
- Route the power wire towards the engine bay, making sure to avoid any hot or moving parts that may damage the wire.
- Connect the other end of the power wire to the power terminal on the back of your tachometer. Most tachometers have a clearly labeled power terminal for easy installation. Use a butt connector, a soldered connection, or a crimp connector to secure the wire to the terminal.
- Ensure that all connections are secure and properly insulated to prevent any electrical issues.
- Finally, test the tachometer to ensure that it powers on and accurately displays the RPM readings. Start the engine and observe the tachometer to confirm that it functions correctly.
Wiring the power supply for your tachometer is a straightforward process, but it requires attention to detail to ensure a proper connection. By following these steps, you can wire your Autometer Sport Comp Monster Tach correctly and enjoy accurate RPM readings during your driving experience.
Q&A:
What is the purpose of wiring the power supply for a tachometer?
The power supply wiring is necessary to provide electrical power to the tachometer so it can function and display the engine RPM.
What type of power supply is typically used for a tachometer?
A tachometer usually requires a 12-volt power supply. It is commonly connected to the vehicle’s battery or a switched 12-volt power source.
How do I connect the power supply wires to the tachometer?
You will need to refer to the tachometer’s instruction manual for specific wiring instructions. Generally, the power supply wires are connected to the appropriate terminals on the tachometer, which are often labeled as “12V” or “B+” for the positive wire and “GND” or “ground” for the negative wire.
Are there any precautions I should take when wiring the power supply for a tachometer?
Yes, it is important to ensure that the power supply wires are connected correctly and securely to avoid any electrical issues or malfunctions. It is also recommended to use the appropriate wire gauges and connectors for a reliable and safe connection.