
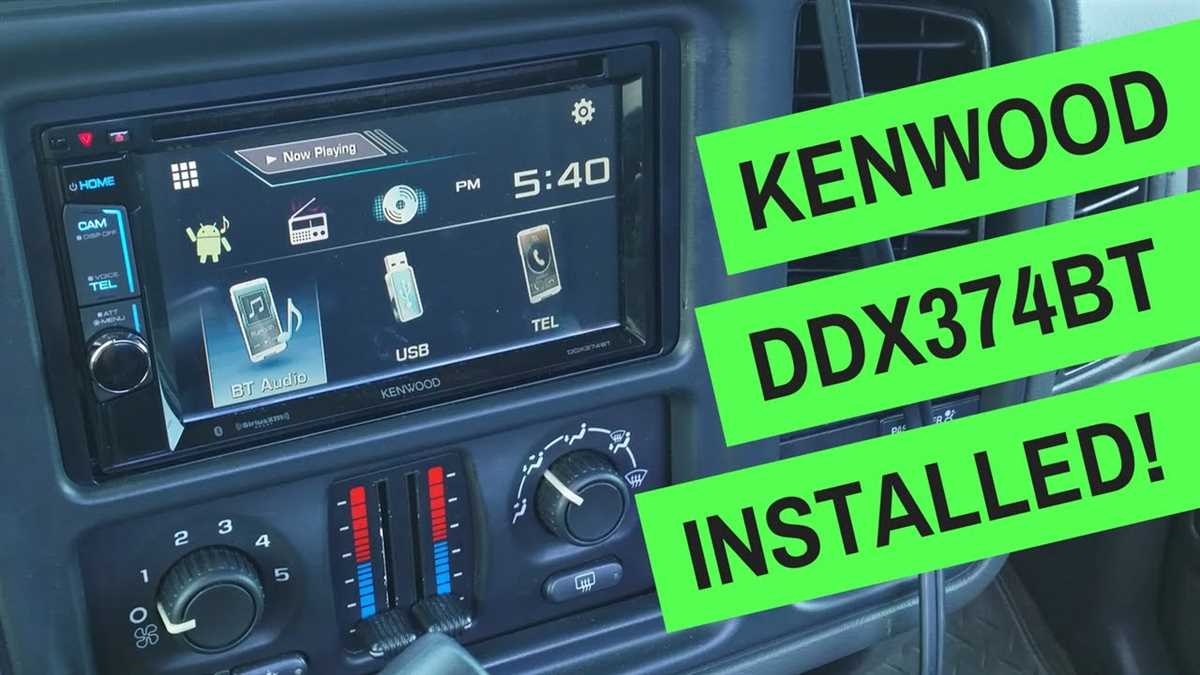
If you’re looking for a detailed wiring diagram for your Kenwood DDX374BT car stereo, you’ve come to the right place. This article will provide you with all the information you need to properly install and wire your Kenwood DDX374BT in your vehicle.
The Kenwood DDX374BT is a popular car stereo model known for its advanced features and user-friendly interface. However, installing a new car stereo can be a daunting task, especially when it comes to wiring. That’s why having a wiring diagram on hand is crucial to ensure a smooth and successful installation.
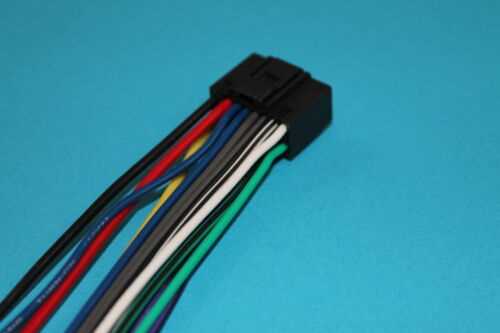
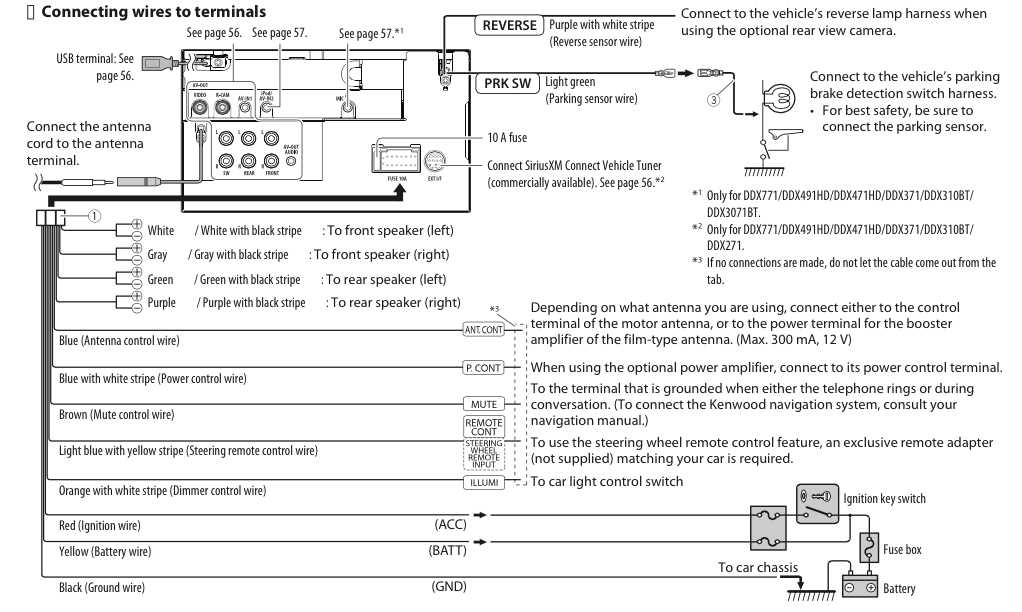
The wiring diagram for the Kenwood DDX374BT includes detailed information on each wire and its function. This diagram will show you how to connect the various components of your car stereo, such as the power wire, ground wire, speaker wires, and antenna wire. It will also provide information on how to connect any additional accessories, such as a steering wheel control adapter or backup camera.
By following the wiring diagram for the Kenwood DDX374BT, you can ensure that all the connections are made correctly and that your car stereo functions properly. Whether you’re a seasoned DIY enthusiast or a beginner, having a wiring diagram can make the installation process much easier and less stressful.
Kenwood ddx374bt Wiring Diagram
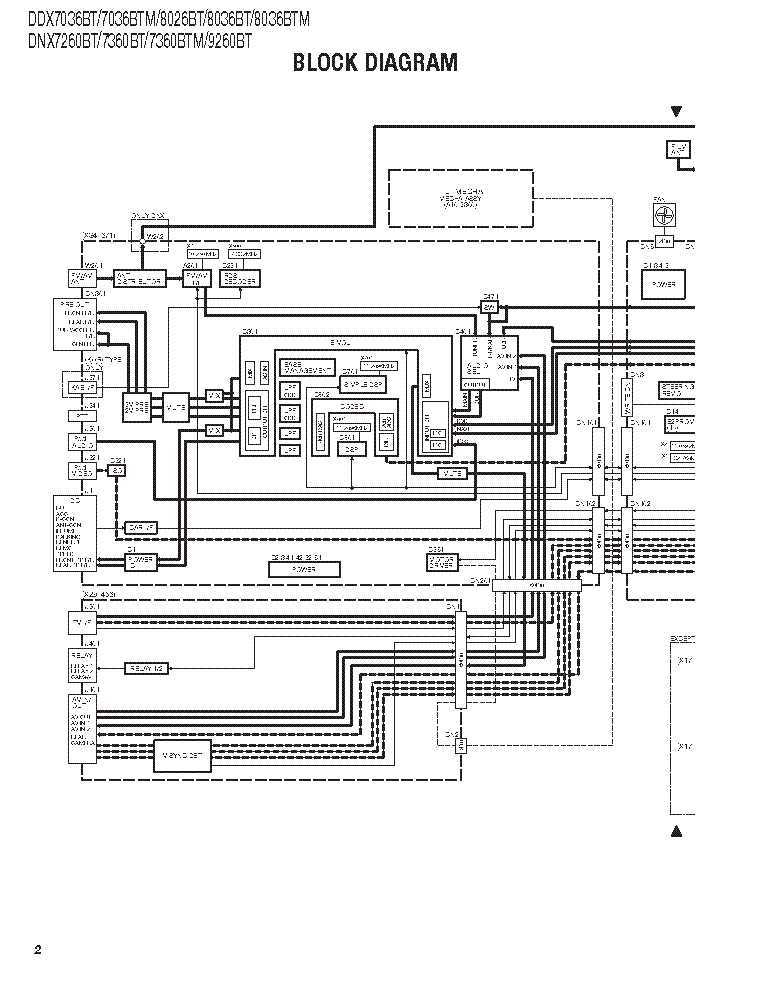
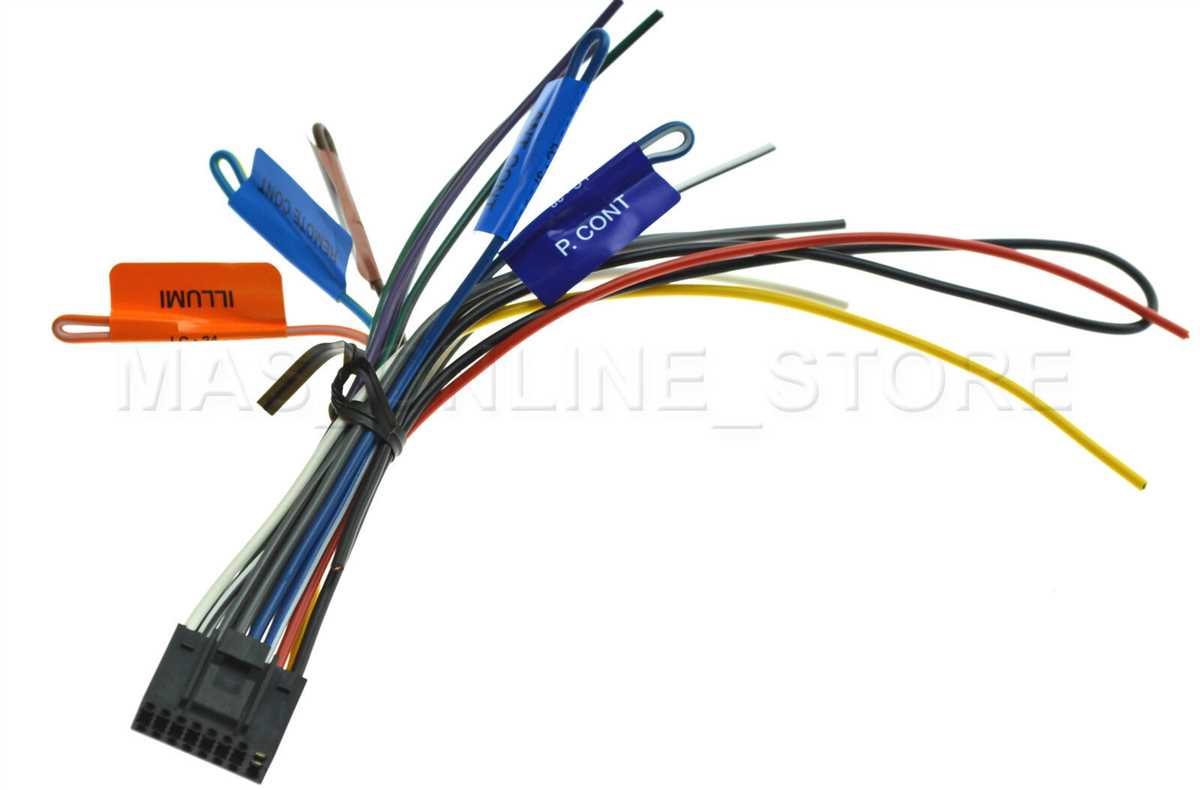
The Kenwood ddx374bt wiring diagram is a helpful resource for anyone looking to install or troubleshoot this specific car stereo model. This diagram provides a visual representation of the electrical connections that need to be made in order for the stereo to function properly. It includes information such as wire colors and their corresponding functions, along with any additional components or accessories that may be required.
One of the key components of the wiring diagram is the color coding of the wires. Each wire is assigned a specific color, which indicates its purpose in the overall electrical system. For example, the red wire typically represents power, while the black wire represents ground. By following the color-coded diagram, users can easily identify which wires need to be connected to specific components or accessories.
Here is a breakdown of the key elements typically found in a Kenwood ddx374bt wiring diagram:
- Power wire: Usually red and connects to the positive terminal of the car battery
- Ground wire: Usually black and connects to a metal part of the car chassis
- Speaker wires: Different colors for each speaker and connect to the corresponding terminals on the speakers
- Accessory wires: Usually yellow and connect to accessories such as the antenna or amplifier
- Ignition wire: Typically connects to the car’s ignition switch
- Remote wire: Connects to the car’s remote turn-on lead to control the amplifier or other accessories
In addition to the basic wiring connections, the diagram may also include information about additional features and accessories. For example, it may indicate the wiring for a backup camera, steering wheel controls, or Bluetooth connectivity. This information can be especially helpful for users who want to take advantage of these advanced features.
Overall, the Kenwood ddx374bt wiring diagram serves as a valuable tool for anyone working on their car stereo installation or troubleshooting. It provides clear guidance on how to properly connect the wires for optimal performance and functionality. By following the diagram and using the correct wiring techniques, users can ensure a successful installation and enjoy the full capabilities of their Kenwood ddx374bt car stereo.
Understanding the Wiring Basics
When it comes to installing or troubleshooting car electronics, understanding the wiring basics is crucial. Whether you’re installing a new stereo system or trying to diagnose an electrical issue, having a good understanding of how wires are connected and what each wire does can save you time and frustration.
Power and ground
One of the most important aspects of car wiring is understanding the concepts of power and ground. Power is the electrical energy that flows through the wires to power various components, while ground provides a path for the electrical current to return back to the battery. In most car wiring systems, the power wire is usually red, while the ground wire is typically black or brown. It’s important to ensure that the power wire is connected to a power source and the ground wire is securely connected to a metal surface for proper functioning.
Color-coded wires
Car manufacturers use color-coded wires to make it easier to identify different functions. For example, a yellow wire may be used for constant power, while a blue wire might be used for remote turn-on control. It’s important to consult the wiring diagram specific to your car model or stereo system to determine the correct color coding for each wire.
Proper wire connections
Making proper wire connections is crucial to ensure that the electrical current flows smoothly and reliably. There are various methods for connecting wires, including crimping, soldering, and using wire connectors. It’s important to choose the appropriate method for the specific situation and to ensure that the connections are secure and free from loose wires or exposed conductors.
Testing and troubleshooting
When troubleshooting car wiring issues, it’s important to have a basic understanding of how to use a multimeter or a voltage tester. These tools can help determine if there is continuity in a wire, if there is a voltage drop, or if there is an open circuit. By carefully testing and troubleshooting the wiring, you can identify and resolve any issues that may be affecting the performance of your car electronics.
Consulting the manual or seeking professional help
If you’re unsure about any aspect of car wiring or are facing complicated issues, it’s always best to consult the wiring diagram specific to your car model or seek the help of a professional. Car wiring can be complex, and it’s important to ensure that all connections are made correctly and that the electrical system is functioning properly for the safety and efficiency of your vehicle.
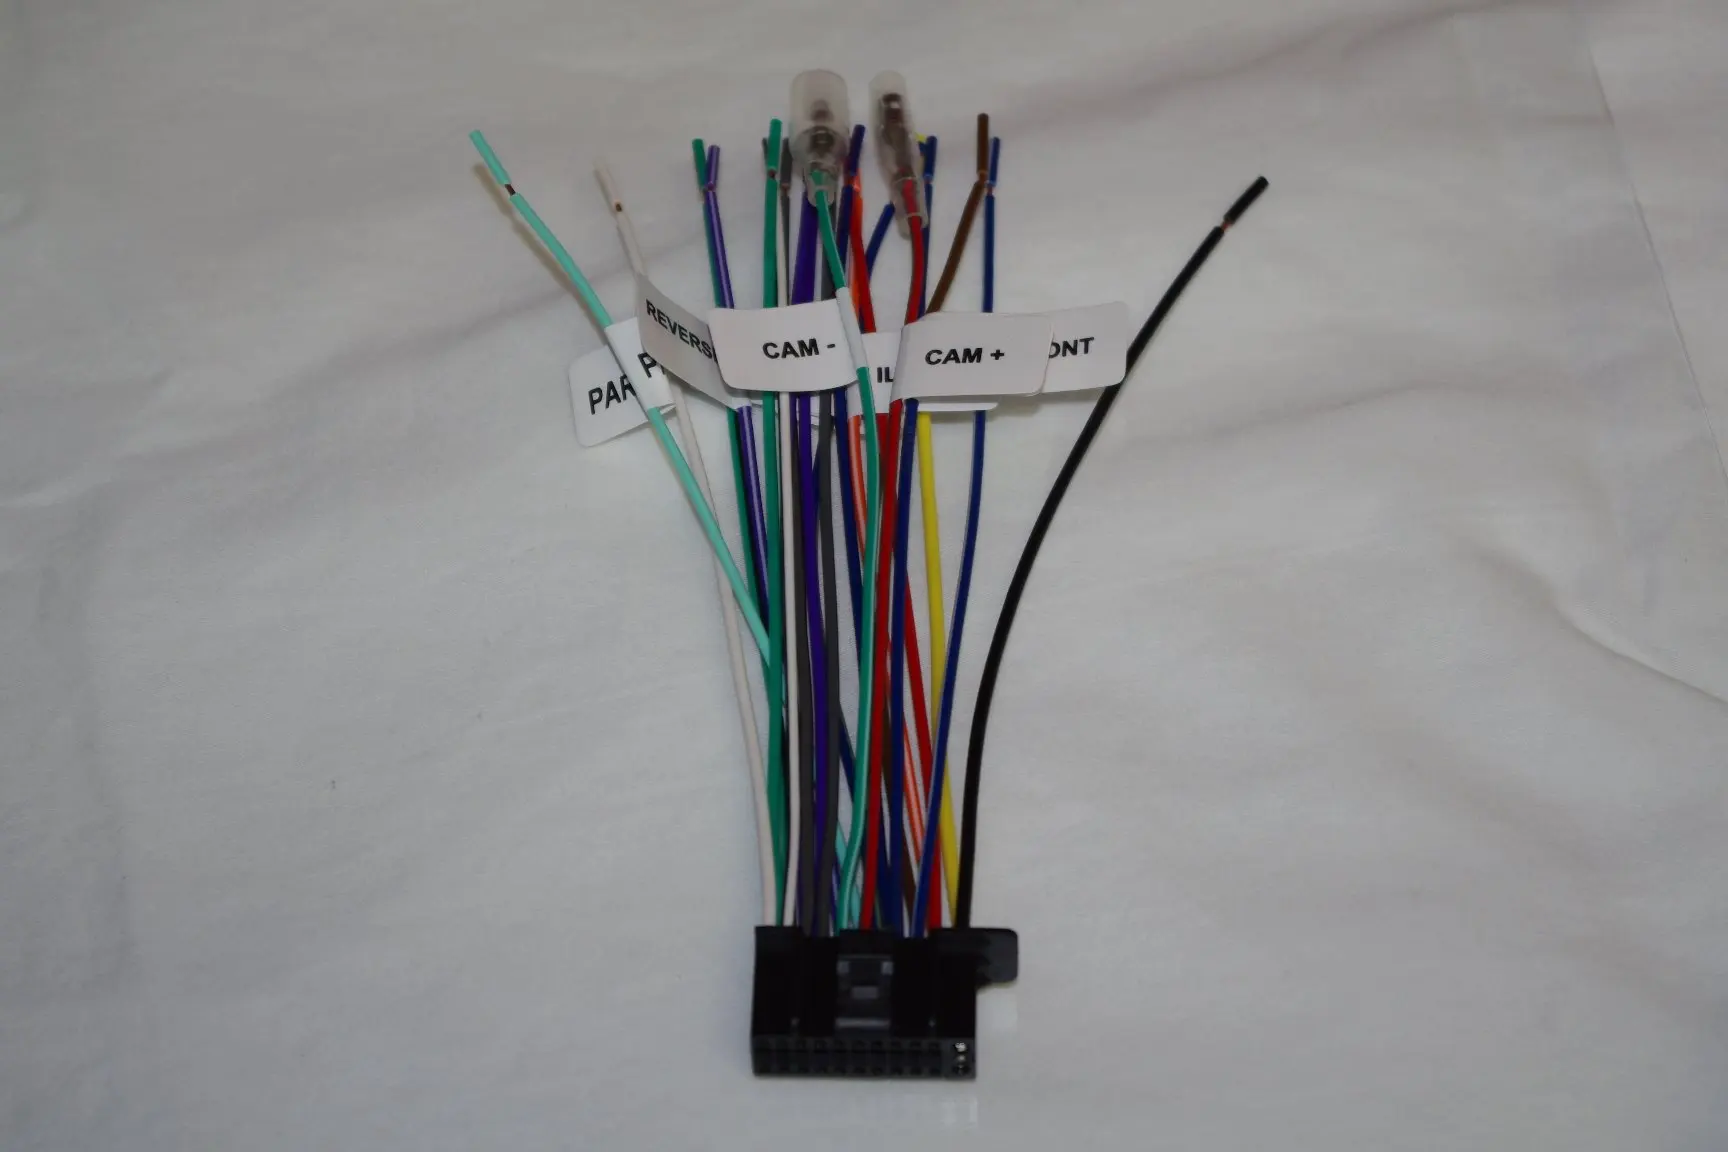
Components of the Kenwood ddx374bt Wiring Diagram
The Kenwood ddx374bt wiring diagram is a visual representation of the electrical connections and components of the Kenwood ddx374bt car stereo system. It provides a detailed outline of how each component is connected and how the wiring should be set up.
Some of the key components that are typically included in the Kenwood ddx374bt wiring diagram are:
- Power wires: These wires provide the necessary power for the car stereo system to function. They are typically labeled as red and yellow wires and should be connected to the appropriate power sources.
- Ground wire: The ground wire is essential for the proper functioning of the car stereo system. It is usually labeled as a black wire and should be connected to a metal part of the vehicle’s chassis to ensure a good ground connection.
- Speaker wires: The speaker wires are responsible for transferring the audio signals from the car stereo to the speakers. They are usually color-coded, with each pair of wires corresponding to a specific speaker. These wires need to be connected correctly to ensure proper audio output.
- Remote wire: The remote wire is used to connect the car stereo system to additional accessories, such as an amplifier or a power antenna. It is usually a blue wire and should be connected to the appropriate accessory.
- Antenna wire: The antenna wire is responsible for receiving radio signals. It is usually labeled as an antenna wire and needs to be connected to an antenna to ensure proper radio reception.
- Input/output connections: The Kenwood ddx374bt wiring diagram also includes input and output connections for various devices, such as USB ports, AUX inputs, and video outputs. These connections allow for the integration of external devices and expanded functionality of the car stereo system.
Overall, the Kenwood ddx374bt wiring diagram provides a comprehensive guide for properly connecting the various components of the car stereo system and ensuring optimal performance. It is important to follow the diagram carefully and consult the user manual for any specific instructions or guidelines provided by the manufacturer.
Step-by-Step Guide to Wiring the Kenwood ddx374bt
Wiring the Kenwood ddx374bt stereo system can be a bit complex, but with the help of this step-by-step guide, you will be able to do it easily. Follow these instructions carefully to ensure a proper installation.
Materials You Will Need:
- Kenwood ddx374bt stereo system
- Vehicle-specific wiring harness adapter
- Wire crimping tool
- Wire strippers
- Electrical tape or heat shrink tubing
Step 1: Prepare the Vehicle
The first step is to prepare your vehicle for the installation of the Kenwood ddx374bt stereo system. Make sure you have turned off the vehicle’s ignition and disconnected the negative battery terminal to avoid any electrical mishaps. Remove the old stereo system from the dashboard and set it aside.
Step 2: Connect the Wiring Harness Adapter
Take the vehicle-specific wiring harness adapter and connect it to the wiring harness of your vehicle. Match the wire colors together and use the wire crimping tool to secure the connections. Make sure each wire is properly insulated using electrical tape or heat shrink tubing to prevent any short circuits.
Step 3: Connect the Wiring Harness Adapter to the Kenwood ddx374bt
Take the other end of the wiring harness adapter and connect it to the corresponding wires on the Kenwood ddx374bt stereo system. Again, match the wire colors and use the wire crimping tool to secure the connections. Insulate each wire properly to ensure a safe and reliable connection.
Step 4: Connect the Antenna Adapter
If your vehicle requires an antenna adapter, connect it to the Kenwood ddx374bt stereo system. Follow the instructions provided with the adapter to ensure the correct connection.
Step 5: Mount the Kenwood ddx374bt
Find a suitable location in the dashboard of your vehicle to mount the Kenwood ddx374bt stereo system. Use the mounting brackets and screws included with the system to securely attach it to the dashboard.
Step 6: Test the System
After completing the wiring and mounting, reattach the negative battery terminal and turn on the vehicle’s ignition. Test the Kenwood ddx374bt stereo system to ensure it is working properly. Adjust the settings as needed and enjoy your new stereo system!
By following these step-by-step instructions, you can easily wire the Kenwood ddx374bt stereo system in your vehicle. Remember to always refer to the user manual provided with the system for any specific instructions or requirements.
Troubleshooting Common Wiring Issues
When installing or troubleshooting a Kenwood ddx374bt system, it’s important to understand common wiring issues that may arise. By knowing how to identify and address these issues, you can ensure that your wiring connections are secure and functioning properly.
One common wiring issue is loose or disconnected wires. If you notice that your system is not working or experiencing intermittent issues, check all wiring connections to ensure they are tight and secure. Sometimes, wires can come loose due to vibrations or other external factors, so it’s important to regularly inspect and re-tighten connections as necessary.
Another common wiring issue is incorrect wire placement or connections. It’s essential to consult the wiring diagram specific to the Kenwood ddx374bt system and double-check that each wire is connected to the correct terminal or connector. Additionally, check for any crossed wires or incorrect splices that may be causing issues.
Furthermore, it’s important to check for any damaged or frayed wires. Wires can become damaged over time or due to external factors such as heat or physical stress. Inspect each wire for any signs of fraying, cuts, or exposed copper. If any wires are damaged, they should be replaced promptly to avoid further issues or potential electrical hazards.
In some cases, the issue may not lie with the wiring itself, but with the fuses or power source. Check all fuses related to the Kenwood ddx374bt system and ensure they are in good working condition. Additionally, verify that the power source is delivering the appropriate voltage levels to the system. Incorrect voltage levels can cause various issues, including audio distortion or system malfunction.
By being aware of and addressing these common wiring issues, you can ensure that your Kenwood ddx374bt system operates smoothly and effectively. It’s essential to follow the provided wiring diagram, regularly inspect and re-tighten connections, and address any damaged wires promptly. With proper wiring, you can enjoy optimal performance from your Kenwood ddx374bt system.
Final Thoughts on the Kenwood ddx374bt Wiring Diagram
Overall, the Kenwood ddx374bt is a versatile and powerful car stereo system that can greatly enhance the audio experience in your vehicle. However, in order to properly install and connect the system, it is crucial to have a clear understanding of the wiring diagram.
The wiring diagram provides a visual representation of the connections that need to be made between the various components of the system, such as the head unit, speakers, and amplifier. It shows the color-coded wires and their corresponding functions, making it easier to identify and connect them correctly.
By following the wiring diagram carefully and accurately, you can ensure that the Kenwood ddx374bt is installed correctly and functions properly. This will prevent any issues or malfunctions that may arise from improper installation or connection.
Additionally, the wiring diagram serves as a valuable reference tool for troubleshooting and maintenance. It allows you to easily identify and locate specific wires or components, making it easier to diagnose and rectify any issues that may occur in the future.
In conclusion, the Kenwood ddx374bt wiring diagram is an essential tool for installing, connecting, troubleshooting, and maintaining the car stereo system. It provides a visual representation of the connections and functions, ensuring a proper and successful installation. By referring to the wiring diagram, you can ensure that the system works efficiently, delivering high-quality audio in your vehicle.