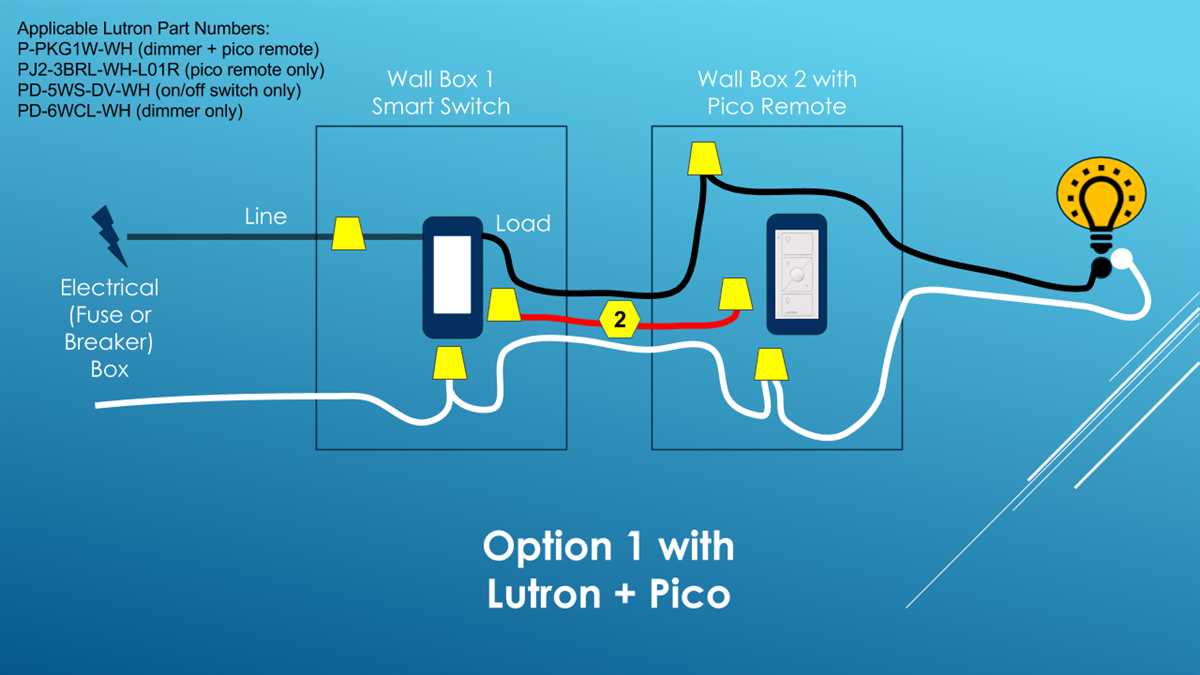
If you’re looking to upgrade your home with modern lighting controls, a Lutron dimmer switch is a great option. These switches allow you to adjust the brightness of your lights, creating a comfortable and personalized ambiance in any room. One of the most common installations is a 3-way switch setup, which allows you to control a single light fixture from two different locations.
The wiring process for a Lutron dimmer switch in a 3-way setup can seem intimidating at first, but it’s actually quite straightforward. With a few basic tools and some knowledge of electrical wiring, you can easily install a Lutron dimmer switch in your home and start enjoying the benefits of adjustable lighting.
In this article, we will walk you through the process of wiring a Lutron dimmer switch in a 3-way setup. We will cover the necessary tools and materials, explain the wiring diagram, and provide step-by-step instructions for a successful installation. Whether you’re a seasoned DIYer or a beginner, this guide will help you transform your home’s lighting system with Lutron dimmer switches.
Lutron Dimmer Switch 3 Way Wiring
If you’re looking to install a Lutron dimmer switch in a three-way setup, it’s important to understand how the wiring works. In a three-way switch configuration, there are two switches that control the same light fixture. One of the switches is typically located at the top or bottom of the stairs, while the other is located at the other end of the hallway or room. The Lutron dimmer switch allows you to control the brightness of the light from both switches.
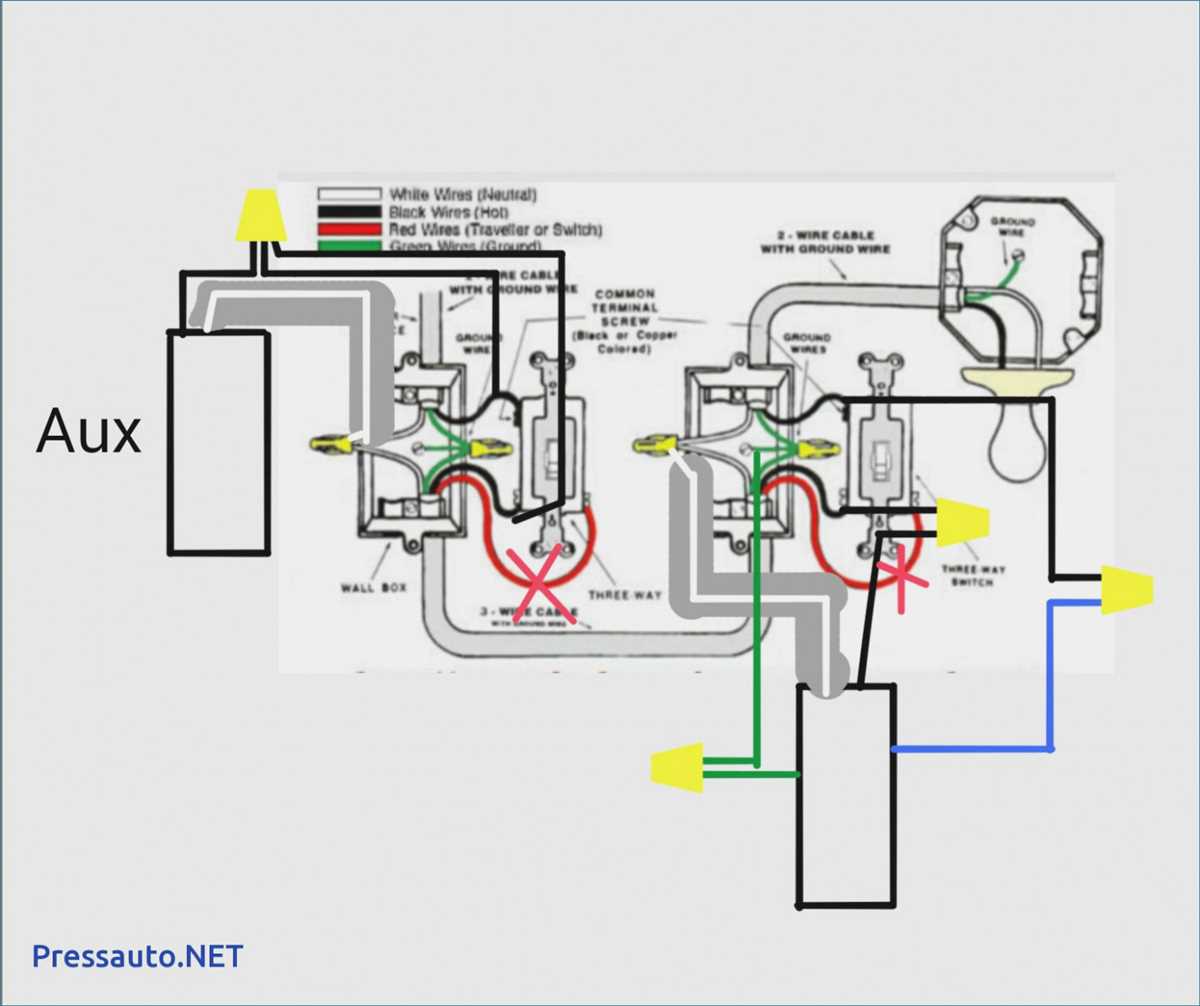
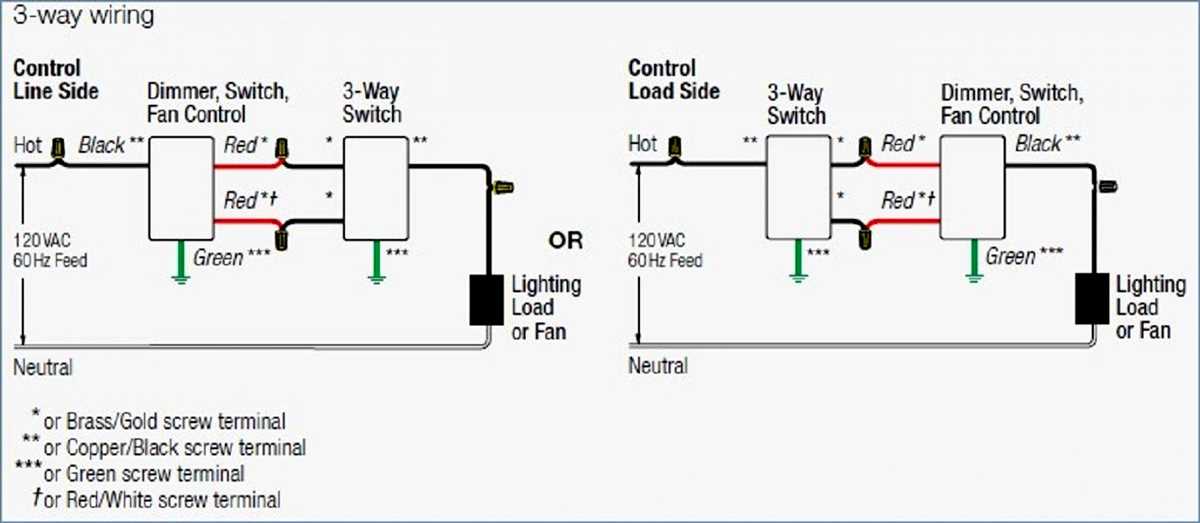
When wiring a Lutron dimmer switch in a three-way setup, you’ll need to identify the common wire, also known as the hot wire. This wire is typically black in color and carries the electrical current to the light fixture. The other two wires, known as the traveler wires, are typically red and white. These wires connect the two switches together and are responsible for transferring the electrical current between them.
To properly wire the Lutron dimmer switch, you’ll need to connect the common wire to the black screw terminal on the switch. The traveler wires should be connected to the brass screw terminals. It’s important to note that the traveler wires can be connected to either brass screw terminal on the switch, as their function does not depend on which terminal they are connected to.
Once the wiring connections are made, you can then install the Lutron dimmer switch into the electrical box using the provided screws. Make sure that the switch is securely fastened and that all wires are properly connected. After installation, you can test the dimmer switch by turning the power back on and adjusting the brightness of the light from both switches.
In conclusion, wiring a Lutron dimmer switch in a three-way setup requires identifying the common wire and connecting it to the black screw terminal. The traveler wires should be connected to the brass screw terminals. Proper installation and testing are essential to ensure the dimmer switch works effectively in controlling the brightness of the light fixture from both switches.
The Basics of 3 Way Switches
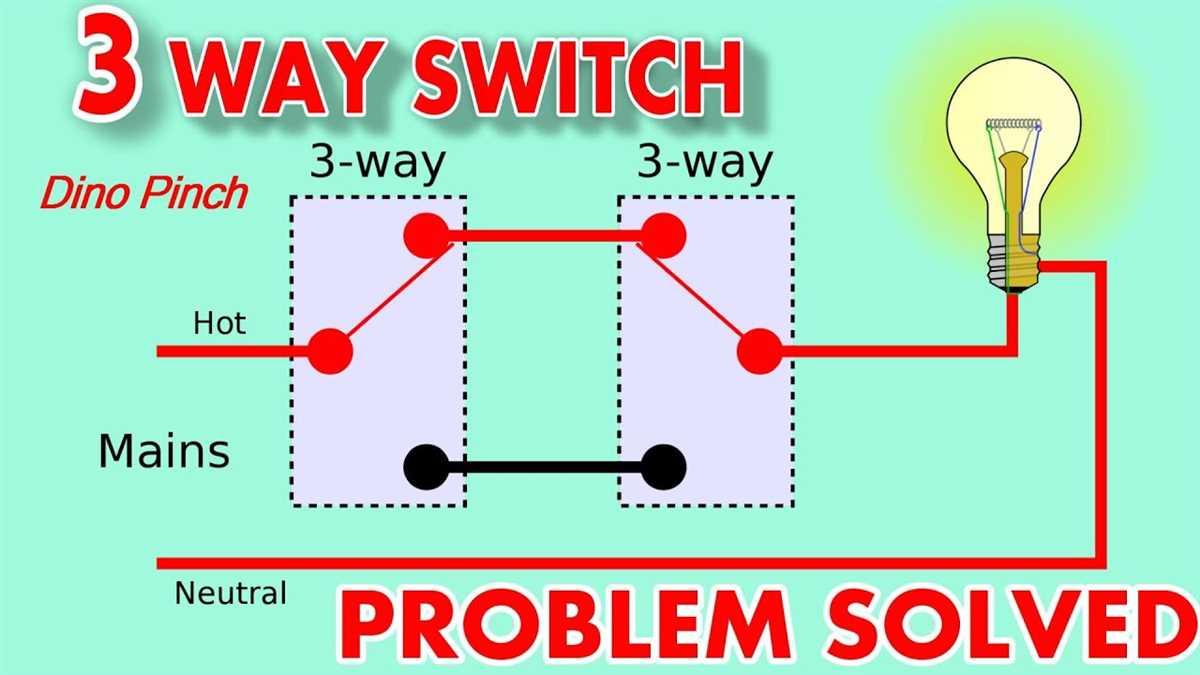
Three-way switches are commonly used in households to control a single light fixture from two different locations. This type of switch allows for greater convenience and flexibility in lighting control, as it eliminates the need to go to the original switch location to turn off the light after it has been turned on from another location. Understanding the basics of how three-way switches work is essential for proper installation and troubleshooting.
Three-way switches consist of two switch units and a light fixture. The first switch, also known as the “common” switch, is typically installed at the original switch location. The second switch, known as the “remote” switch, is installed at the desired additional location. Both switches are connected to each other and the light fixture through a three-wire cable.
To wire a three-way switch system:
- Ensure that the power is turned off at the circuit breaker before beginning the wiring process.
- Connect the black wire, also known as the “hot” wire, from the power source to the common terminal of the first switch.
- Connect the black wire, also known as the “switched hot” wire, from the light fixture to the common terminal of the second switch.
- Connect the remaining two colored wires from the three-wire cable to the traveler terminals of both switches.
- Finally, connect the white wire, also known as the neutral wire, from the power source and the light fixture together.
With the wiring complete, flipping either switch will allow the circuit to be completed and the light to turn on. If one switch is in the “up” position and the other switch is in the “down” position, the light will be off. However, if both switches are in the same position, either “up” or “down”, the light will be on.
In summary, three-way switches provide a convenient way to control a light fixture from two different locations. Understanding the basic wiring principles of three-way switches is crucial for successful installation and efficient operation.
Understanding Lutron Dimmer Switches
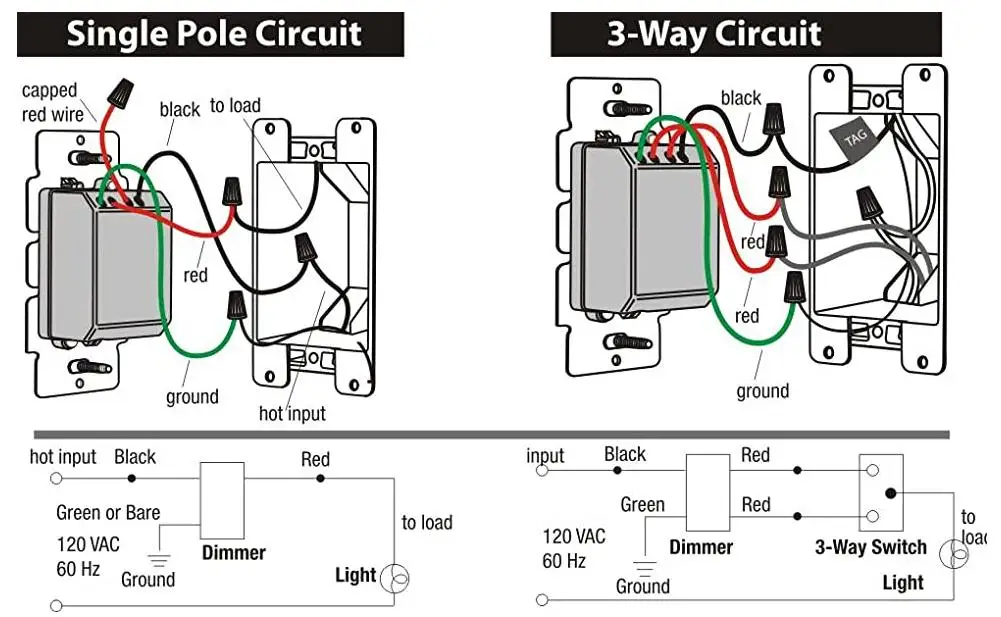
When it comes to creating the perfect lighting ambiance in your home, Lutron dimmer switches are an excellent choice. These switches allow you to control the brightness of your lights, providing you with the ability to set the mood for any occasion. However, understanding how to wire a Lutron dimmer switch, especially in a three-way configuration, can be a bit challenging for some homeowners.
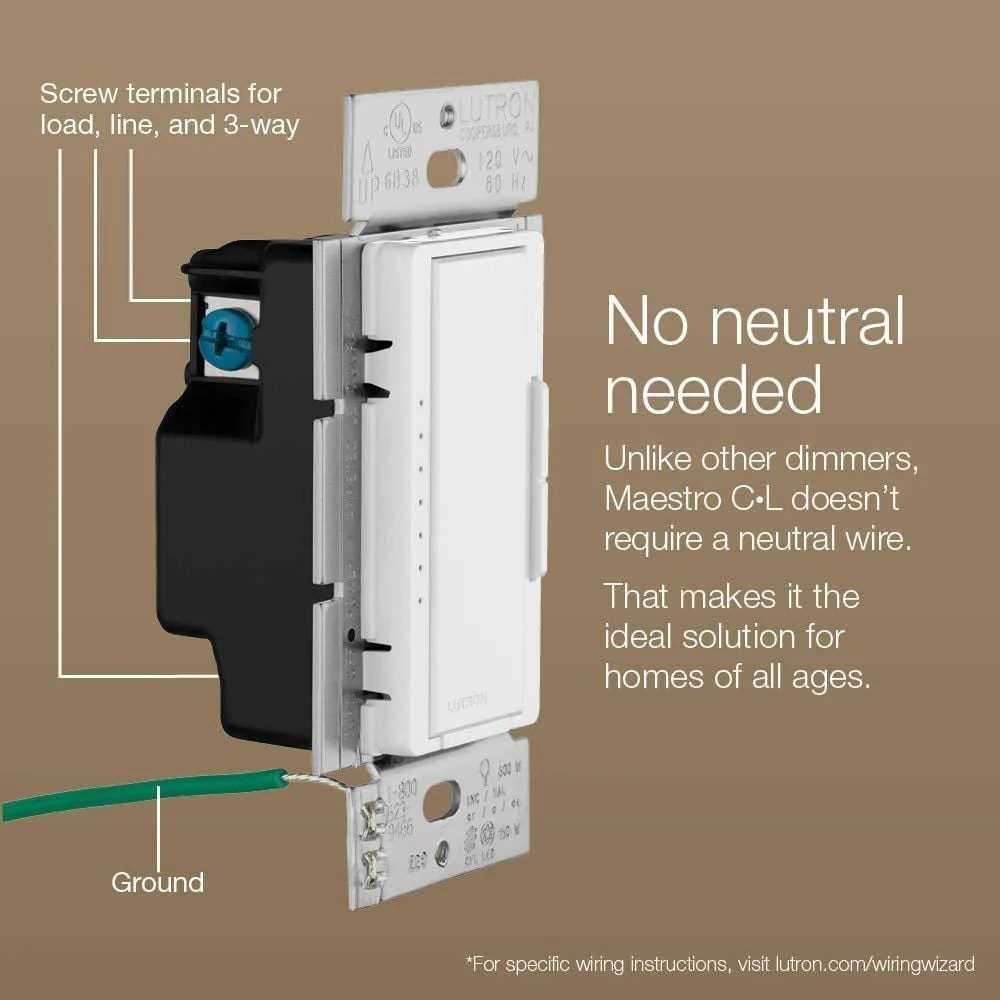
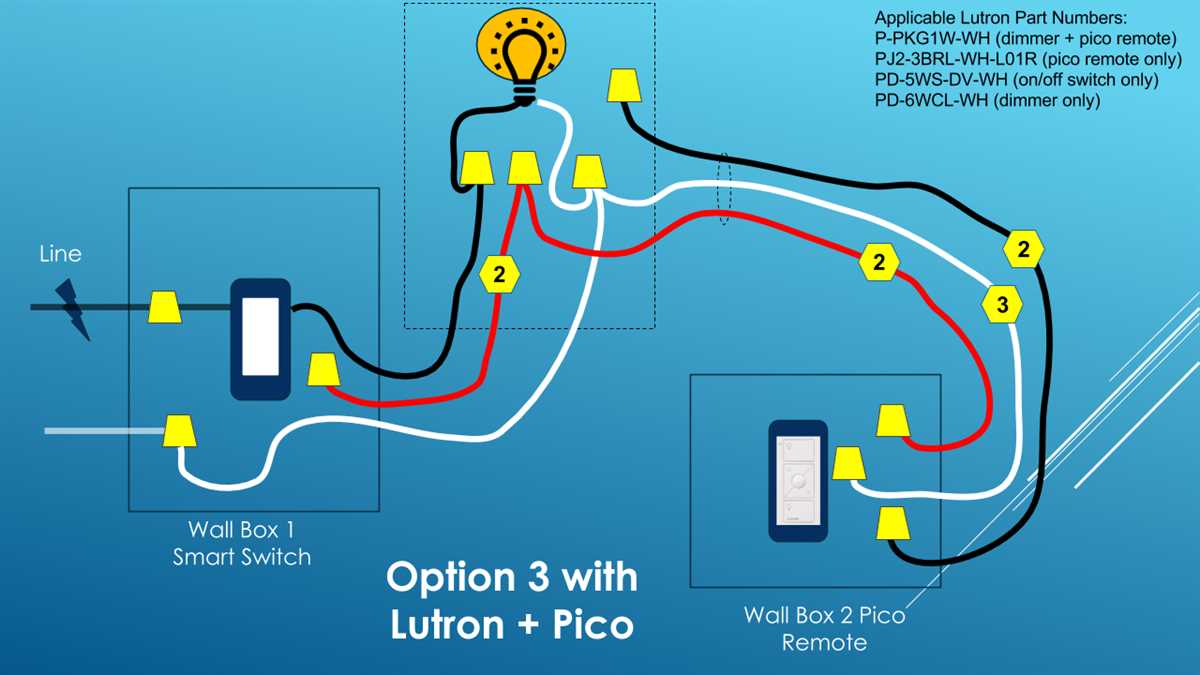
One of the most common questions when it comes to wiring a Lutron dimmer switch in a three-way setup is determining which wires to connect. In this type of configuration, there are typically two switches that control a single light fixture from different locations. To wire the Lutron dimmer switch correctly, you will need to identify the “line” and “load” wires. The line wire carries the electrical current from the power source to the switch, while the load wire carries the current from the switch to the light fixture.
To properly wire a Lutron dimmer switch in a three-way setup, you will need to connect the line wire to the common terminal of one of the existing switches. Then, you will need to connect the load wire to the common terminal of the Lutron dimmer switch. The remaining wires, usually referred to as the traveler wires, will need to be connected to the remaining terminals of both switches.
It is important to note that wiring a Lutron dimmer switch in a three-way configuration may require additional steps, such as installing a Lutron companion switch. This companion switch allows you to control the lights from both switch locations. Following the manufacturer’s instructions and consulting a professional electrician if needed is crucial to ensure proper installation and functionality of your Lutron dimmer switch.
Key Takeaways:
- Lutron dimmer switches allow you to control the brightness of your lights and create the perfect lighting ambiance.
- Wiring a Lutron dimmer switch in a three-way setup requires identifying the line and load wires and connecting them correctly.
- Additional steps, such as installing a Lutron companion switch, may be necessary for full functionality in a three-way configuration.
- Consulting a professional electrician is recommended to ensure proper installation and safety when working with electrical wiring.
Required Tools and Materials
In order to successfully install a Lutron dimmer switch in a 3-way wiring setup, you will need a few essential tools and materials. Here is a list of what you will need:
Tools:
- Screwdriver: A screwdriver will be necessary for removing and installing screws during the installation process.
- Wire stripper: A wire stripper is required to remove the insulation from the wires for proper connection.
- Pliers: Pliers may be needed to tightly secure wire connections.
- Non-contact voltage tester: This tool is used to check for the presence of electricity in the wires before beginning any work.
Materials:
- Lutron dimmer switch: The main component of the installation, the Lutron dimmer switch, is necessary to control the lighting in the 3-way setup.
- Wire nuts: Wire nuts are used to securely connect the wires together.
- Electrical tape: Electrical tape is used to insulate wire connections and provide extra safety.
- Wire connectors: Wire connectors are used to make secure and reliable connections between the switch and the wires.
- Wire: Depending on the length and configuration of the existing wiring, you may need additional wire to make the necessary connections.
Before beginning the installation process, make sure you have all of these tools and materials readily available to ensure a smooth and successful installation of the Lutron dimmer switch in your 3-way wiring setup.
Step-by-Step Guide to Wiring a Lutron Dimmer Switch in a 3 Way Setup
Installing a Lutron dimmer switch in a 3 way setup can help you achieve the perfect lighting ambiance in your home. This step-by-step guide will walk you through the process of wiring the dimmer switch, ensuring a successful installation.
Step 1: Turn off the power
Before you begin, make sure to turn off the power to the circuit you will be working on. Locate the circuit breaker panel and flip the corresponding switch to the “off” position. This will prevent any accidents or electrical shocks while you work.
Step 2: Identify the wires
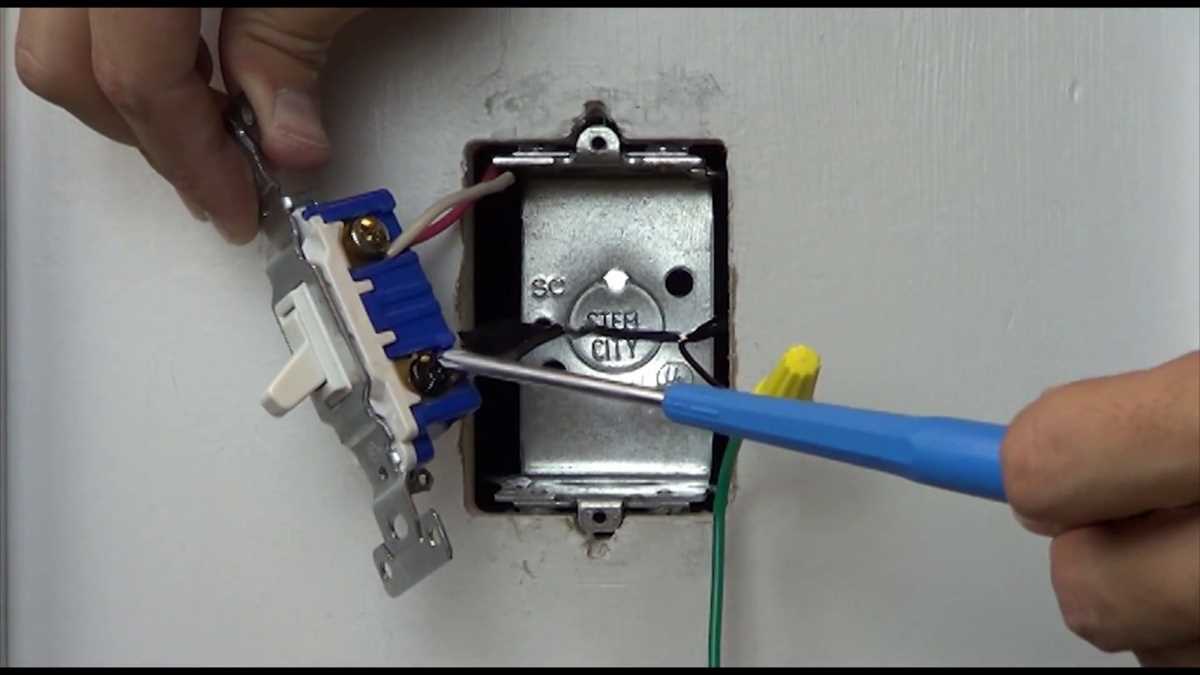
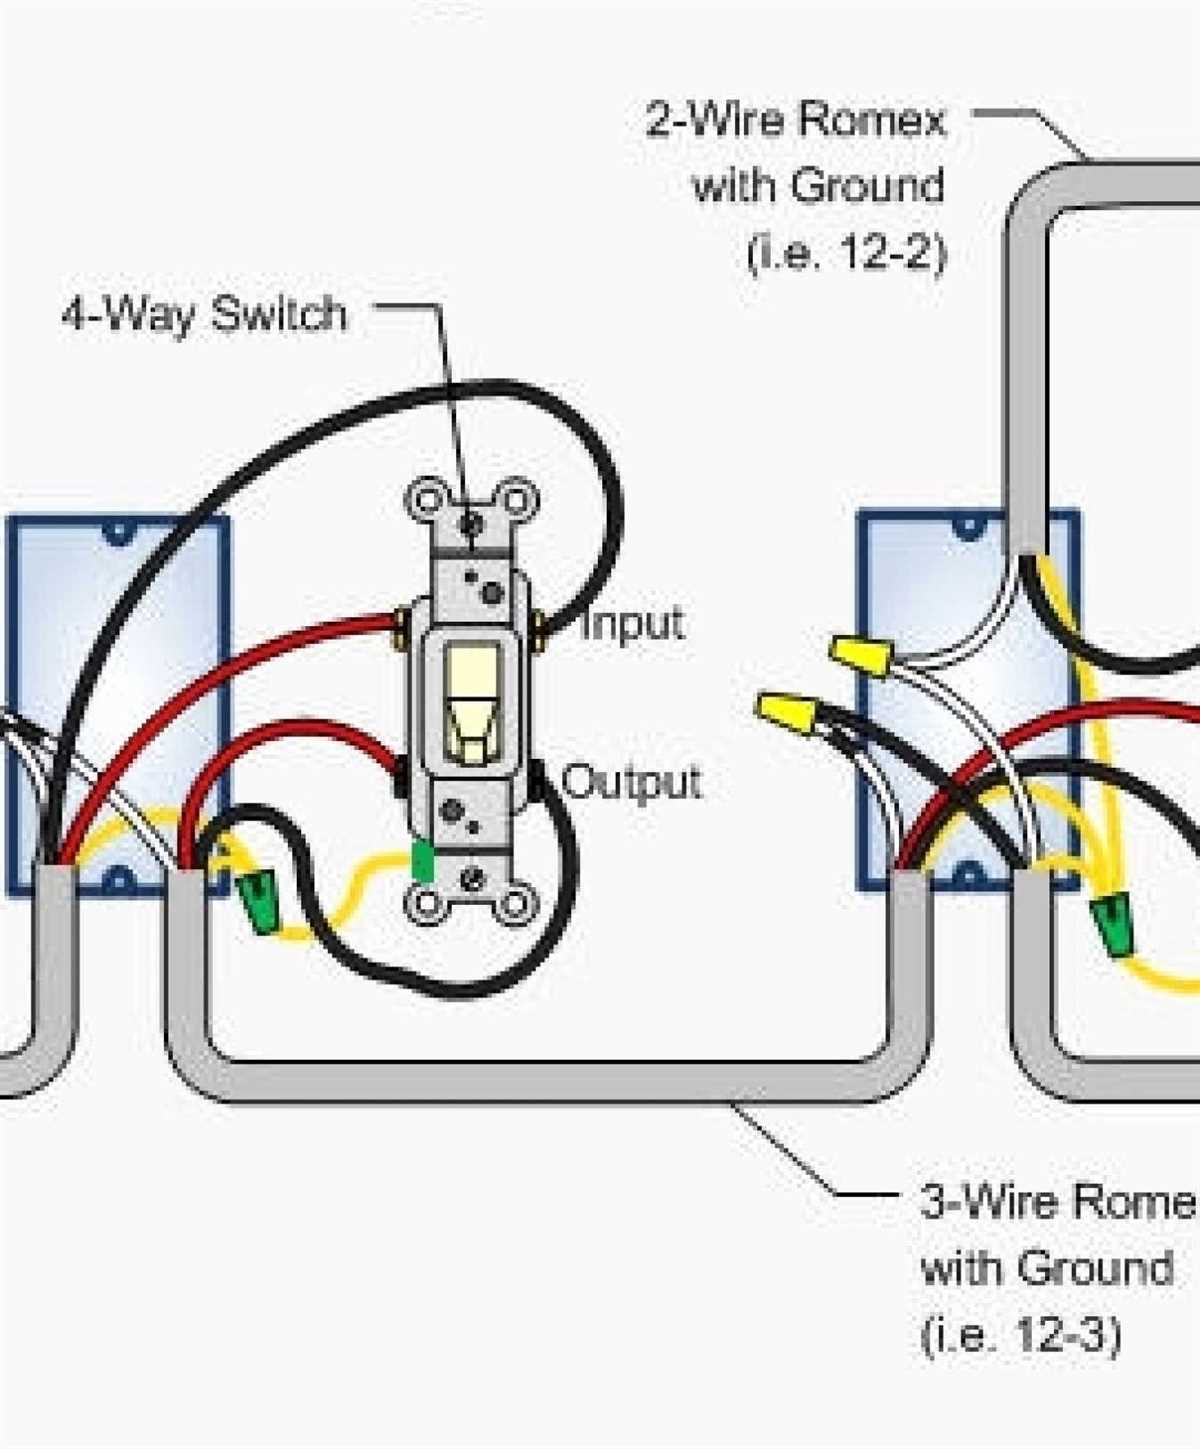
Next, identify the wires in your existing 3 way setup. There should be three wires connected to each of the existing switches: a common wire (typically black), a traveler wire (typically red), and a ground wire (typically green or bare copper). Use a voltage tester to double-check that the power is off before proceeding.
Step 3: Connect the dimmer switch
Take the Lutron dimmer switch and connect the common wire from your existing setup to the black “common” terminal on the dimmer switch. Connect the traveler wire from your existing setup to the brass or gold-colored “traveler” terminal on the dimmer switch. Finally, connect the ground wire from your existing setup to the green or bare copper “ground” terminal on the dimmer switch.
Step 4: Verify the connections
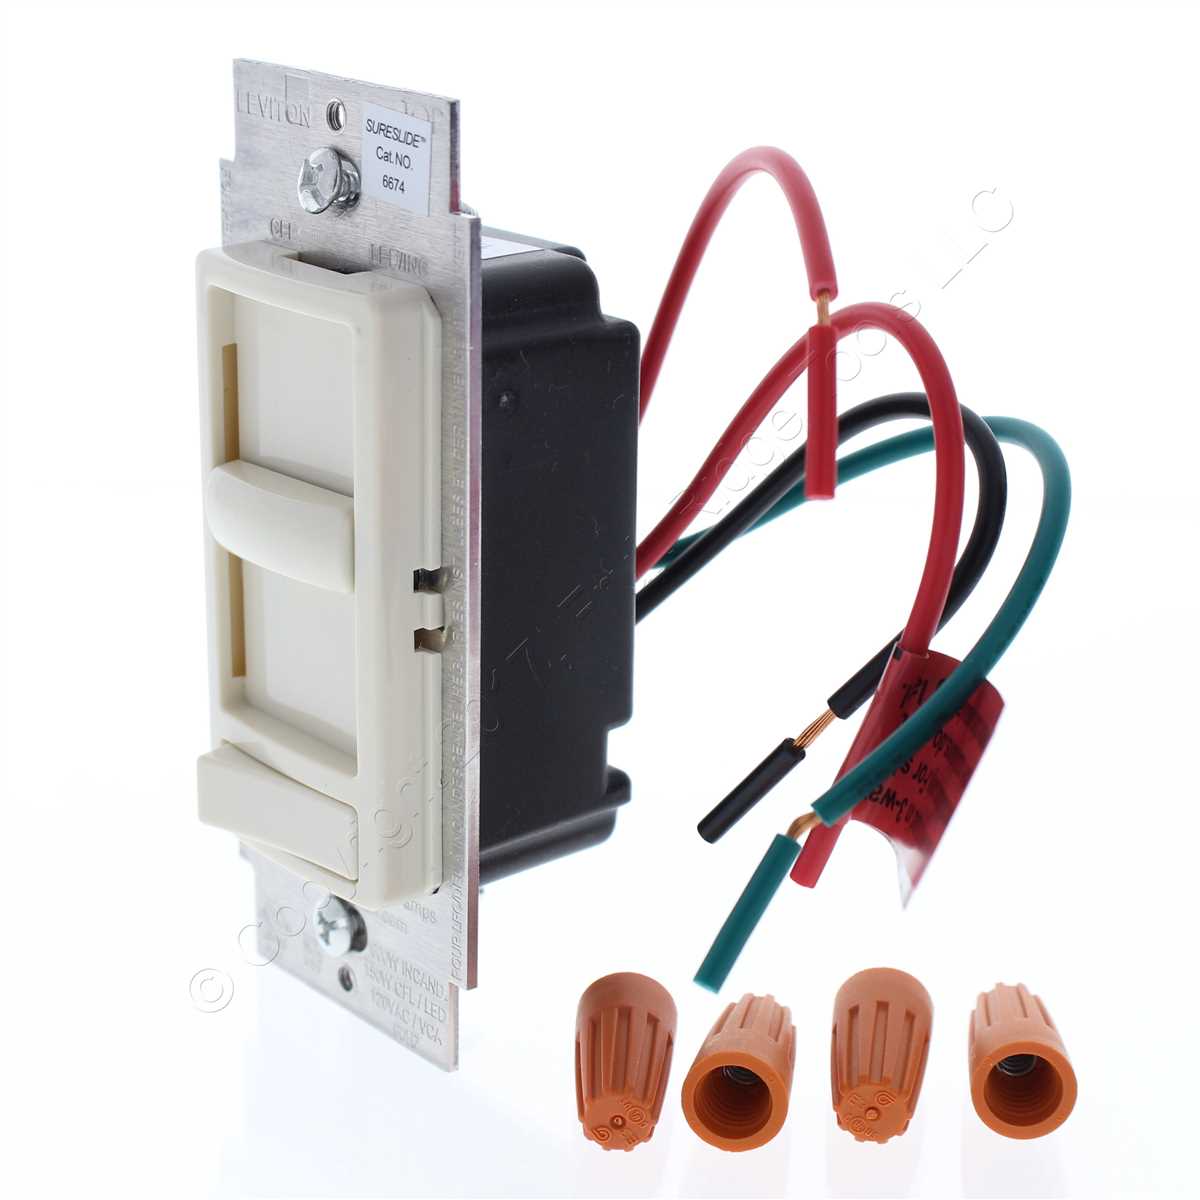
After connecting the wires, double-check that all connections are secure and properly tightened. Make sure there are no loose wires or exposed copper. Verify that the dimmer switch is wired correctly according to the manufacturer’s instructions.
Step 5: Restore the power

Once you have completed the wiring connections and confirmed their accuracy, you can restore power to the circuit by flipping the corresponding switch on the circuit breaker panel back to the “on” position. Test the dimmer switch to ensure it is working properly, adjusting the lighting intensity as desired.
By following this step-by-step guide, you can confidently wire a Lutron dimmer switch in a 3 way setup, allowing you to enhance the lighting control in your home and create the perfect atmosphere for any occasion.
Troubleshooting Common Issues
If you are experiencing issues with your Lutron dimmer switch 3 way wiring, there are a few common problems that you can troubleshoot before seeking professional help.
1. Dimmer Not Working
If your dimmer switch is not working at all, there are a few potential causes to consider. First, check the power supply. Make sure that the circuit breaker is on and that there is power reaching the switch. If the power supply is fine, the issue might be with the switch itself. Check the wiring connections to ensure they are secure, and try replacing the switch if necessary.
2. Dimmer Flickering or Not Dimming Properly
If your dimmer switch is flickering or not dimming the lights properly, there are a few things to check. First, make sure that you are using compatible dimmable LED or incandescent bulbs. Non-dimmable bulbs can cause flickering or dimming issues. Additionally, check the wattage ratings for your bulbs and ensure that they are within the recommended range for your dimmer switch. If the issue persists, try replacing the bulbs with different ones to see if that resolves the problem.
3. Lights Not Turning On or Off
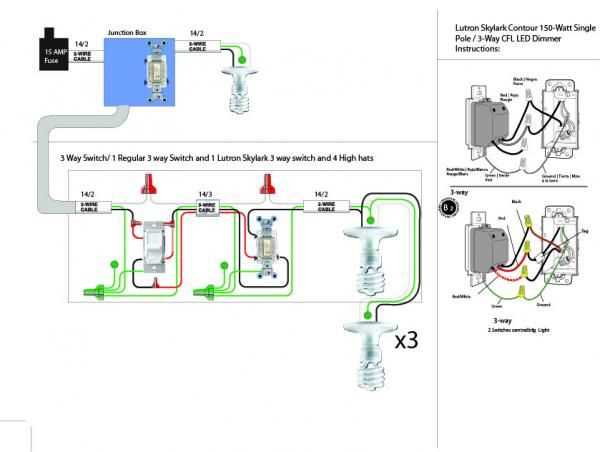
If your lights are not turning on or off when using the dimmer switch, check the wiring connections to ensure they are correct and secure. Make sure that the switch is properly installed and that the wires are connected to the appropriate terminals. If everything appears to be connected correctly, the issue might be with the switch itself. Try replacing the switch to see if that resolves the problem.
If you have tried troubleshooting these common issues and are still experiencing problems with your Lutron dimmer switch 3 way wiring, it is recommended to consult a professional electrician for further assistance.
Benefits of Using Lutron Dimmer Switches
When it comes to controlling the lighting in your home or workspace, Lutron dimmer switches offer several benefits. Whether you’re looking to create a cozy ambiance, save energy, or enhance the lifespan of your light bulbs, Lutron dimmer switches provide the solution.
1. Ambiance: Lutron dimmer switches allow you to easily adjust the brightness of your lights, giving you the ability to create the perfect atmosphere for any occasion. Whether you want a bright, well-lit room for task-oriented activities or a dimly-lit area for relaxation and unwinding, Lutron dimmer switches give you full control.
2. Energy Savings: By using Lutron dimmer switches, you can save energy and reduce your electricity bill. Dimming your lights even by a small amount can significantly reduce energy consumption. Additionally, Lutron dimmer switches can be programmed to automatically adjust the lighting based on the natural light available, further maximizing energy savings.
3. Extended Bulb Life: Lutron dimmer switches help extend the lifespan of your light bulbs. By dimming the lights, you lower the amount of heat emitted, reducing the strain on the bulb and increasing its longevity. This not only saves you money on replacement bulbs but also reduces waste and contributes to a more sustainable environment.
4. Convenience: Lutron dimmer switches offer convenient features that make controlling your lights effortless. Many models come with remote controls, allowing you to adjust the brightness from anywhere in the room. Some switches also have programmable settings, timers, and even smartphone compatibility, which enable you to control the lights remotely or create preset lighting scenes.
Overall, Lutron dimmer switches provide a range of benefits, including the ability to create the desired ambiance, save energy, extend bulb life, and enjoy convenient control options. By investing in Lutron dimmer switches, you can enhance the lighting experience in your space while also making a positive impact on energy consumption and the environment.