
If you have recently purchased a Predator 9000 generator, then you may be wondering about the wiring diagram. Understanding the wiring diagram is crucial if you want to properly install or repair the generator. In this article, we will take a closer look at the Predator 9000 generator wiring diagram and explain the various components and connections.
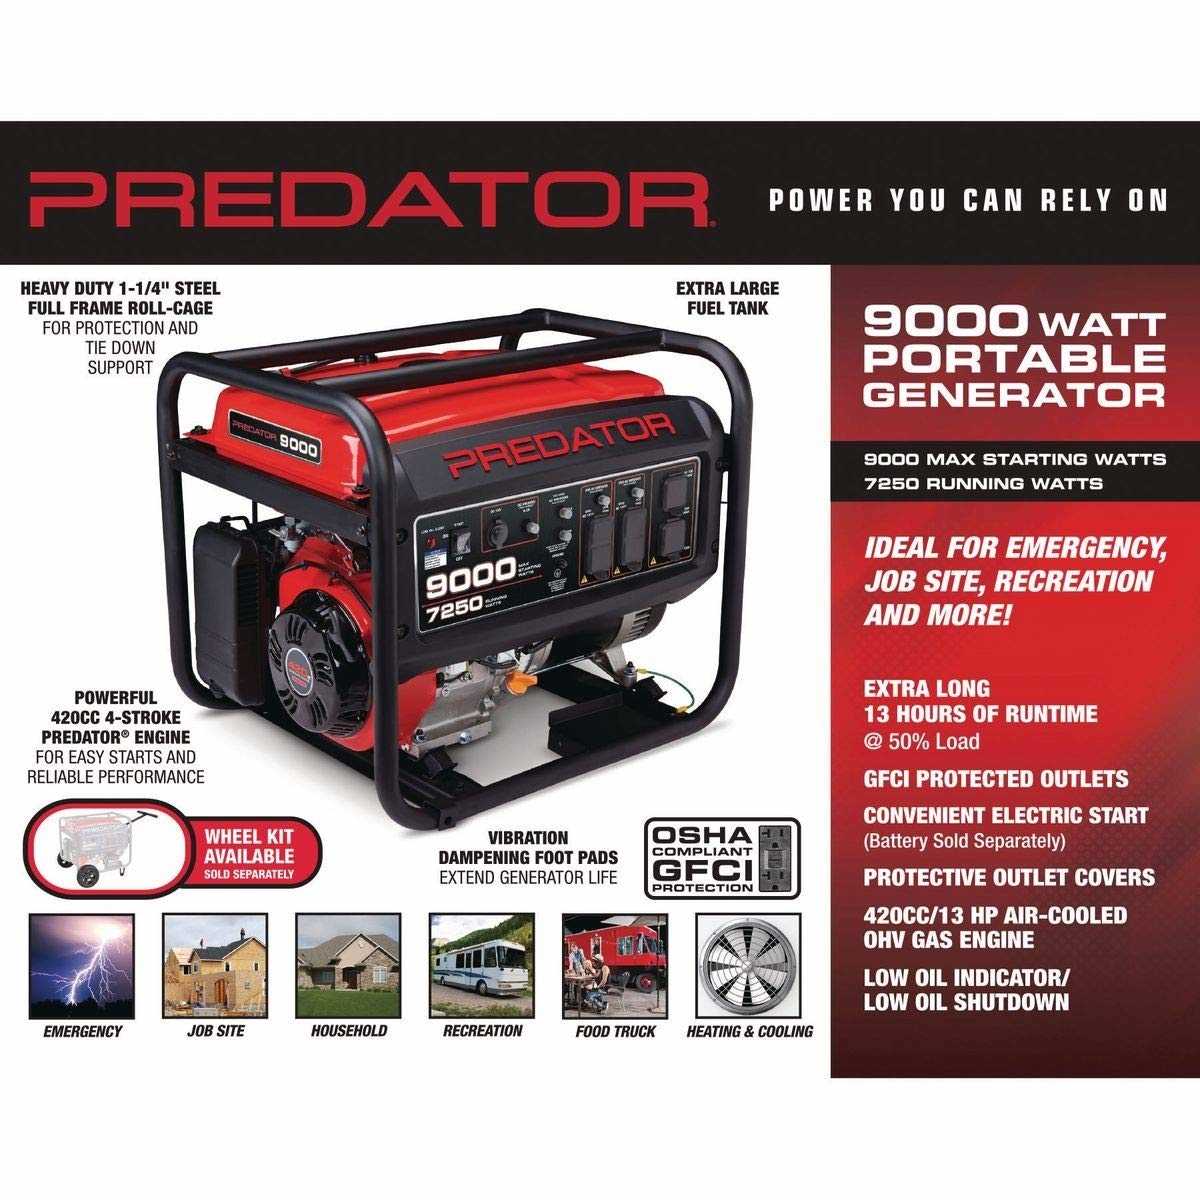
The Predator 9000 generator is a powerful machine that can provide reliable backup power during emergencies or be used for various outdoor activities. However, it is important to understand the electrical system of the generator to ensure safe operation. The wiring diagram provides a visual representation of the electrical connections and can help you identify the different components and their functions.
The wiring diagram of the Predator 9000 generator includes information about the various circuits, such as the main circuit, the control circuit, and the charging circuit. It also shows the connections between the generator’s engine, alternator, voltage regulator, and other electrical components. By following the wiring diagram, you can easily trace the path of the electrical current and troubleshoot any issues that may arise.
Whether you are a professional electrician or a DIY enthusiast, having access to the Predator 9000 generator wiring diagram is essential. It can help you understand the electrical system of the generator and make any necessary repairs or modifications. So, if you find yourself in need of the wiring diagram for your Predator 9000 generator, make sure to consult the manufacturer’s manual or reach out to their customer support for assistance.
Predator 9000 Generator Wiring Diagram
When it comes to powering your devices during a power outage or in a remote location, the Predator 9000 generator is a reliable and powerful solution. To understand how to properly connect and use this generator, it is important to refer to the wiring diagram.
The wiring diagram of the Predator 9000 generator showcases the different electrical components and their connections, ensuring safe and efficient operation. These diagrams provide a visual representation of the generator’s wiring system, including the various switches, outlets, and circuits.
One important component highlighted in the wiring diagram is the transfer switch. This device allows you to switch between generator power and utility power seamlessly. The wiring diagram illustrates how the generator and transfer switch should be connected to ensure proper functionality.
The Predator 9000 generator wiring diagram also indicates the location of the circuit breakers. Circuit breakers protect the generator and connected devices from electrical overloads. The diagram helps users identify how the breakers are wired and how they can be reset in case of a tripped breaker.
In addition to the transfer switch and circuit breakers, the wiring diagram includes information on the generator’s outlets, grounding, and connection to external devices. It provides a clear understanding of how to safely connect devices to the generator without overloading the system.
Overall, the Predator 9000 generator wiring diagram is a valuable resource for understanding the electrical system of the generator. It ensures that users can properly connect and operate the generator, minimizing the risk of electrical hazards and maximizing the generator’s performance.
Understanding the Wiring Diagram of the Predator 9000 Generator
The Predator 9000 generator is a powerful and reliable source of portable electricity. To ensure its proper functioning, it is important to understand the wiring diagram of the generator. This diagram provides a detailed visual representation of the electrical connections and components of the generator, allowing users to troubleshoot, repair, and maintain the generator effectively.
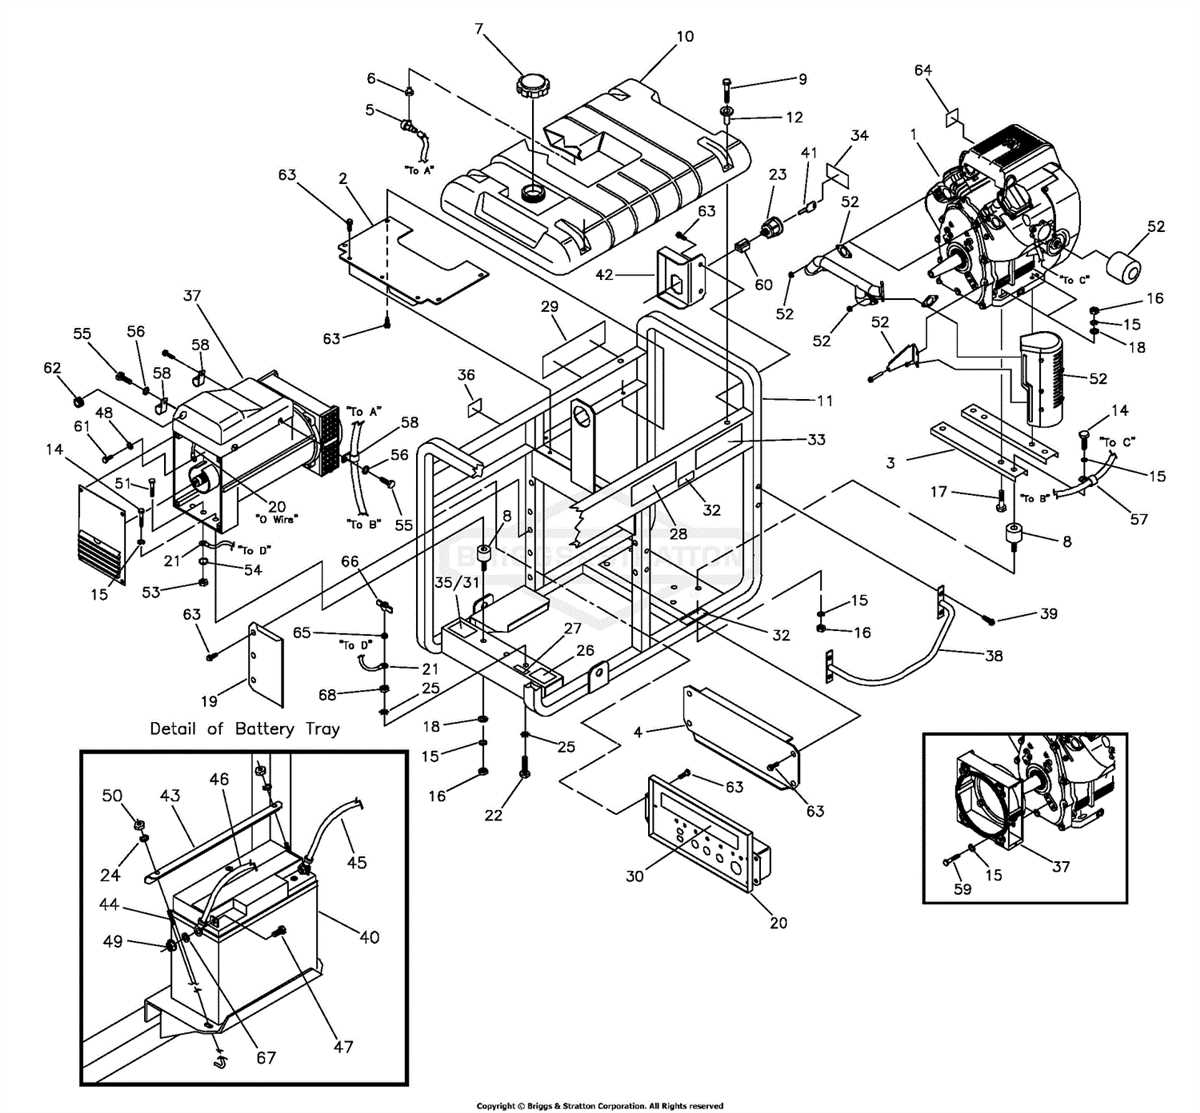
The wiring diagram of the Predator 9000 generator typically consists of several key components, including the engine, generator unit, fuel system, control panel, and various safety features. Each component is represented by different symbols and lines, indicating their connections and interactions with other components.
Starting with the engine, the wiring diagram shows the ignition system, which includes the spark plug, ignition coil, and flywheel. The diagram also illustrates the starter motor and its wiring, allowing users to understand how the engine is started and powered up.
Moving on to the generator unit, the wiring diagram displays the connection between the generator head and the engine. This includes the voltage regulator, brushes, and slip rings, which are responsible for generating and regulating the electricity produced by the generator. Users can refer to the diagram to identify potential issues with the generator’s electrical output and troubleshoot accordingly.
The fuel system wiring is also depicted in the diagram, showing the connections between the fuel tank, fuel pump, and carburetor. This allows users to understand how the fuel is delivered to the engine and ensure that there are no issues with fuel flow or blockages in the system.
Additionally, the wiring diagram showcases the control panel of the Predator 9000 generator, highlighting the various switches, gauges, and outlets present. This enables users to comprehend the functionality of the control panel and make any necessary repairs or adjustments.
In summary, understanding the wiring diagram of the Predator 9000 generator is crucial for maintaining and troubleshooting the generator effectively. By studying the diagram and familiarizing oneself with the electrical connections and components, users can ensure the proper functioning of the generator, identify and resolve any issues, and safely operate the generator for various power needs.
Components of the Predator 9000 Generator Wiring System
The Predator 9000 generator is equipped with a comprehensive wiring system that enables efficient and reliable power generation. This wiring system consists of various components that work together to ensure proper distribution of electricity and safe operation of the generator.
Main Control Panel
The main control panel is the central component of the Predator 9000 generator’s wiring system. It houses various switches, buttons, and indicators that allow the user to control and monitor the generator. These include the power switch, voltage selector switch, engine start button, and LED indicators for power output, low oil level, and overload protection.
Engine
The generator’s engine is another crucial component of the wiring system. It provides the mechanical energy required to generate electricity. The engine is equipped with various sensors, such as the oil level sensor and temperature sensor, that provide information to the control panel for monitoring and protection purposes. The engine also includes a starter motor that enables easy starting of the generator.
Alternator
The alternator is responsible for converting the mechanical energy from the engine into electrical energy. It consists of a stationary stator and a rotating rotor. The stator contains a set of copper windings that produce the electric current, while the rotor creates a rotating magnetic field. The alternator is connected to the engine via a belt and pulley system, which allows it to rotate at the same speed as the engine.
Automatic Voltage Regulator (AVR)
The AVR is an essential component of the Predator 9000 generator’s wiring system. It regulates the generator’s output voltage to maintain a stable and reliable power supply. The AVR constantly monitors the voltage and adjusts the excitation current supplied to the alternator’s rotor to maintain the desired voltage level. This ensures that the generator can provide consistent and clean power for various electrical devices.
Circuit Breakers and Outlets
The wiring system of the Predator 9000 generator includes circuit breakers and outlets that allow for safe and convenient power distribution. The circuit breakers protect the generator and connected devices from overload or short circuits by automatically cutting off the electricity flow in case of an electrical fault. The generator is equipped with multiple outlets of different types, such as 120V AC, 240V AC, and 12V DC, to accommodate a wide range of electrical devices.
Wiring Harness
The wiring harness is a collection of wires and connectors that connect all the components of the Predator 9000 generator’s wiring system. It ensures proper and efficient transmission of electrical signals between the control panel, engine, alternator, AVR, circuit breakers, and outlets. The wiring harness is carefully designed and organized to minimize the risk of electrical faults and ensure the smooth operation of the generator.
In conclusion, the Predator 9000 generator’s wiring system consists of several key components, including the main control panel, engine, alternator, AVR, circuit breakers, and wiring harness. These components work together to provide efficient and reliable power generation, while also ensuring the safety of the generator and connected devices.
Step-by-Step Guide to Read and Interpret the Wiring Diagram
When it comes to understanding the functionality and connections of electrical components in a Predator 9000 generator, interpreting the wiring diagram is essential. The wiring diagram is a visual representation of the electrical system, illustrating how the various components are connected and how electricity flows through the system. Here is a step-by-step guide to help you read and interpret the wiring diagram effectively:
1. Identify the Components
Begin by identifying the different components listed in the wiring diagram. These can include the generator, battery, ignition switch, voltage regulator, AC outlets, and more. Understanding the names and functions of these components will help you follow the diagram accurately.
2. Recognize the Symbols
Wiring diagrams use symbols to represent different electrical components and connections. Familiarize yourself with the most commonly used symbols, such as a circle for a battery, zigzag lines for resistors, parallel lines for wires, and various shapes for different types of switches. Knowing these symbols will make it easier to interpret the diagram.
3. Follow the Flow of Electricity
Trace the flow of electricity through the diagram by following the arrows and lines. The arrows indicate the direction of the current, while the lines represent wire connections and pathways. Pay close attention to the sequence and direction of these lines to understand how electricity travels between the different components.
4. Analyze the Connections
Examine the connections between the components shown in the wiring diagram. Different types of lines and symbols are used to represent various connection types, such as direct connections, grounds, splices, and switches. Understanding these connections will allow you to determine how electricity is transmitted and controlled within the system.
5. Consult the Legend or Key
If you come across any symbols or abbreviations that you don’t understand, refer to the legend or key provided with the wiring diagram. This section typically provides explanations for all the symbols and abbreviations used, helping you decipher any unfamiliar elements in the diagram.
6. Take Note of Colors and Labels
In some wiring diagrams, colors or labels may be used to further clarify the connections. For example, wires may be color-coded to indicate their specific functions or to differentiate positive and negative connections. Pay attention to these color codes and labels to accurately interpret the wiring diagram.
By following these steps and familiarizing yourself with the components, symbols, connections, and other elements of the wiring diagram, you can gain a comprehensive understanding of the electrical system in the Predator 9000 generator. This knowledge will enable you to troubleshoot issues, make necessary connections, and perform maintenance tasks with confidence.
Troubleshooting Common Wiring Issues in the Predator 9000 Generator
The Predator 9000 generator is a powerful machine that provides reliable backup power for various applications. However, like any generator, it can experience wiring issues that may affect its performance. Here are some common wiring problems you may encounter with the Predator 9000 generator and how to troubleshoot them.
1. No Output Voltage
If your Predator 9000 generator is running but there is no output voltage, the issue may lie in the wiring. Start by checking the connection between the generator and the electrical load. Ensure that the wires are securely connected and not damaged. Also, make sure the circuit breaker on the generator is not tripped. If everything appears to be fine, it could be a problem with the alternator or voltage regulator, and it may require professional repair.
2. Overloaded Circuits
If your electrical devices are not receiving power from the generator or the circuits keep tripping, it may be due to overloaded circuits. The Predator 9000 generator has a maximum output capacity, and exceeding it can cause wiring issues. Check the power requirements of your devices and make sure they do not exceed the generator’s capacity. To resolve the issue, you may need to redistribute the load by connecting fewer devices or using a separate generator for heavier loads.
3. Loose or Damaged Wiring
Inspect the wiring connections in the generator for any loose or damaged wires. Loose connections can disrupt the flow of electricity and affect the generator’s performance. Tighten any loose connections and ensure that all wires are securely connected. If you notice any damaged wires, they should be replaced to avoid electrical hazards.
4. Malfunctioning Control Panel
If the control panel of the Predator 9000 generator is not functioning properly, it could indicate a wiring issue. Check the connections between the control panel and the generator’s internal components. Ensure that the wiring connections are secure and undamaged. If the control panel still does not work, there may be a problem with the wiring harness, and it may require professional repair.
In summary, troubleshooting wiring issues in the Predator 9000 generator involves checking the connection between the generator and the electrical load, avoiding overloading circuits, inspecting for loose or damaged wiring, and addressing any malfunctioning control panel. By following these steps, you can identify and resolve common wiring problems in your Predator 9000 generator.
Tips for Properly Maintaining the Wiring System of the Predator 9000 Generator
Regular maintenance of the wiring system is crucial for the proper functioning and safety of the Predator 9000 generator. Here are some important tips to follow:
- Inspect the wiring regularly: Periodically check the wiring system for any signs of damage, such as frayed wires or loose connections. This will help prevent potential electrical hazards and ensure the generator operates smoothly.
- Keep the wiring clean: Dirt, dust, and debris can accumulate on the wiring over time, affecting its conductivity. Use a soft brush or cloth to gently clean the wiring and remove any unwanted particles.
- Ensure proper grounding: Make sure the wiring system is properly grounded to prevent electrical shock or damage to the generator. Consult the generator’s manual for specific instructions on grounding.
- Replace damaged wiring: If you notice any damaged or worn-out wiring, it is important to replace it immediately. Using damaged wiring can be dangerous and may lead to electrical malfunctions.
- Check for loose connections: Over time, vibrations and usage can cause connections to loosen. Regularly check all wiring connections, including plugs, terminals, and junction boxes, and tighten any loose connections.
- Follow the wiring diagram: Refer to the generator’s wiring diagram provided in the manual for proper installation and maintenance. This will ensure that all wires are connected correctly and minimize the risk of electrical problems.
- Perform routine maintenance: In addition to checking the wiring, make sure to follow the generator’s maintenance schedule for overall upkeep. This includes oil changes, filter replacements, and other routine tasks to keep the generator in optimal condition.
By following these tips, you can ensure the proper functioning and longevity of the wiring system in your Predator 9000 generator. Regular maintenance will not only maintain the generator’s performance but also provide a safe and reliable power source for your needs.