
If you are planning to install a well pump in your home, it is important to understand the wiring diagram. A well pump is an essential component that helps bring water from the ground to your taps and appliances.
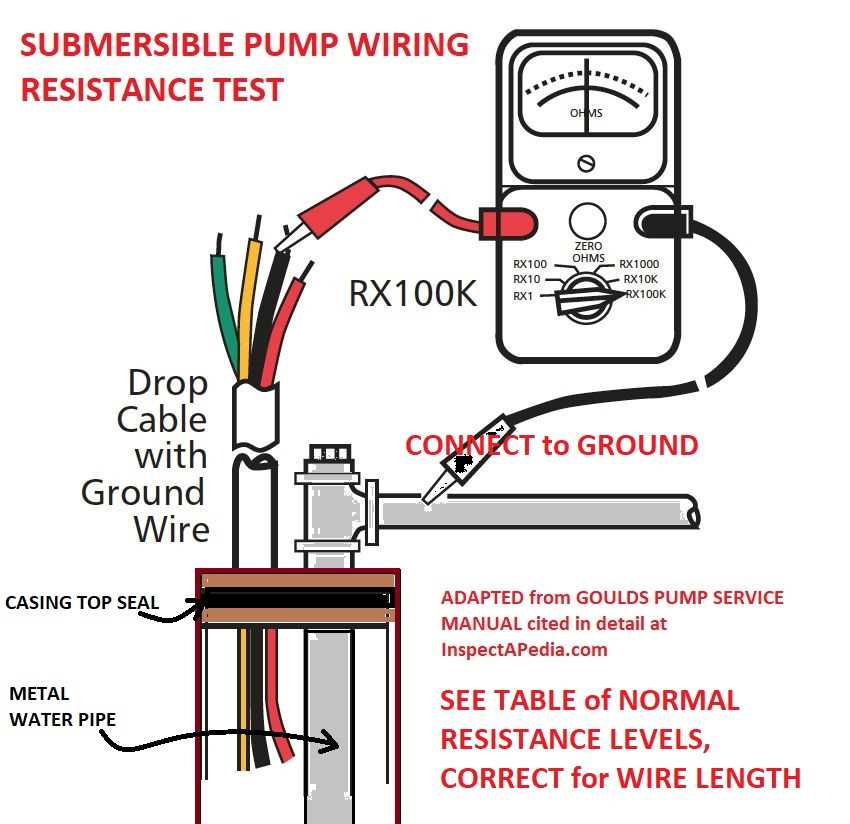
The wiring diagram for a Sta-Rite well pump is a visual representation of how the electrical components of the pump are connected. It shows the power supply, control box, motor, and other electrical connections. Understanding this diagram will help you properly install and troubleshoot your well pump system.
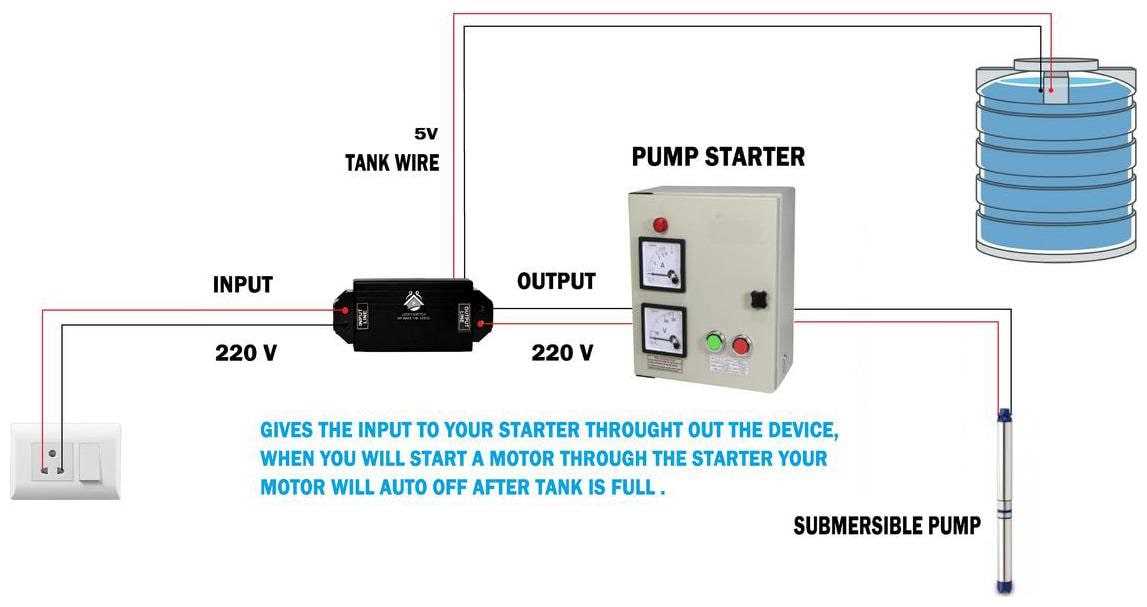
One of the key components in the wiring diagram is the control box. This box is responsible for regulating the power supply to the pump motor. It also includes various safety features, such as overload protection and low voltage protection. The well pump wiring diagram will show you how the control box is connected to the power supply and motor.
Additionally, the wiring diagram will show the different types of wires used in the well pump system. These include the power supply wires, control box wires, and motor wires. Each wire has a specific purpose and must be connected correctly to ensure proper operation of the well pump.
Sta Rite Well Pump Wiring Diagram: Everything You Need to Know
When it comes to installing or troubleshooting a Sta Rite well pump, understanding the wiring diagram is essential. A wiring diagram is a visual representation of the electrical circuitry of a system and can help you understand how the various components are connected.
The Basics of a Sta Rite Well Pump Wiring Diagram
At its core, a Sta Rite well pump wiring diagram consists of symbols representing different electrical components and lines that represent the wires connecting these components. The symbols can include things like a motor, pressure switch, control box, and power supply. The lines indicate the flow of electricity from one component to another.
Understanding the Components
By studying the wiring diagram, you can identify the various components of the Sta Rite well pump system and understand how they work together. For example, the motor is responsible for powering the pump and is connected to the power supply via the control box. The pressure switch monitors the water pressure and turns the pump on or off accordingly.
Troubleshooting with the Wiring Diagram
If you encounter any issues with your Sta Rite well pump, the wiring diagram can be a valuable tool for troubleshooting. By following the lines and understanding how the components are connected, you can pinpoint the source of the problem and make necessary repairs or replacements.
Consulting the Manual
While the wiring diagram provides a visual representation of the electrical connections, it is important to consult the manufacturer’s manual for specific instructions and guidelines. The manual will provide further details regarding the installation, wiring, and troubleshooting of the Sta Rite well pump.
In conclusion, understanding the Sta Rite well pump wiring diagram is crucial for proper installation, maintenance, and troubleshooting. It allows you to identify the components, understand their connections, and effectively address any issues that may arise.
Understanding the Basics of Sta Rite Well Pump Wiring
The wiring diagram for a Sta Rite well pump provides a visual representation of how the electrical components of the pump are connected. It is crucial to understand the basics of well pump wiring in order to troubleshoot any issues that may arise and ensure proper installation and functioning of the pump.
The wiring diagram typically includes important information such as the voltage requirements, wire colors, and the specific connections between the pump, pressure switch, pressure tank, and power source. These components work together to draw water from the well and deliver it to the residence or building.
When interpreting the wiring diagram, it is important to consider safety precautions, such as proper grounding and following the manufacturer’s instructions. The diagram may also indicate the need for specific tools or materials, such as wire nuts or conduit, to complete the installation correctly.
- Power source: The first step in the wiring process is to identify the power source, often a circuit breaker panel. The wiring diagram will typically indicate the voltage requirement, such as 110V or 220V, and the specific wires that need to be connected to the power source.
- Pressure switch: The pressure switch is an important component that controls when the pump turns on and off based on water pressure in the system. The wiring diagram will show how to connect the pressure switch to the pump and power source.
- Pump: The well pump itself will have terminals that need to be connected to the appropriate wires. The wiring diagram will indicate the specific connections required, typically labeled as “L1” and “L2” for the power supply and “T1” and “T2” for the pump.
- Pressure tank: The wiring diagram may also include instructions for wiring the pressure tank, which helps regulate the water pressure in the system. This may involve connecting wires to pressure switch terminals or other components.
In summary, understanding the basics of Sta Rite well pump wiring is essential for installing and maintaining a well pump system. The wiring diagram provides a visual guide for connecting the pump, pressure switch, pressure tank, and power source. Following safety precautions and the manufacturer’s instructions is crucial for a safe and efficient installation.
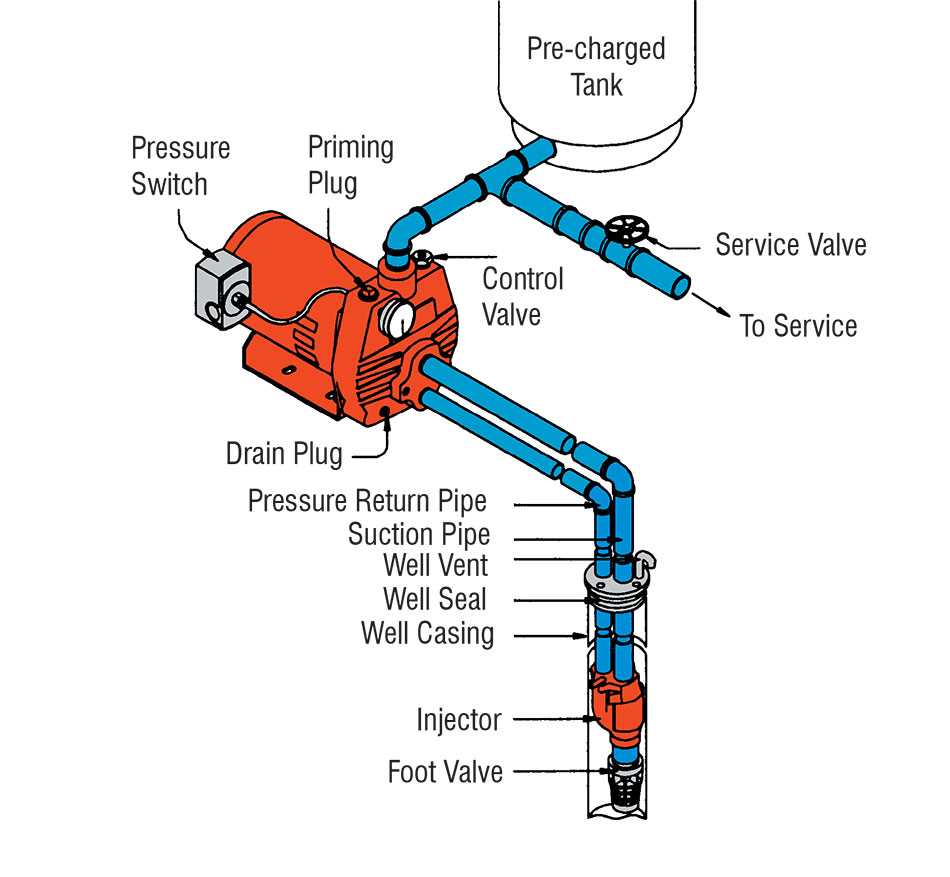
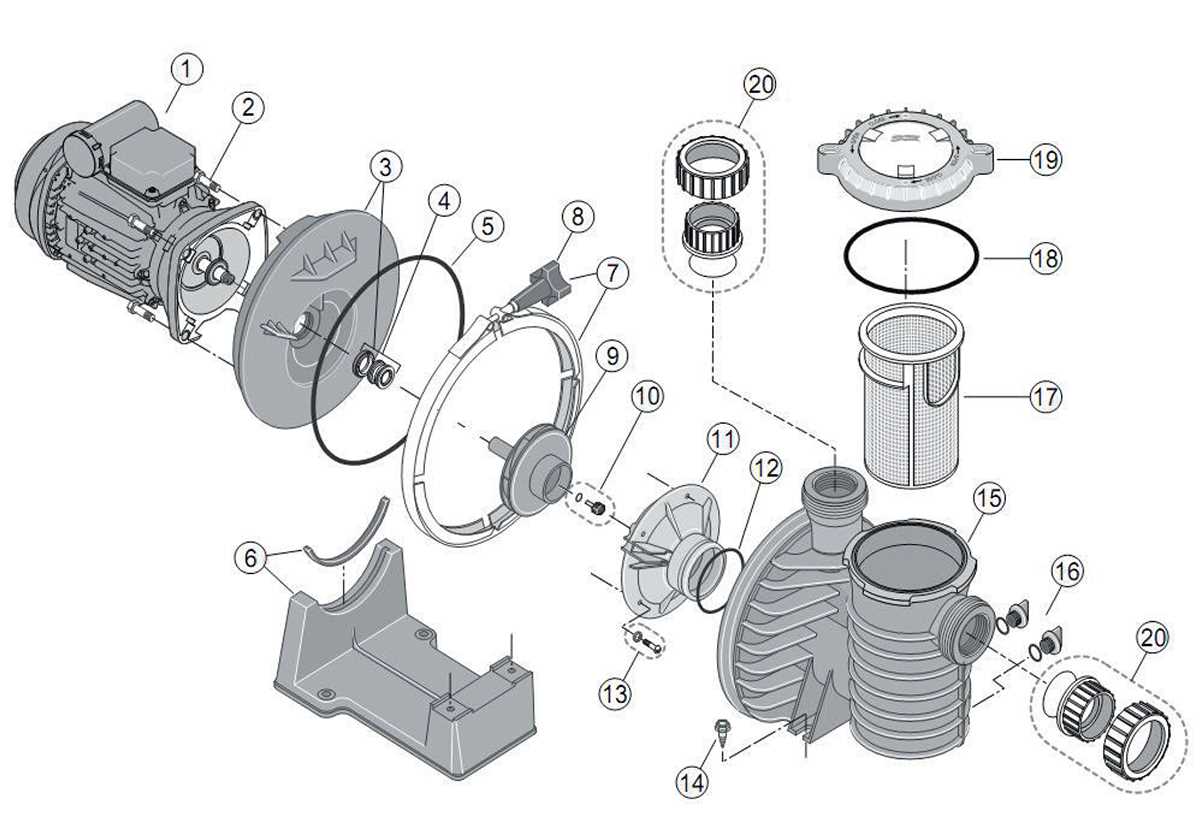
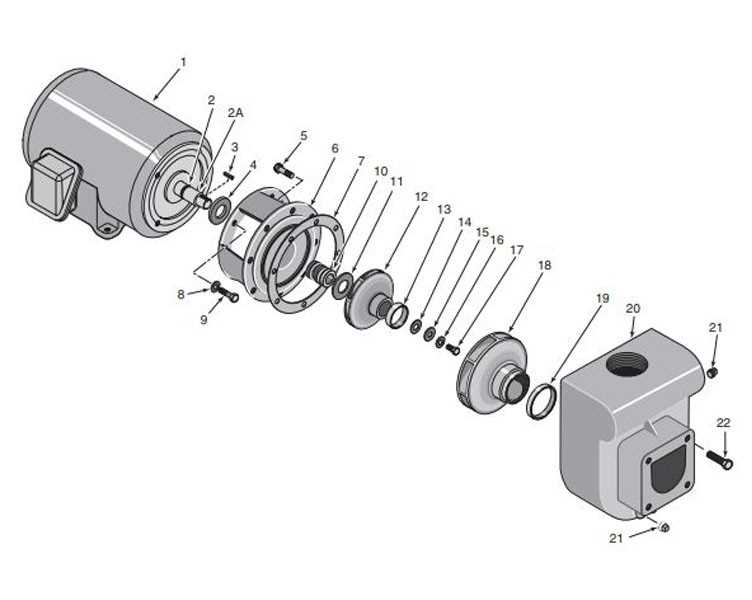
Components of a Sta Rite Well Pump
A Sta Rite well pump is a crucial component of a well water system. It helps to extract water from underground and deliver it to the surface for various household and agricultural purposes. Understanding the components of a Sta Rite well pump can help in troubleshooting issues and ensuring proper maintenance.
Motor: The motor is the main driving force of the pump and is responsible for creating the power needed to draw the water from the well. Sta Rite well pumps typically use high-quality electric motors that are durable and efficient.
Impeller: The impeller is a rotating component within the pump that helps to create centrifugal force, which in turn helps to push the water out of the well. Sta Rite well pumps often use a multistage impeller design, which provides increased pressure and efficiency.
Control Box: The control box is an essential part of a Sta Rite well pump system. It houses electrical components that regulate the operation of the pump, such as starting and stopping the motor, protecting against overload, and monitoring the water pressure.
Pressure Switch: The pressure switch is responsible for monitoring the water pressure in the system. When the pressure drops below a certain level, it signals the control box to start the motor and draw more water from the well. Conversely, when the pressure reaches a certain level, it signals the control box to stop the motor.
Check Valve: The check valve is a one-way valve that prevents water from flowing back into the well once it has been pumped out. It helps to maintain the water pressure in the system and prevents damage to the well pump.
Well Casing: The well casing is the vertical pipe that extends from the surface down into the well. It provides support and protection for the well pump and other components. Sta Rite well pumps are designed to fit securely within the well casing for efficient operation.
Overall, a Sta Rite well pump consists of various components that work together to extract water from a well and deliver it to the surface. Understanding these components can help in troubleshooting and maintaining the pump to ensure a reliable water supply.
Step-by-Step Guide to Wiring a Sta Rite Well Pump
Wiring a Sta Rite well pump may seem like a daunting task, but with the right instructions and tools, it can be done easily and safely. Whether you are installing a new pump or replacing an old one, this step-by-step guide will walk you through the process.
1. Gather the necessary tools: Before you begin, make sure you have all the required tools on hand. You will need wire strippers, wire nuts, electrical tape, a voltage tester, and a screwdriver.
2. Disconnect power: Safety is of utmost importance when working with electrical components. Before starting any work, locate the breaker that supplies power to the well pump and turn it off. Use a voltage tester to ensure that the power is indeed off.
3. Remove the pump cover: Locate the pump’s cover and remove it using a screwdriver. This will expose the terminals where the wires need to be connected.
4. Strip the wires: Strip about half an inch of insulation from the end of each wire that needs to be connected. Use wire strippers to carefully remove the insulation without damaging the wire itself.
5. Connect the wires: Refer to the wiring diagram provided by Sta Rite to determine which color wire goes to each terminal. Connect the corresponding wires by twisting them together and securing them with wire nuts. Make sure the connections are tight and secure.
6. Insulate the connections: Once the wires are connected, wrap each connection with electrical tape to insulate them and protect against any potential electrical shock. This step is crucial for safety.
7. Test the connections: After completing the wiring, it’s important to test the connections to ensure they are functioning properly. Use a voltage tester to check for voltage at the terminals. If the tester indicates voltage, the connections were made correctly.
8. Replace the pump cover: Once the wiring is complete and the connections have been tested, replace the pump cover by screwing it back into place. Make sure it is securely fastened.
9. Restore power: With the pump cover securely in place, you can now turn the breaker back on to restore power to the well pump. Check that the pump is running smoothly and that there are no issues with the wiring.
Following these step-by-step instructions will ensure that your Sta Rite well pump is properly wired and ready to function efficiently. If you are unsure about any step of the process, it is always recommended to consult a professional electrician for assistance.
Troubleshooting Common Wiring Issues with Sta Rite Well Pumps
Sta Rite well pumps are a reliable and efficient way to ensure a steady supply of water to your home or property. However, like any electrical system, there can be wiring issues that may cause the pump to malfunction or not work at all. Understanding and troubleshooting these common wiring issues can help you resolve the problem quickly and restore the functionality of your Sta Rite well pump.
1. Incorrect wiring connections
One of the most common issues with Sta Rite well pumps is incorrect wiring connections. This can happen when wires are not properly connected to the correct terminals or if there are loose connections. To troubleshoot this issue, start by checking the wiring diagram provided by Sta Rite for your specific pump model. Make sure that the wires are connected as indicated in the diagram. Additionally, tighten any loose connections and ensure that the wires are securely connected to the terminals.
2. Damaged or worn-out wires
Another common wiring issue with Sta Rite well pumps is damaged or worn-out wires. Over time, the insulation on the wires may deteriorate due to exposure to moisture, heat, or physical wear. This can lead to short circuits or open circuits, causing the pump to stop working. Inspect the wires for any signs of damage, such as frayed insulation or exposed wires. If you find any damage, replace the affected wires with new ones of the same gauge and ensure the connections are properly insulated.
3. Faulty pressure switch or control box
In some cases, the wiring issue may not be directly related to the pump itself, but rather the pressure switch or control box that regulates its operation. These components can develop wiring problems over time, such as loose connections or corroded terminals. If you have ruled out any issues with the pump wiring, inspect the pressure switch and control box for any signs of damage or faulty wiring. Replace any damaged components and ensure all connections are secure.
By troubleshooting and resolving common wiring issues with Sta Rite well pumps, you can ensure a reliable water supply to your home or property. If you are unsure or uncomfortable working with electrical systems, it is always recommended to consult a professional electrician for assistance.
Tips for Proper Maintenance of Sta Rite Well Pump Wiring
Proper maintenance of Sta Rite well pump wiring is crucial for the efficient and reliable operation of your well system. Here are some tips to help you ensure the longevity and performance of your well pump wiring:
Regular Inspections:
Periodically inspect the wiring connections of your Sta Rite well pump to check for any signs of wear, damage, or loose connections. Look for frayed or exposed wires, burned insulation, or loose terminal screws. If any issues are found, it is important to address them immediately to prevent further damage or malfunction.
Lorem ipsum dolor sit amet
Lorem ipsum dolor sit amet, consectetur adipiscing elit. Praesent eget dictum tortor, quis condimentum felis. Nullam hendrerit scelerisque eleifend. Vivamus id tellus nec justo sodales pretium eget at ligula. Nullam convallis ac turpis id eleifend. Vestibulum at orci eget diam iaculis sollicitudin. Nunc mauris enim, varius id felis sed, blandit pellentesque tortor. Nulla facilisi. Fusce quis sem nec urna elementum suscipit. Duis sollicitudin malesuada mauris, in lacinia tellus dapibus varius. Suspendisse potenti.
Regular Maintenance:
Aside from visual inspections, it is important to regularly clean and maintain the well pump wiring. Remove any dirt, debris, or corrosion from the wiring and terminal connections. Keep the wiring protected from moisture and extreme temperatures to prevent damage and ensure optimal performance.
Proper Installation:

When installing or repairing the well pump wiring, make sure to follow the manufacturer’s instructions and guidelines. Use appropriate wiring and connectors that are rated for the specific voltage and amperage requirements of your well pump system. Improper installation can lead to electrical hazards and premature failure of the wiring.
Professional Assistance:
If you are unsure about the maintenance or troubleshooting process of your Sta Rite well pump wiring, it is always recommended to seek professional assistance. A qualified electrician or well pump technician can ensure that the wiring is in good condition and address any issues effectively and safely.
Upgrading Your Sta Rite Well Pump Wiring for Enhanced Performance
Upgrading the wiring of your Sta Rite well pump can greatly enhance its performance and ensure a reliable water supply for your home or property. Whether you are experiencing issues with your current wiring or simply want to improve the efficiency of your pump, upgrading the wiring is a smart investment.
There are several key benefits to upgrading your Sta Rite well pump wiring:
- Increased reliability: Upgrading the wiring can help eliminate electrical issues that may cause pump failures or interruptions in water supply.
- Improved efficiency: By utilizing high-quality wiring and proper insulation, you can reduce energy loss and ensure that the pump operates at its optimal efficiency.
- Protection against voltage fluctuations: Upgraded wiring can provide better protection against power surges and voltage fluctuations, which can damage the pump and other electrical components.
- Enhanced safety: By upgrading the wiring, you can ensure that the pump operates safely and minimize the risk of electrical hazards.
When upgrading your Sta Rite well pump wiring, it is important to follow these steps:
- Assess your current wiring: Determine the condition of your existing wiring and identify any potential issues or areas that need improvement.
- Choose the right wiring: Select high-quality, properly rated wires that are suitable for well pump applications. Consult with a professional or refer to the manufacturer’s guidelines for specific requirements.
- Replace old or damaged components: Inspect and replace any outdated or damaged components, such as connectors, junction boxes, or switches.
- Ensure proper insulation: Use insulation materials that are appropriate for underground or outdoor use, as well as for protection against moisture and environmental factors.
- Follow safety guidelines: Adhere to all safety guidelines and regulations, including proper grounding and electrical connections.
- Consider professional installation: If you are unsure about your wiring skills or lack experience in electrical work, it is recommended to hire a professional electrician to ensure the job is done correctly and safely.
By upgrading your Sta Rite well pump wiring, you can improve the performance, reliability, and safety of your water supply system. Take the time to assess your current wiring and invest in high-quality materials and professional installation for optimal results.