
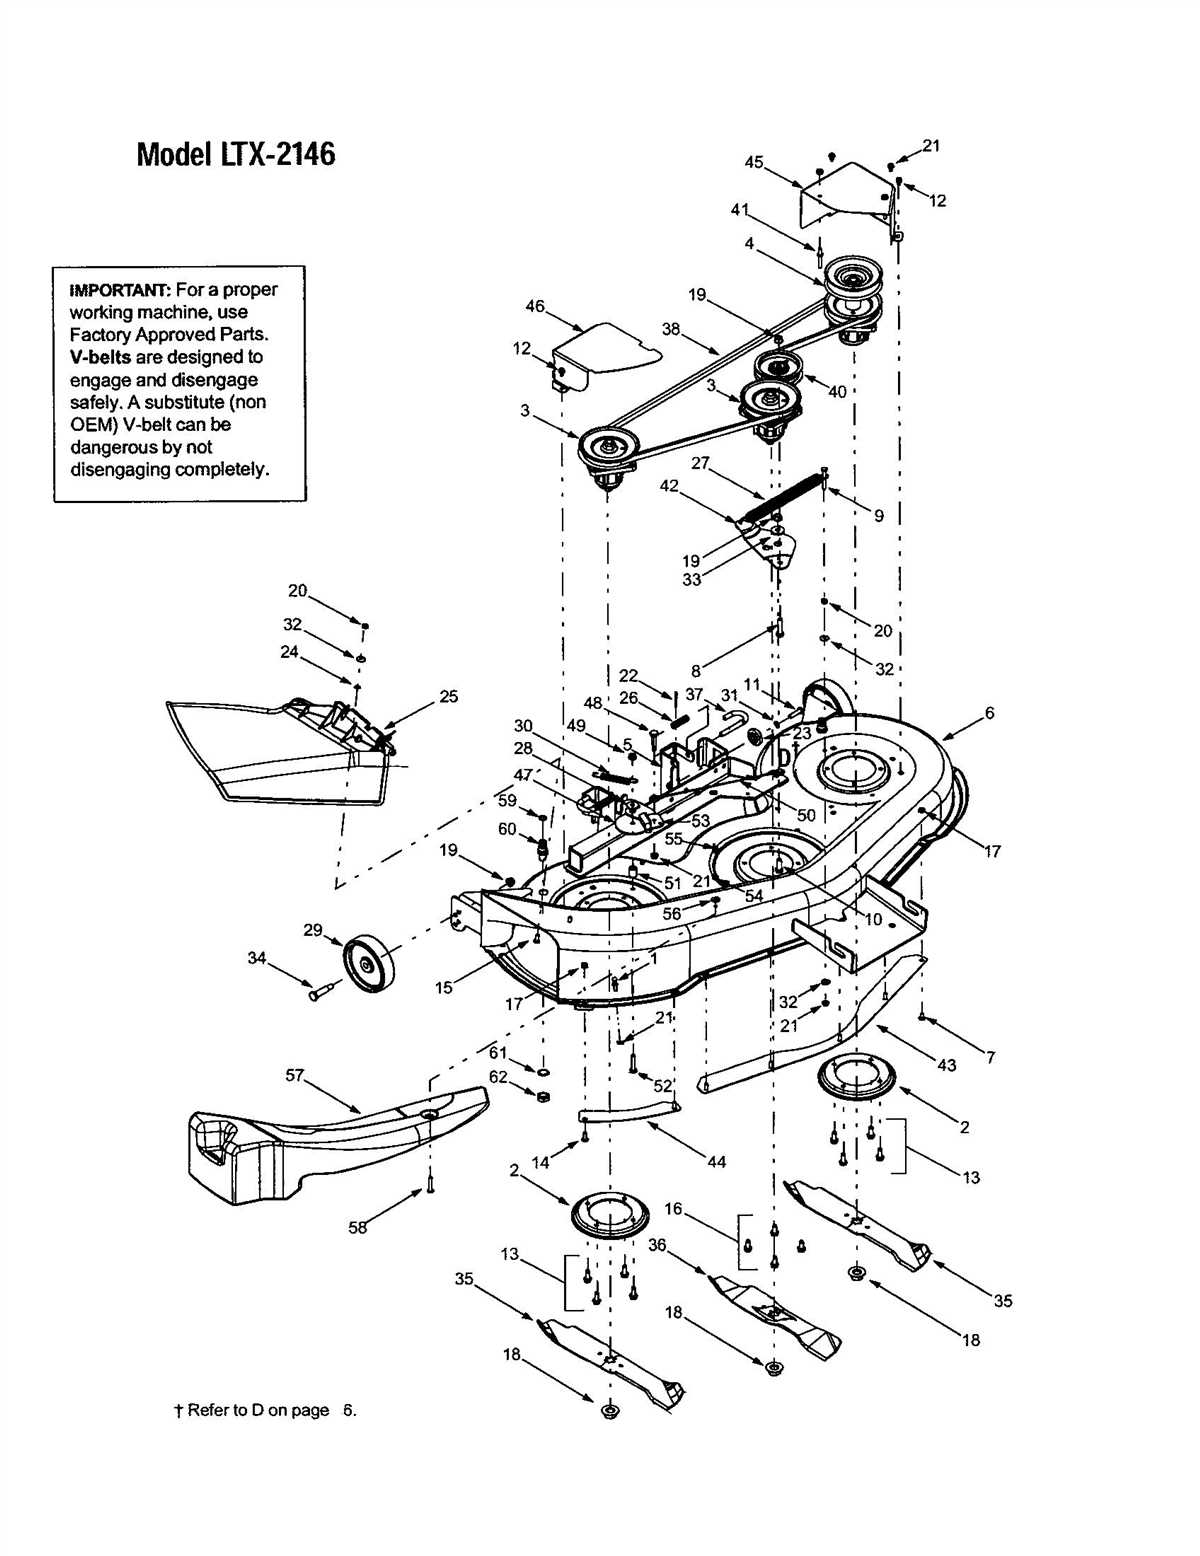
When it comes to maintaining and repairing your Troy Bilt Mustang 42 deck, having a diagram of the deck belt setup can be extremely helpful. The deck belt on the Mustang 42 is an essential component that drives the blades and allows them to cut grass efficiently. Understanding the correct belt routing and tension is crucial for proper operation of your riding lawn mower.
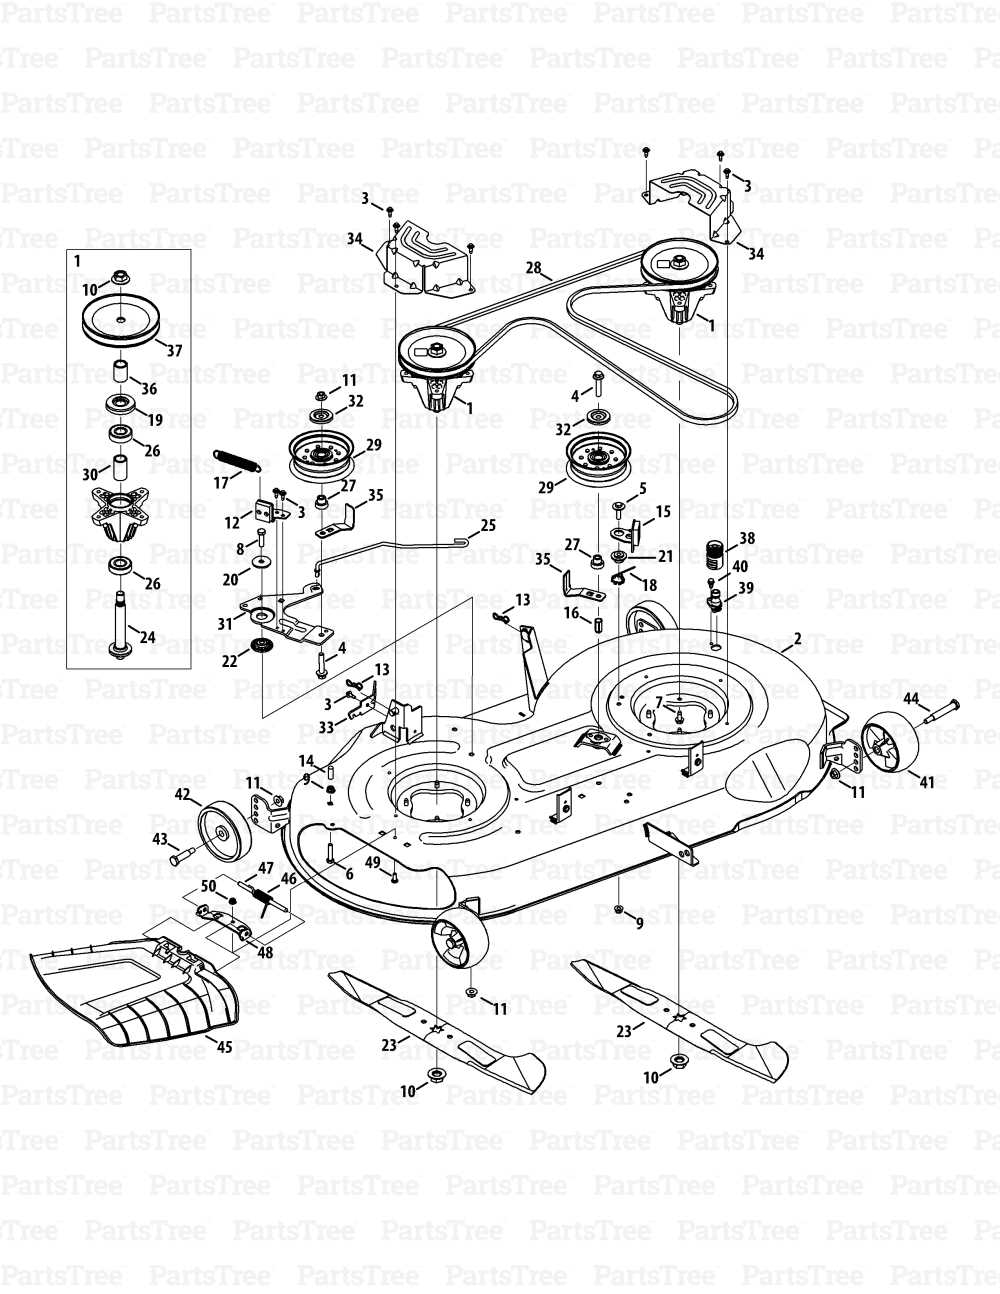
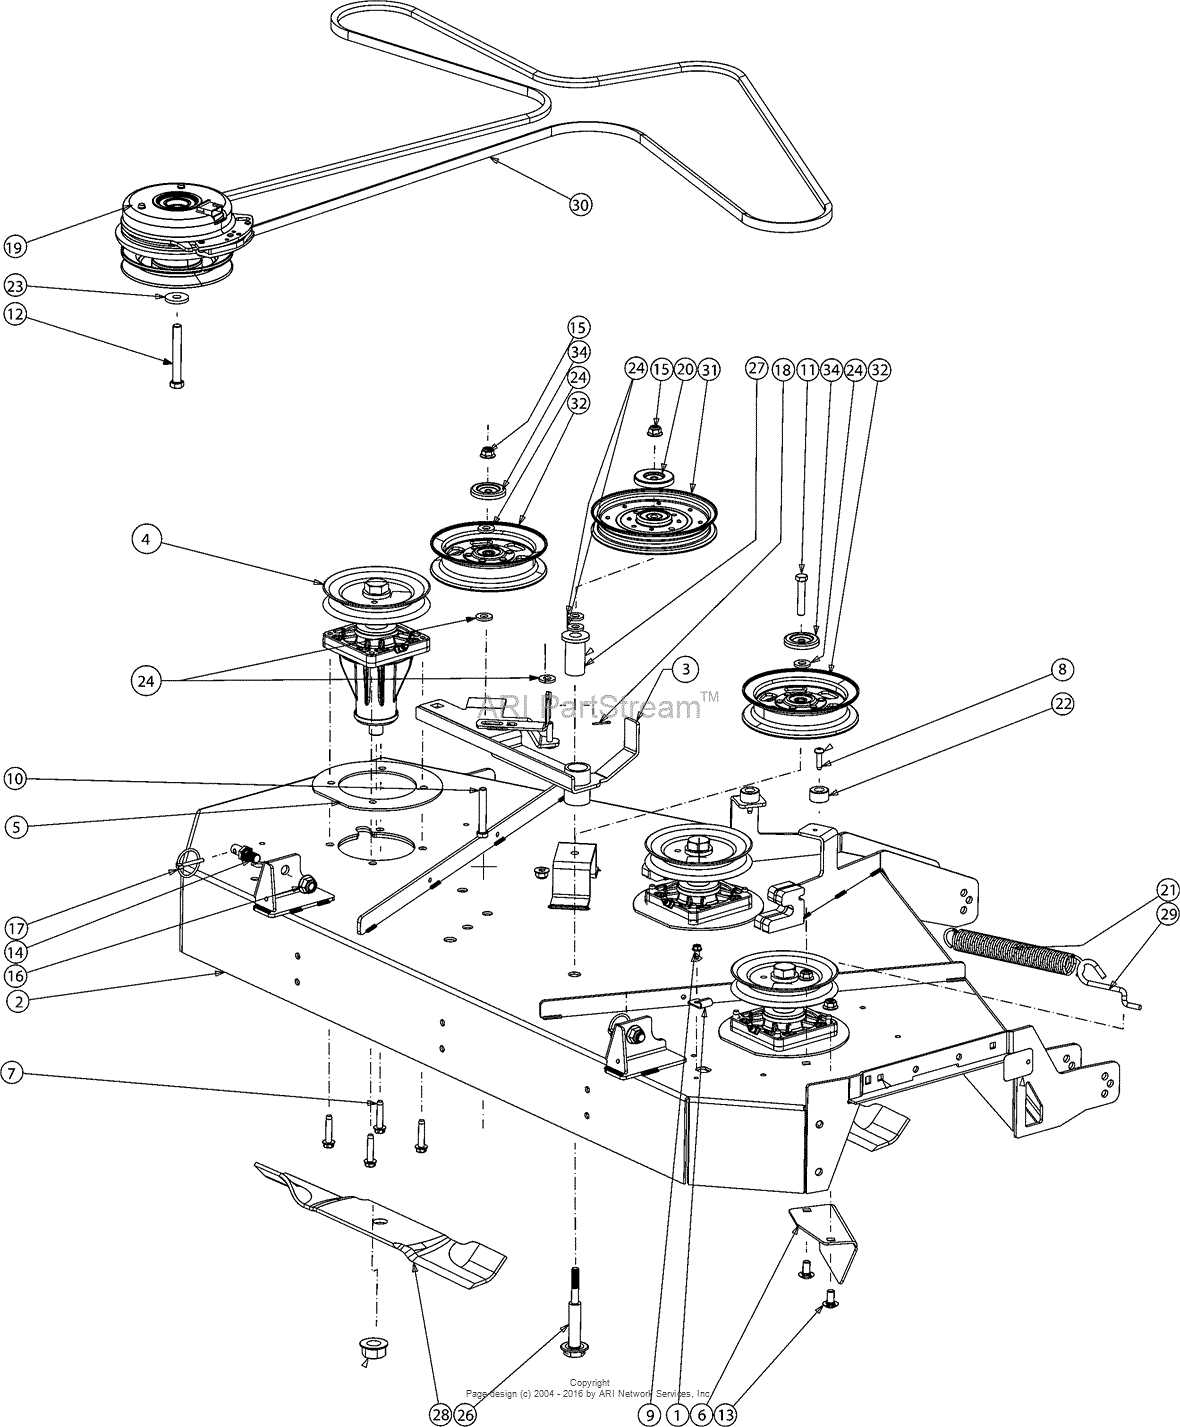
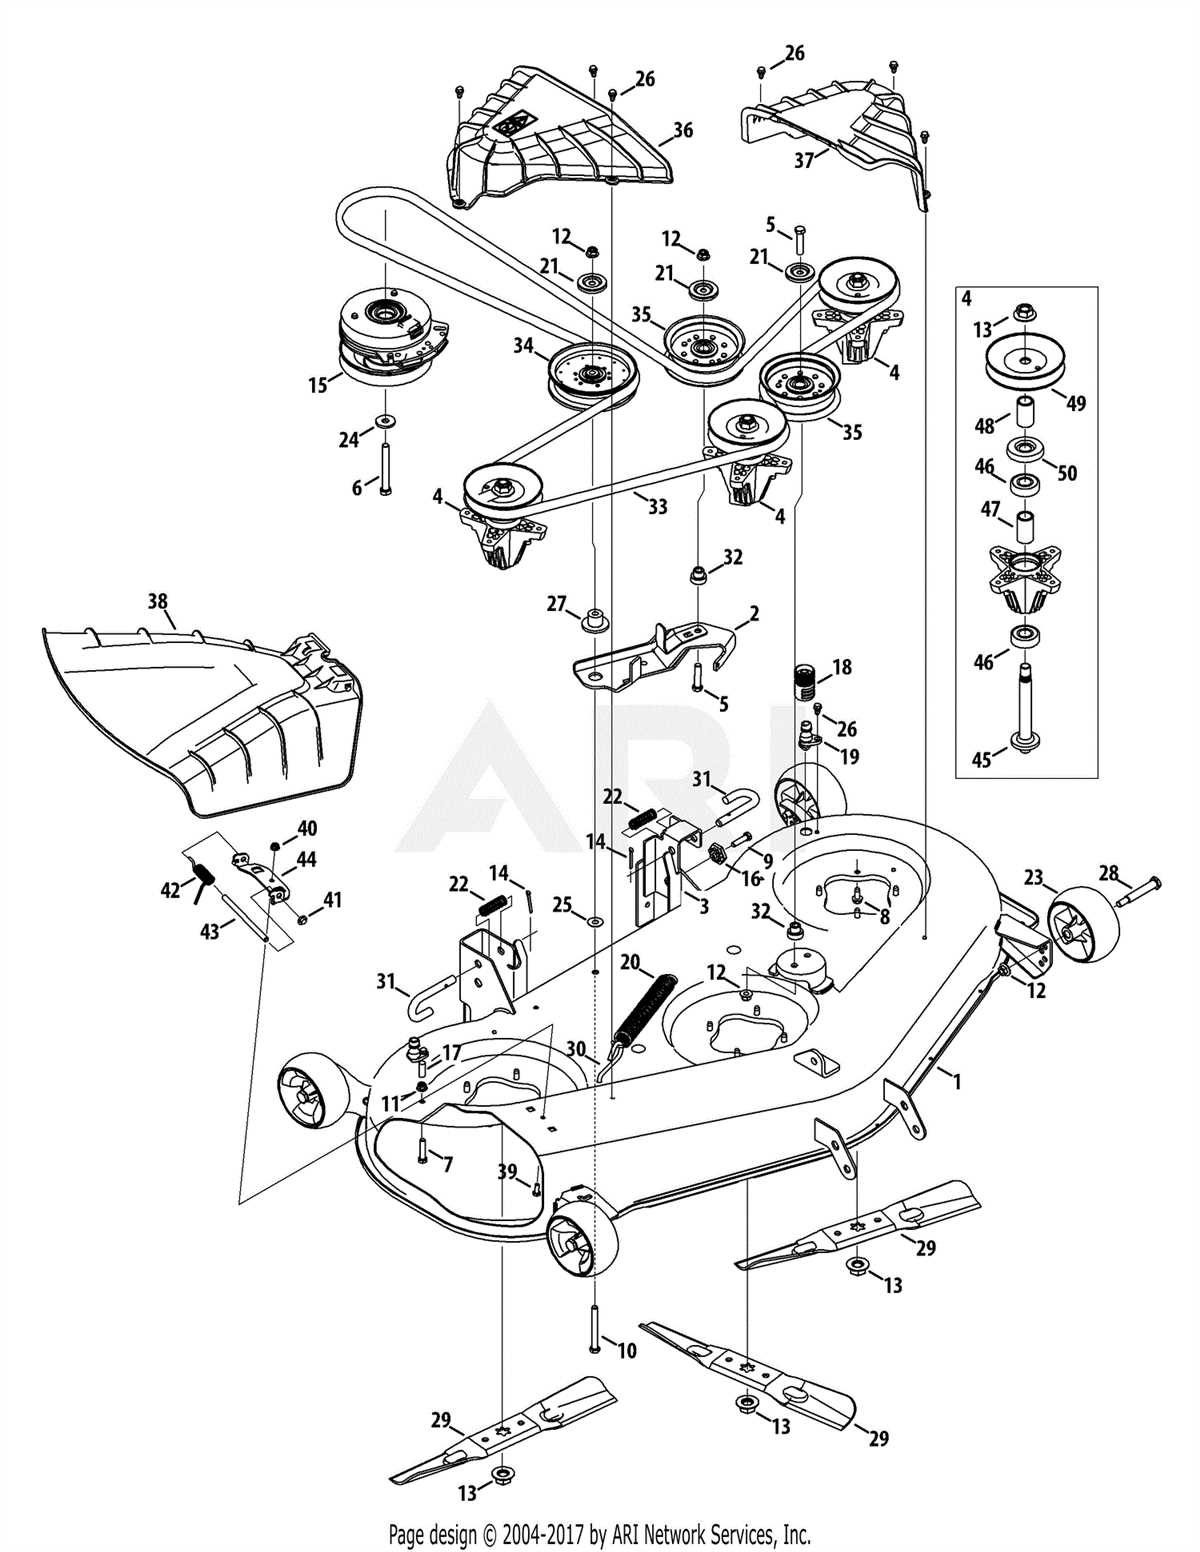
The Troy Bilt Mustang 42 deck belt diagram provides a visual representation of how the belt should be routed through the various pulleys and idlers on the deck. It shows the path the belt needs to take to ensure proper engagement with the blades and drive system. This diagram is an invaluable resource for DIYers and professionals alike, as it eliminates the guesswork when it comes to replacing or adjusting the deck belt.
By following the Troy Bilt Mustang 42 deck belt diagram, you can ensure that your mower operates smoothly and efficiently. It provides step-by-step instructions on how to install and adjust the belt, as well as how to troubleshoot any issues that may arise. With this diagram, you can save time and money by doing the maintenance and repairs yourself, without the need for expensive service calls or professional assistance.
Troy Bilt Mustang 42 Deck Belt Diagram
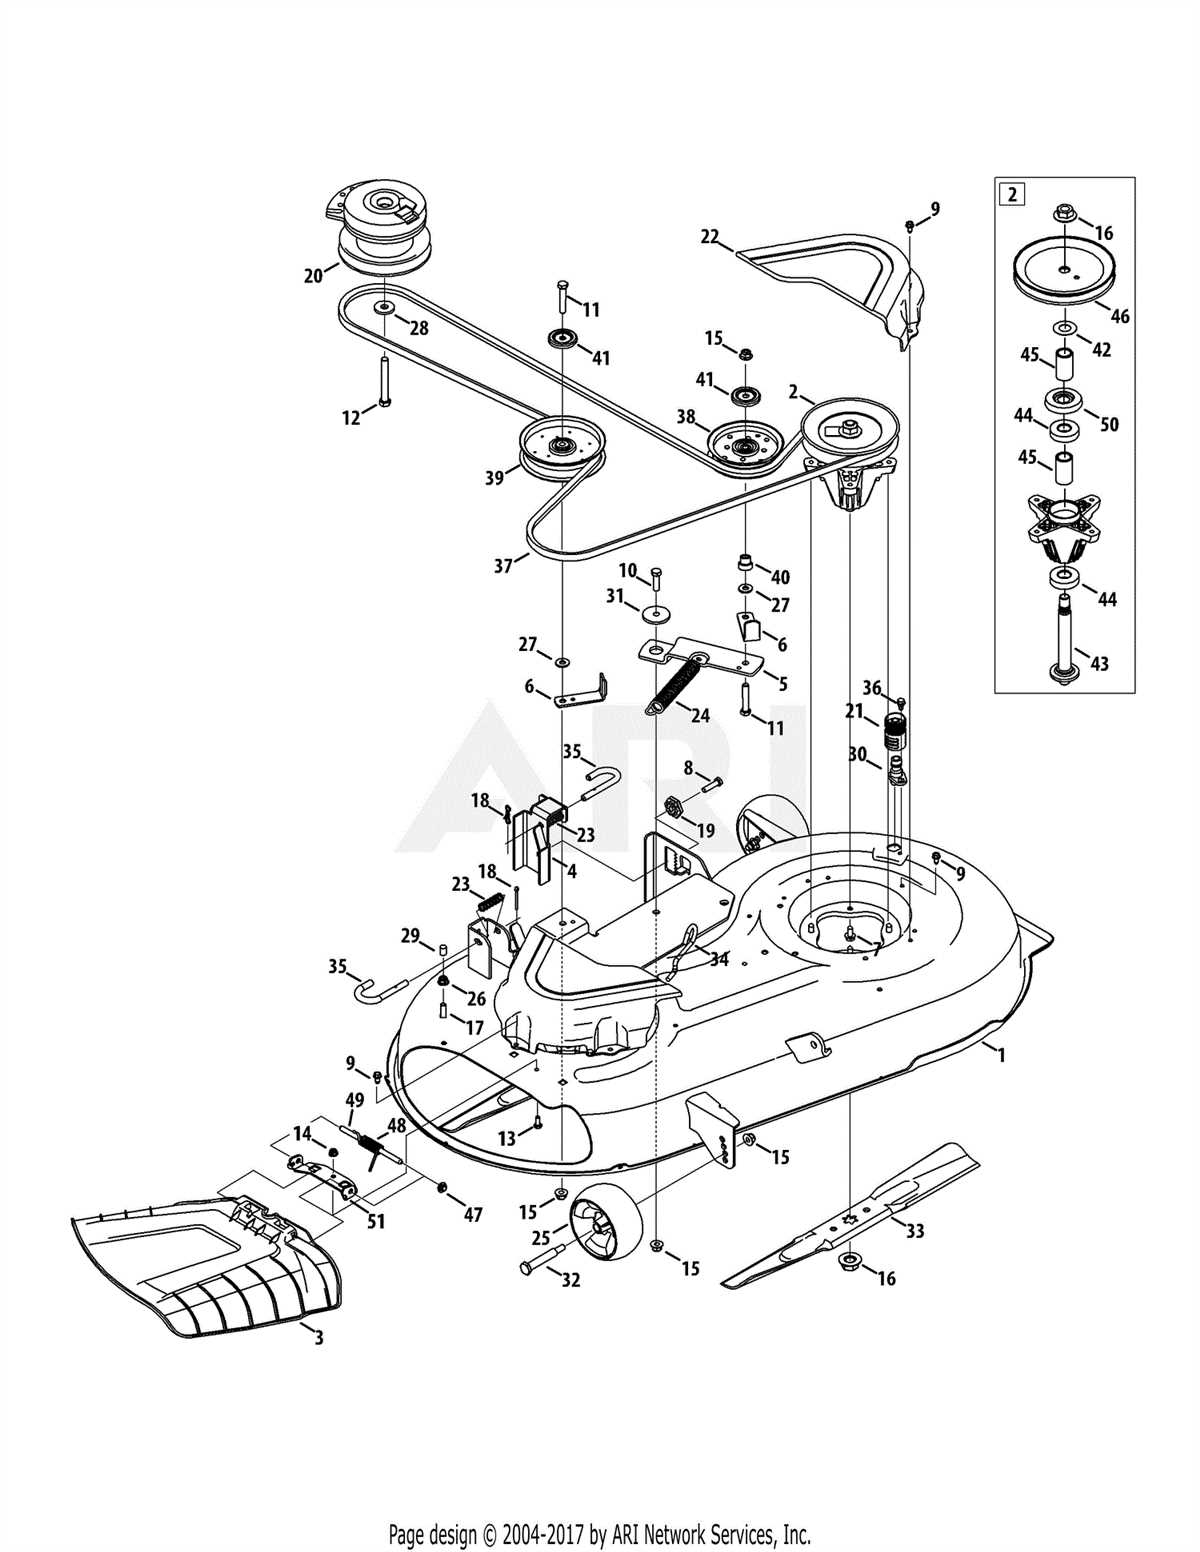
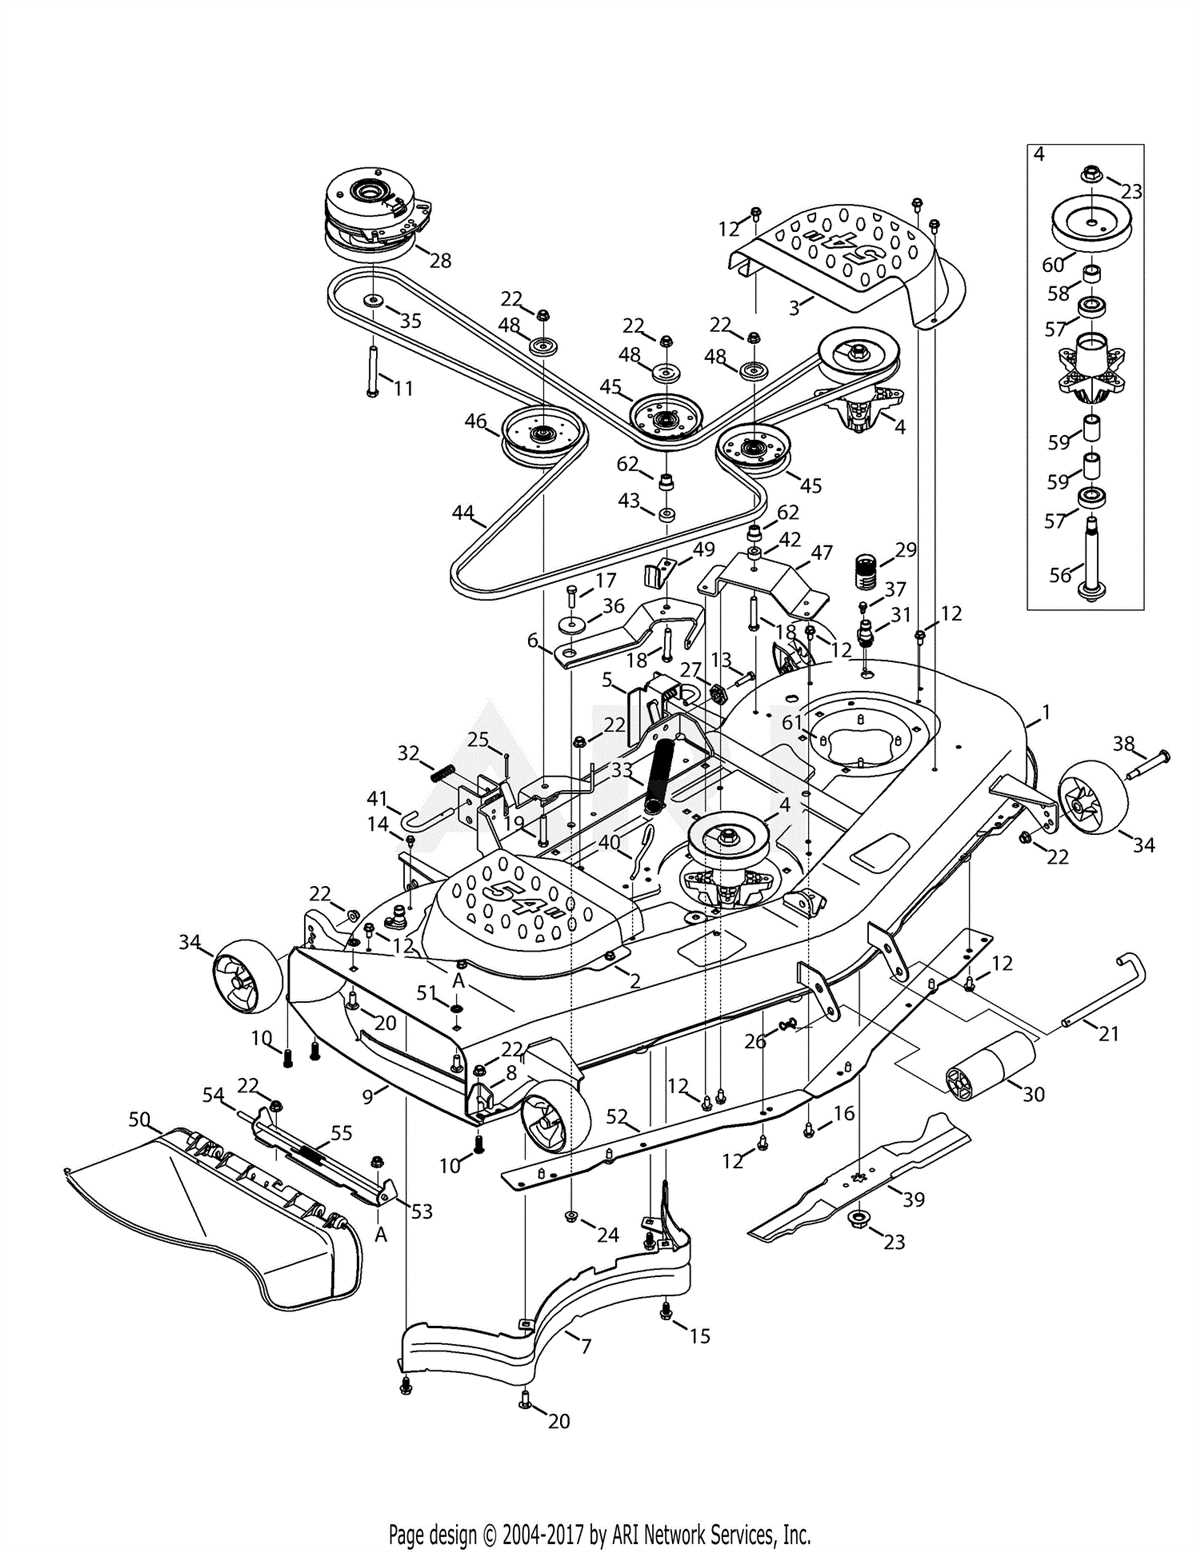
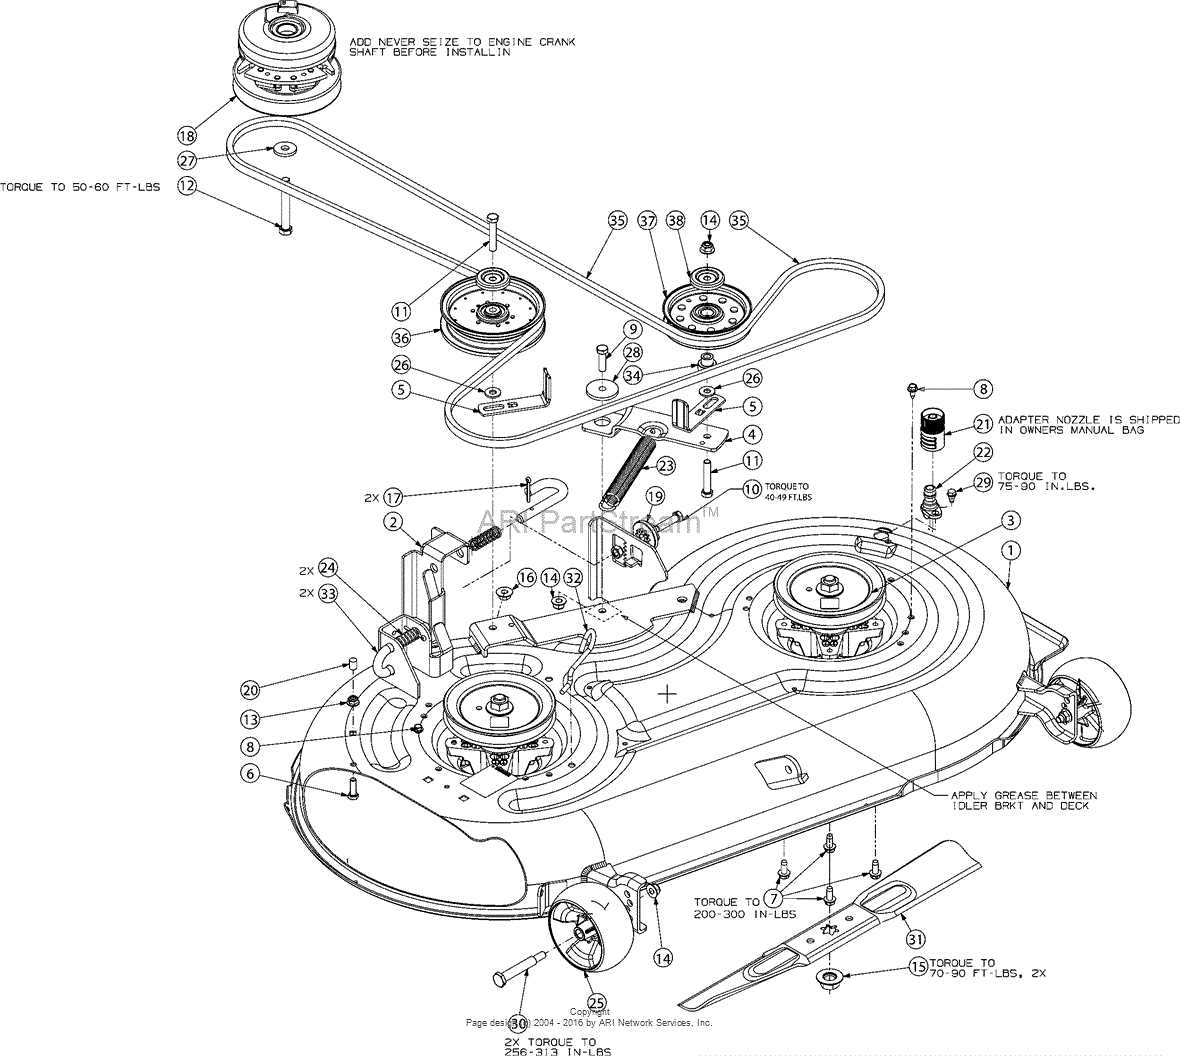
When it comes to maintaining and repairing your Troy Bilt Mustang 42 lawn mower, understanding the deck belt system is crucial. The deck belt diagram provides a visual representation of how the belt is routed around the deck pulleys and ensures the proper operation of the cutting blades.
To properly replace or adjust the deck belt on your Troy Bilt Mustang 42, refer to the deck belt diagram for accurate guidance. The diagram typically shows the deck belt path from the engine pulley to the deck pulleys, including any tensioner pulleys or idler pulleys that may be present.
Using the deck belt diagram as a reference, you can easily identify any worn or damaged components, such as the belt itself or pulleys. It is important to ensure that the deck belt is properly tensioned and aligned to prevent slipping or premature wear.
Following the deck belt diagram, begin by releasing the tension on the belt and removing the old belt from the pulleys. Install the new belt, making sure that it follows the correct path as shown in the diagram. Adjust the tension on the belt according to the manufacturer’s recommendations.
Regularly referring to the deck belt diagram and properly maintaining the deck belt system will help ensure the optimum performance and longevity of your Troy Bilt Mustang 42 lawn mower.
Understanding the Importance of a Deck Belt Diagram
The deck belt diagram is an essential tool for owners of Troy Bilt Mustang 42 lawn mowers. This diagram provides a visual representation of the correct belt routing for the mower’s deck, ensuring proper operation and optimal performance. With this diagram, owners can easily identify the correct placement of the deck belt, eliminating guesswork and potential errors.
Having a clear understanding of the deck belt diagram is crucial for maintaining the longevity of the lawn mower. A properly installed deck belt ensures smooth rotation of the mower blades, allowing for efficient cutting of grass. An incorrect or improperly installed belt can result in poor mowing performance, uneven cutting, and unnecessary stress on the mower’s components.
Following the deck belt diagram is also essential for safety reasons. A loose or improperly routed belt can pose a safety hazard as it may come off or get tangled in other moving parts. This can not only damage the mower but also potentially cause injury to the operator or bystanders. By adhering to the diagram, owners can ensure that the belt is securely in place and functioning correctly, reducing the risk of accidents.
It’s worth mentioning that the deck belt diagram also serves as a valuable reference during maintenance and repair work. When replacing a worn-out or damaged belt, owners can refer to the diagram to ensure they install the new belt correctly. This helps avoid common mistakes and ensures that the new belt functions as intended.
To summarize, understanding and using the deck belt diagram is vital for the optimal performance, longevity, and safety of your Troy Bilt Mustang 42 lawn mower. By following the correct belt routing depicted in the diagram, owners can ensure proper operation, avoid unnecessary wear and tear, and reduce the risk of accidents. So, make sure to consult the deck belt diagram whenever working with the mower’s deck belt.
Components of the Troy Bilt Mustang 42 Deck Belt Diagram
The Troy Bilt Mustang 42 is a popular lawn tractor model known for its efficient performance and durability. One of the essential components of this mower is the deck belt, which plays a crucial role in driving the cutting blades and ensuring efficient grass cutting. Understanding the components of the Troy Bilt Mustang 42 deck belt diagram is essential for proper maintenance and troubleshooting.
The deck belt diagram of the Troy Bilt Mustang 42 includes several key components that work together to ensure the smooth operation of the mower. These components include the deck belt itself, tensioner pulleys, idler pulleys, and the cutting blades. The deck belt is a durable and flexible rubber belt that connects the engine pulley to the blades, transferring power from the engine to the cutting mechanism.
- Tensioner pulleys: The tensioner pulleys are responsible for maintaining the correct tension on the deck belt. These pulleys are adjustable and can be tightened or loosened to ensure optimal performance and prevent slipping or breakage of the belt.
- Idler pulleys: The idler pulleys provide additional support and tension to the deck belt. These pulleys are strategically placed to guide the belt along its designated path and help maintain proper engagement with the engine and cutting blades.
- Cutting blades: The cutting blades are the main components responsible for cutting the grass. The deck belt connects to the spindle pulleys, which then rotate the cutting blades at high speeds to effectively trim the grass.
By following the Troy Bilt Mustang 42 deck belt diagram and understanding the functionality of each component, users can ensure proper installation, adjustment, and replacement of the deck belt as needed. Regular inspection and maintenance of these components will help prolong the lifespan of the mower and ensure optimal cutting performance.
Step-by-step Guide on How to Use the Deck Belt Diagram
When it comes to maintaining and repairing your Troy Bilt Mustang 42 deck belt, having a deck belt diagram can be incredibly helpful. This diagram provides a visual representation of the correct belt routing and allows you to easily identify and replace the belt if needed. Here is a step-by-step guide on how to use the deck belt diagram:
1. Locate the deck belt diagram: The deck belt diagram is typically located on the underside of the mower’s hood or in the owner’s manual. Look for a detailed illustration that shows the belt routing and the position of all the pulleys.
2. Study the diagram: Take the time to carefully study the diagram and familiarize yourself with the belt routing. Pay attention to the direction in which the belt wraps around each pulley and any tensioner mechanisms that may be involved.
3. Remove the old belt: If you are replacing the deck belt, start by removing the old belt from the pulleys. You may need to release any tension on the belt by loosening or removing the tensioner mechanisms as indicated in the diagram.
4. Position the new belt: Refer to the deck belt diagram to position the new belt on the pulleys correctly. Start by placing the belt on the largest pulley and then follow the designated path as shown in the diagram.
5. Adjust tension: Once the new belt is in place, use the diagram to adjust the tension as necessary. Some mowers have an adjustable tensioner that can be moved to achieve the correct belt tension.
6. Test and fine-tune: After installing the new belt and adjusting the tension, start the mower and observe the belt in action. Make sure it is running smoothly and not slipping or making any unusual noises. If necessary, make further adjustments based on the diagram.
By following this step-by-step guide and utilizing the deck belt diagram, you can confidently replace and maintain the deck belt on your Troy Bilt Mustang 42 mower, ensuring optimal performance and longevity.
Troubleshooting Common Issues with the Deck Belt Diagram
When it comes to the performance of your Troy Bilt Mustang 42 deck, the deck belt plays a crucial role in ensuring smooth operation. However, there may be instances where you encounter issues with the deck belt diagram. Here are some common issues and troubleshooting tips to help you resolve them:
1. Misalignment of the deck belt: If you notice that the deck belt is not properly aligned according to the diagram, it can lead to poor cutting performance and belt damage. To fix this issue, make sure that the belt is correctly routed around all the pulleys and tensioners as indicated in the diagram. If necessary, refer to the owner’s manual or online resources for a more detailed diagram.
2. Belt slipping off the pulleys: If the deck belt keeps coming off the pulleys, it can be due to various reasons like a loose tensioner, worn-out belt, or misalignment. First, check the tensioner and make sure it is properly adjusted to keep the belt tight. If the belt is worn or damaged, it needs to be replaced. Additionally, inspect the pulleys for any signs of damage or misalignment and make the necessary adjustments.
- 3. Excessive belt wear: Over time, the deck belt can wear out due to constant operation and exposure to debris and moisture. If you notice excessive belt wear, it is recommended to replace the belt. Refer to the deck belt diagram to ensure you install the new belt correctly.
- 4. Inaccurate tension: The tension of the deck belt is crucial for proper functioning. If you find that the belt is too loose or too tight, it can affect the performance of the deck. Use the deck belt diagram as a guide to adjust the tension to the correct specifications. This will help ensure optimal cutting performance and prevent premature belt failure.
- 5. Incorrect installation: If you have recently replaced the deck belt and are experiencing issues, double-check the installation. Make sure the belt is routed correctly around all the pulleys and tensioners according to the diagram. Any deviation from the diagram can lead to belt slippage or improper functioning.
By troubleshooting these common issues with the deck belt diagram, you can enhance the performance and longevity of your Troy Bilt Mustang 42 deck. Regular maintenance, such as checking the belt tension and alignment, will help prevent problems and ensure smooth operation for a beautiful lawn.
Tips for Maintaining and Replacing Deck Belts for the Troy Bilt Mustang 42
Maintaining and replacing the deck belts on your Troy Bilt Mustang 42 is essential for keeping your lawn mower operating at its best. Here are some tips to help you properly maintain and replace the deck belts on your mower:
Maintaining the Deck Belts:
- Regularly inspect the deck belts for any signs of wear, fraying, or cracking. If you notice any damage, it is important to replace the belt as soon as possible.
- Clean the deck belts regularly to remove any grass clippings or debris that may accumulate. This will prevent build-up and ensure smooth operation.
- Check the tension of the deck belts and adjust if necessary. The belts should be tight enough to prevent slipping but not so tight that they cause excessive wear or strain on the pulleys.
- Ensure that the belt guards are properly installed and in good condition. These guards provide protection and prevent the belt from coming off during operation.
- Keep the pulleys and belt channels clean and free of debris. Dirty or damaged pulleys can cause the belt to wear more quickly.
Replacing the Deck Belts:
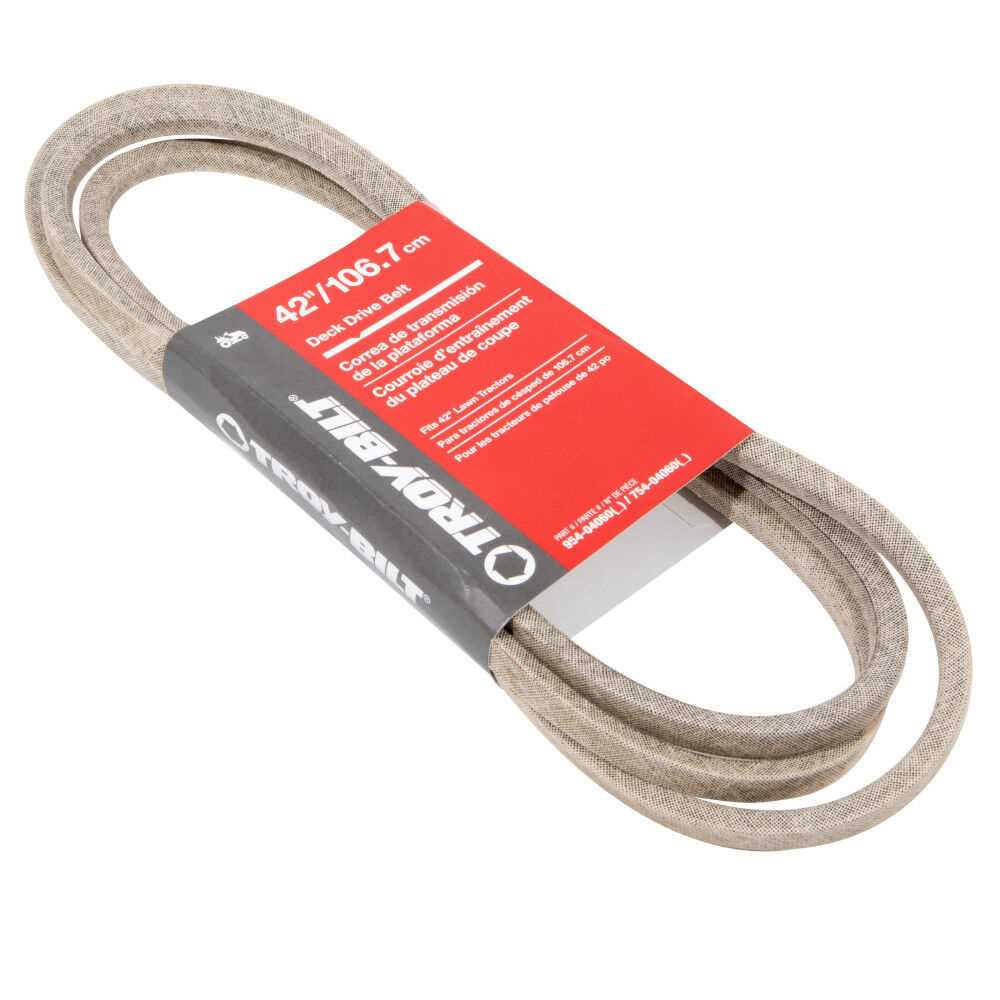
- Refer to the owner’s manual for the correct belt size and part number. Using the wrong size or type of belt can cause damage to your mower.
- Before starting the replacement process, make sure the mower is turned off and the spark plug wire is disconnected to prevent accidental start-up.
- Identify the locations of the belt tensioner and idler pulleys. These will need to be adjusted or removed to replace the belt.
- Use a wrench or socket set to loosen the tensioner and release the belt from the pulleys. Note the routing of the old belt so you can properly install the new one.
- Install the new belt by following the same routing as the old one. Make sure the belt is properly seated in all the pulleys before tightening the tensioner.
- Once the new belt is installed, recheck the tension and make any necessary adjustments. The belt should be tight enough to prevent slipping but not overly tight.
- Turn on the mower and test the operation of the new belt. Check for any abnormal sounds or vibrations, and inspect the belt for proper alignment and tension.
By following these tips for maintaining and replacing deck belts for the Troy Bilt Mustang 42, you can ensure the longevity and optimal performance of your lawn mower. Regular inspection, cleaning, and proper installation are key to keeping your deck belts in good condition. Remember to always consult the owner’s manual for specific instructions and belt sizes recommended by the manufacturer.