
Installing solar panels is a great way to harness the power of the sun and generate renewable energy for your home or business. However, understanding how to wire these panels can be a bit overwhelming for beginners. In this article, we will break down the basic solar panel wiring diagram to help you get started on your solar energy journey.
The first step in wiring your solar panels is to determine how many panels you will need. This will depend on the amount of energy you want to generate and the size of your property. Each panel will have a certain wattage, and you can calculate the total wattage needed by multiplying the wattage of one panel by the number of panels you plan to install.
Once you have determined the number of panels needed, you will need to decide how to wire them together. The most common configuration is called a series connection, where the positive terminal of one panel is connected to the negative terminal of the next panel. This creates a string of panels that all work together to generate electricity. It’s important to note that the voltage of each panel in the series will add up, so you will need to make sure your wiring can handle the increased voltage.
What is a Solar Panel Wiring Diagram?
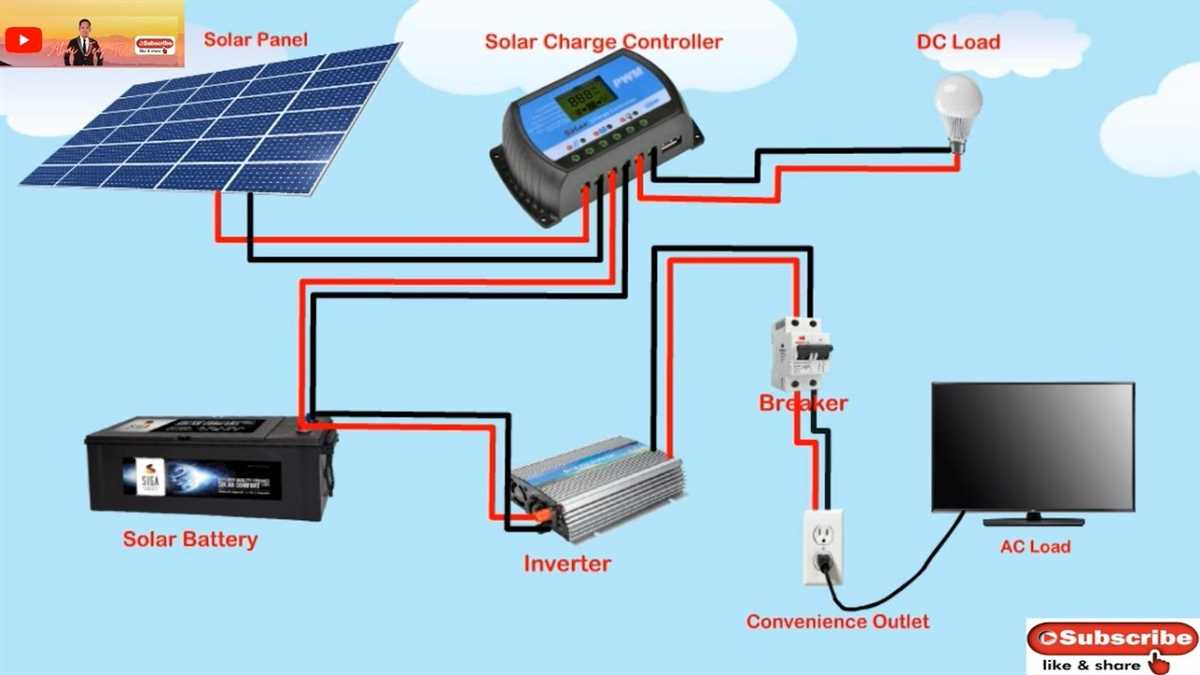
A solar panel wiring diagram is a visual representation of how the various components of a solar power system are connected together. It shows the flow of electricity from the solar panels to the battery and other components, allowing for easier installation and troubleshooting.
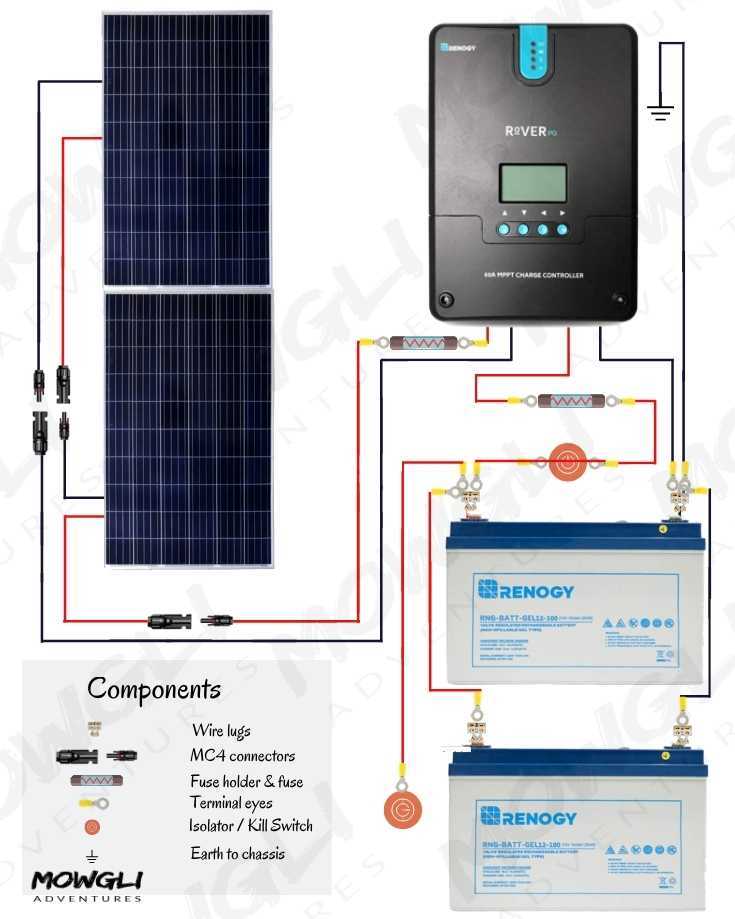
Typically, a solar panel wiring diagram includes the solar panels themselves, a charge controller, a battery bank, and sometimes an inverter. The diagram will show the positive and negative terminals of each component, as well as the cables and connectors used to connect them. It may also include information about the gauge of the wires and the voltage and current ratings of the components.
A solar panel wiring diagram is essential for anyone looking to install or maintain a solar power system. It provides a clear and organized overview of how the system is configured, allowing for faster and more efficient installation. It also makes troubleshooting easier, as you can easily identify any potential issues or faults in the system.
There are many different types of solar panel wiring diagrams available, depending on the specific configuration of the system. Some diagrams may include additional components, such as a charge controller or an inverter, while others may be more simplified for smaller systems. It’s important to choose a wiring diagram that matches your specific needs and components.
Key Points:
- A solar panel wiring diagram is a visual representation of how the components of a solar power system are connected together.
- It shows the flow of electricity and the connections between the solar panels, charge controller, battery bank, and other components.
- A solar panel wiring diagram is essential for installation and troubleshooting.
- There are different types of wiring diagrams available, depending on the specific configuration of the system.
- Choosing the right wiring diagram is important to ensure compatibility with your components.
Understanding the Components of a Solar Panel System
When it comes to setting up a solar panel system, it’s important to understand the different components that make up the system. Each component plays a crucial role in harnessing solar energy and converting it into usable electricity. Below, we’ll take a closer look at the key components of a basic solar panel system.
Solar Panels
Solar panels are the heart of any solar panel system. These panels are made up of multiple solar cells, which are responsible for converting sunlight into direct current (DC) electricity. The number of panels you need will depend on your energy needs and the amount of available sunlight in your area.
Solar Inverter
The solar inverter is an essential component that converts the DC electricity generated by the solar panels into alternating current (AC) electricity, which is what your home and appliances use. Inverters also help optimize the efficiency of the system and monitor the performance of the solar panels.
Charge Controller
A charge controller is necessary in off-grid systems to regulate the voltage and current flowing to and from the battery storage. It prevents overcharging and over-discharging, ensuring the batteries are properly maintained and extending their lifespan.
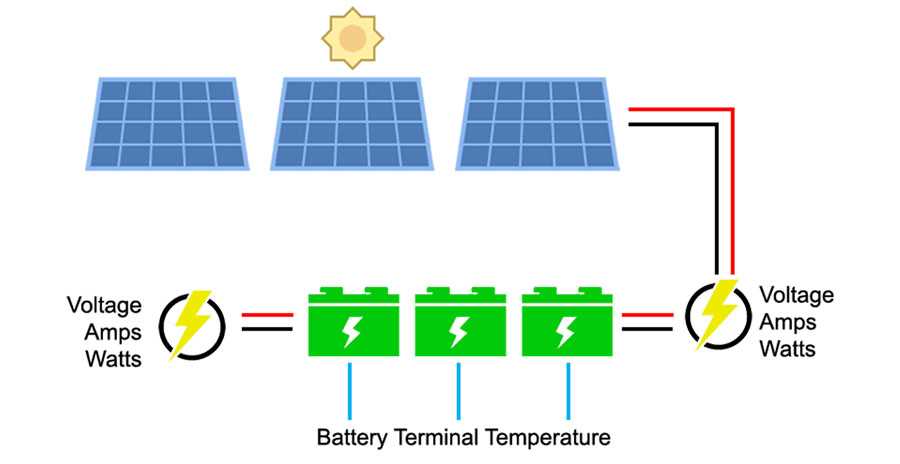
Battery Storage
In many solar panel systems, battery storage is used to store excess electricity generated by the panels during the day for use during the night or when the sun is not shining. This allows for a more consistent and reliable power supply, especially in off-grid or backup systems.
Mounting System
The mounting system provides the structural support for the solar panels and keeps them securely in place. Different types of mounts, such as roof mounts or ground mounts, can be used depending on the location and design of the solar panel system.
Wiring and Connectors
Wiring and connectors are essential for connecting all the components of the solar panel system together. They ensure that electricity flows properly and safely between the panels, the inverter, the charge controller, and the battery storage.
- Solar panels
- Solar inverter
- Charge controller
- Battery storage
- Mounting system
- Wiring and connectors
By understanding the function and importance of each component, you can better design and configure your solar panel system to meet your energy needs and maximize efficiency.
The Importance of Proper Wiring in a Solar Panel System
Proper wiring is crucial in a solar panel system as it ensures the safe and efficient operation of the entire system. A well-designed and correctly installed wiring system helps to minimize power losses and maximize the energy output of the solar panels.
Efficiency: Proper wiring allows for the optimal transfer of electricity from the solar panels to the battery bank or the electrical grid. By minimizing power losses during transmission, the efficiency of the solar panel system is enhanced, resulting in improved overall performance.
Safety: Accurate and secure wiring prevents electrical hazards such as short circuits, electrical fires, or electrocution. By following proper wiring practices, the risk of accidents and damage to the solar panel system, as well as to the surrounding property and individuals, is significantly reduced.
Longevity: A well-designed wiring system ensures that all components of the solar panel system work together harmoniously, allowing the system to function optimally over an extended period of time. Proper wiring minimizes wear and tear on electrical components and can prevent premature failure or damage to the system.
Compliance: Following proper wiring guidelines and regulations is essential to ensure compliance with industry standards and local electrical codes. Non-compliant wiring can result in costly penalties and legal issues, as well as potential safety hazards.
Overall, proper wiring in a solar panel system is essential for maximizing energy efficiency, ensuring safety, extending the system’s lifespan, and complying with regulations. Investing time and effort into proper wiring practices will ultimately result in a reliable and efficient solar panel system.
Wiring Diagram for a Basic Solar Panel System
A basic solar panel system consists of several components that work together to generate and store electricity from the sun. The wiring diagram outlines the connections between these components to create a functional and efficient system.
In a basic solar panel system, the main components include solar panels, a charge controller, a battery bank, and an inverter. Solar panels capture sunlight and convert it into DC electricity, which is then sent to the charge controller. The charge controller regulates the flow of electricity and ensures that the battery bank is charged at the optimal level. The battery bank stores the electricity generated by the solar panels for later use. The inverter is responsible for converting the DC electricity from the battery bank into AC electricity, which can be used to power household appliances and electronics.
Wiring Diagram:
Below is a simplified wiring diagram for a basic solar panel system:
- Solar panels are connected in series or parallel to increase the voltage or current, respectively.
- The combined output of the solar panels is then connected to the charge controller.
- The charge controller is connected to the battery bank to charge and maintain the batteries.
- The battery bank is connected to the inverter to provide power for AC devices.
It is important to note that wiring diagrams can vary depending on the specific components and configurations of the solar panel system. It is recommended to consult the manufacturer’s instructions or seek professional assistance when installing or modifying a solar panel system.
Step-by-Step Guide for Wiring a Solar Panel System
Wiring a solar panel system may seem like a complex task, but with a step-by-step guide, it can be done easily and effectively. Whether you are installing a new system or upgrading an existing one, here is a simple outline to follow:
1. Determine the Load Capacity
Before starting the wiring process, it is crucial to determine the load capacity of your solar panel system. This will ensure that your panels can generate enough electricity to power the devices and appliances connected to it. Calculate the total wattage of your appliances and devices that will be connected to the system to determine the number of solar panels needed.
2. Choose the Correct Wiring Type
Next, you will need to choose the correct wiring type for your solar panel system. There are two main options: parallel and series wiring. Parallel wiring connects multiple solar panels together, increasing the current, while series wiring connects them in a chain, increasing the voltage. The choice will depend on your specific energy needs and the configuration of your panels.
3. Connect the Solar Panels
Once you have determined the load capacity and chosen the wiring type, it’s time to connect the solar panels. Start by connecting the positive (+) terminal of one panel to the positive terminal of the next panel, and repeat this process until all panels are connected. Similarly, connect the negative (-) terminals of each panel. This will create a continuous loop of panels.
4. Install a Charge Controller
To protect your solar panel system from overcharging and ensure optimal performance, it is essential to install a charge controller. Connect the charge controller between the solar panels and the battery bank. The charge controller will regulate the charging process, preventing damage to the batteries and maximizing energy efficiency.
5. Connect the Battery Bank
After installing the charge controller, connect the battery bank to the system. Start by connecting the positive terminal of the battery bank to the positive terminal of the charge controller and the negative terminal to the negative terminal. Make sure to secure the connections properly to avoid any loose wiring.
6. Connect to the Power Inverter
Finally, connect the power inverter to the battery bank. The power inverter will convert the DC (direct current) power generated by the solar panels into AC (alternating current) power that can be used to power your devices and appliances. Connect the positive terminal of the battery bank to the positive terminal of the power inverter and the negative terminal to the negative terminal.
By following these steps, you can successfully wire a solar panel system and enjoy the benefits of renewable energy. It is always recommended to consult a professional or an electrician for guidance and to ensure the system is installed safely and efficiently.
Tips for Ensuring Safety and Efficiency in Solar Panel Wiring
Proper installation and wiring of solar panels are crucial for their safety and efficient operation. Here are some important tips to follow:
- Work with a qualified professional: It is recommended to hire a certified electrician or solar panel installer who has experience in solar panel wiring. They will ensure that the installation is performed correctly and in compliance with all relevant building codes and safety standards.
- Use appropriate wiring and connectors: High-quality wiring and connectors specifically designed for use in solar panel installations should be used. This helps to minimize the risk of fire and ensures efficient transfer of electricity.
- Follow manufacturer guidelines: Always refer to the manufacturer’s instructions and guidelines when installing and wiring solar panels. Each panel may have specific requirements that need to be followed to ensure optimal performance and safety.
- Protect against overcurrent: Install appropriate overcurrent protection devices, such as fuses or circuit breakers, to prevent damage to the solar panels and wiring in case of overcurrent or short circuits. These devices should be sized correctly based on the system’s specifications.
- Ground the system: Grounding is essential for safety in case of a fault or lightning strike. Make sure the solar panel system is properly grounded according to local regulations and guidelines.
- Inspect and maintain regularly: Regularly inspect the wiring and connections of the solar panel system to ensure they are in good condition. Keep the panels clean and free from debris to maintain their efficiency.
Following these tips will help you ensure the safety and efficiency of your solar panel wiring. Remember to always prioritize safety and consult with professionals when in doubt. Enjoy the benefits of clean and renewable solar energy!