
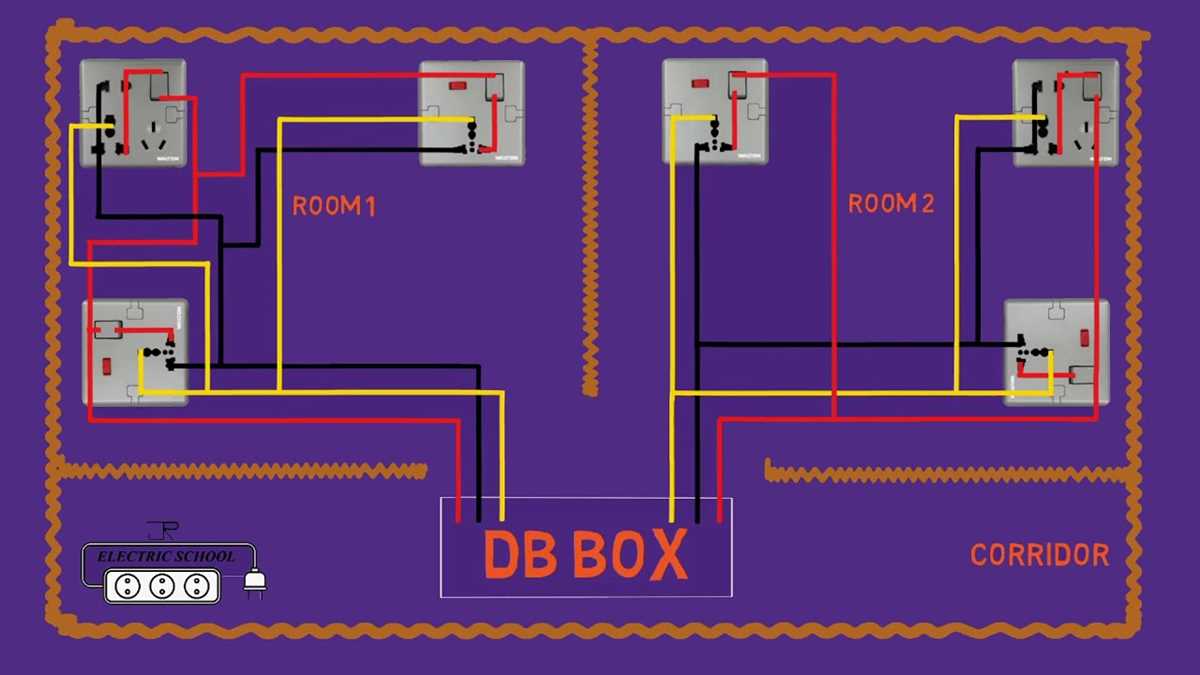
Electrical socket wiring diagram is a visual representation of how electrical sockets are wired in a building or a particular location. It shows the connections between the electrical wire, socket outlet, and the electrical device that will be plugged into the outlet. This diagram is essential for electricians and homeowners to understand the proper wiring of electrical sockets to ensure safety and functionality.
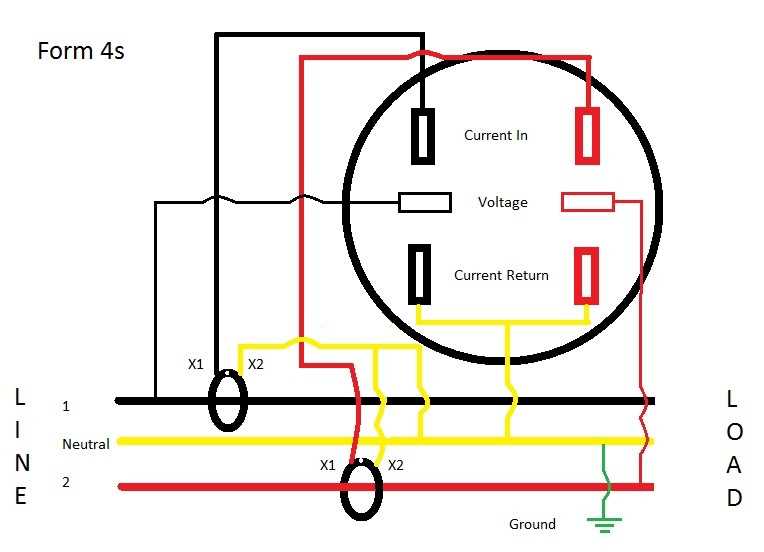
The electrical socket wiring diagram typically includes symbols or labels to represent different components and connection points. These symbols help to easily identify and understand the wiring layout and make the necessary connections. It also indicates the color-coding of the wires, which is crucial for ensuring correct connections to prevent electrical accidents or damage to the electrical system.
Understanding the electrical socket wiring diagram is essential for various scenarios, such as installing new electrical outlets, troubleshooting electrical issues, or replacing faulty sockets. It helps to identify the correct wires to be connected, the ground wire, and the hot and neutral wires. This knowledge is vital for electricians to ensure the proper functioning of the electrical system and to comply with electrical codes and regulations.
Understanding Electrical Socket Wiring Diagrams
When it comes to electrical socket wiring, it is important to understand the diagrams that are used to represent the connections and configurations. These diagrams provide a visual representation of how the wires should be connected to ensure safety and proper functionality of the electrical sockets.
The electrical socket wiring diagrams typically consist of symbols and lines that indicate the different components and connections within the circuit. For example, a circle or square symbol may represent the electrical socket, while lines with arrows may indicate the direction of the electrical current flow.
One important aspect of understanding electrical socket wiring diagrams is the identification of the different wires. These diagrams often include color coding to distinguish between the live, neutral, and earth wires. The live wire carries the electrical current, the neutral wire provides the return path for the current, and the earth wire is for safety purposes to prevent electric shocks.
Another key element of electrical socket wiring diagrams is the connection points. These diagrams illustrate where each wire should be connected to ensure proper functioning of the electrical socket. It is crucial to follow these diagrams accurately to avoid any electrical hazards or damage to the wiring and appliances.
Overall, understanding electrical socket wiring diagrams is essential for anyone involved in electrical installation and maintenance work. These diagrams provide clear instructions on how to properly connect the wires and ensure the safety and functionality of the electrical sockets.
The Importance of Electrical Socket Wiring Diagrams
Electrical socket wiring diagrams play a crucial role in ensuring the safety and functionality of electrical systems in buildings. These diagrams provide an organized visual representation of how electrical sockets are connected to the main power supply and other components. They show the layout of wires, connections, and circuits involved in the electrical socket installation process.
One of the primary reasons why electrical socket wiring diagrams are important is that they help electricians and other professionals understand the correct installation process. These diagrams act as a guide, ensuring that the electrical sockets are connected properly and in accordance with safety standards. They provide information about the correct placement of wires, the type of conductors to be used, and any necessary grounding or bonding requirements.
Furthermore, electrical socket wiring diagrams also aid in troubleshooting electrical issues. When a problem arises, such as a socket not working or an electrical circuit malfunctioning, the diagram can be a valuable tool in identifying the potential causes. Electricians can refer to the diagram to trace the wiring and pinpoint any faulty connections or components, helping expedite the repair process and minimize downtime.
Overall, electrical socket wiring diagrams are an essential resource for professionals in the electrical industry. They ensure the proper installation and functioning of electrical sockets, promote safety, and facilitate troubleshooting. Without these diagrams, the risk of improper wiring and electrical hazards would increase significantly. Therefore, it is crucial to consult and follow electrical socket wiring diagrams when installing or repairing electrical systems.
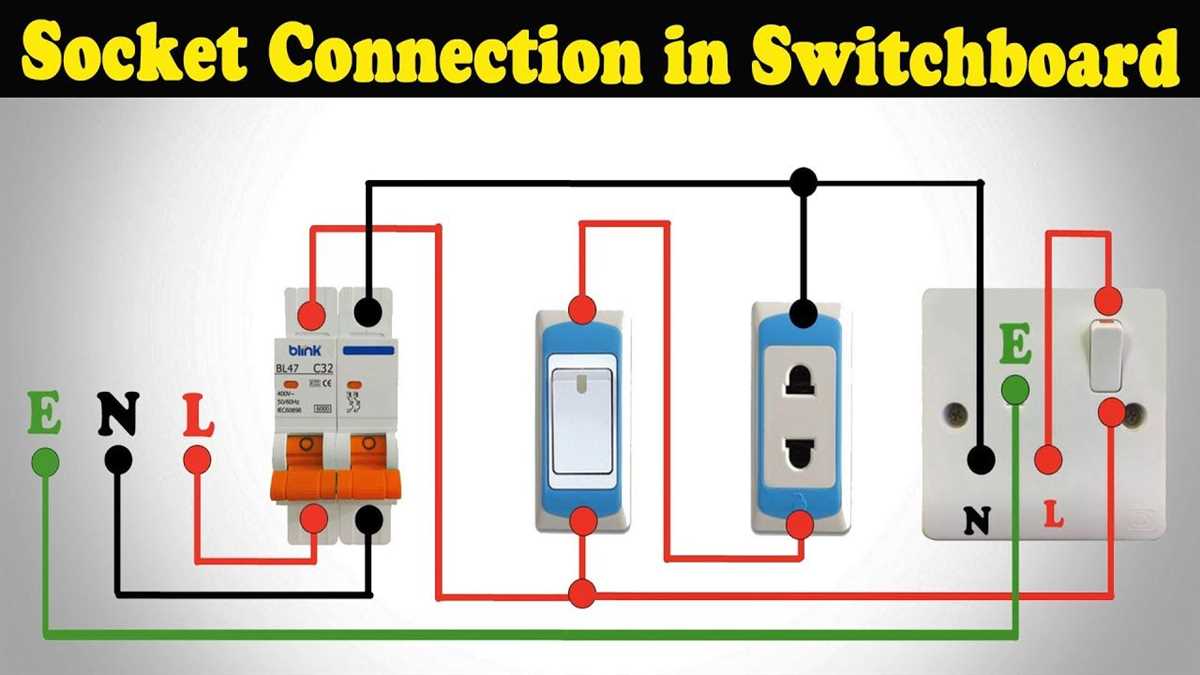
Components of an Electrical Socket Wiring Diagram
An electrical socket wiring diagram is a visual representation of the various components that make up an electrical socket. It provides a detailed illustration of how the wiring connections should be made, ensuring proper installation and safe usage.
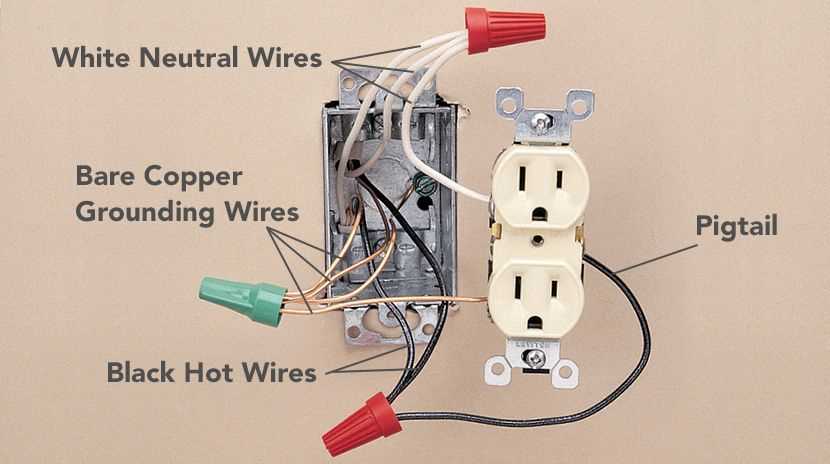
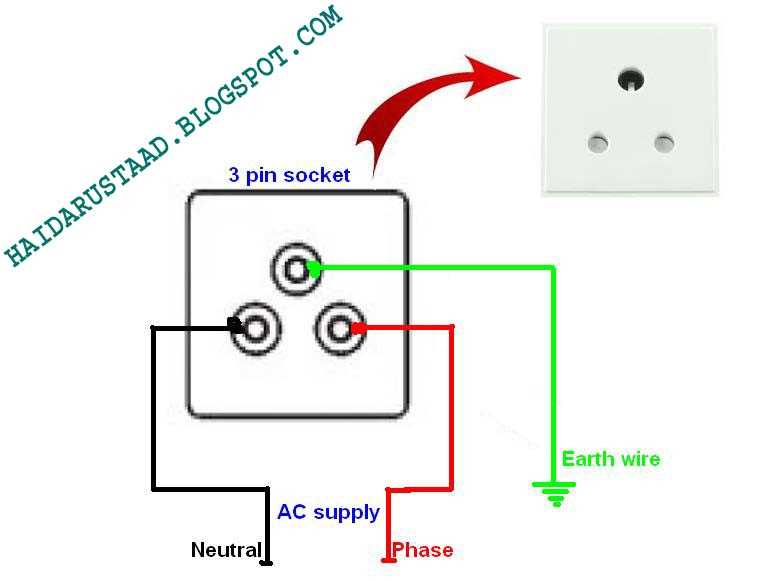
1. Live wire: The live wire, also known as the “hot” wire, supplies the current from the electrical source to the socket. It is typically colored black or red and is connected to the brass terminal of the socket.
2. Neutral wire: The neutral wire serves as the return path for the current and completes the electrical circuit. It is usually colored white or gray and is connected to the silver terminal of the socket.
3. Ground wire: The ground wire provides a path for electrical current in the event of a fault or malfunction. It helps to prevent electrical shocks and is usually colored green or bare copper. It is connected to the green terminal of the socket.
4. Brass terminal: The brass terminal is where the live wire is connected. It is a metal contact point that provides a secure connection for the live wire.
5. Silver terminal: The silver terminal is where the neutral wire is connected. It acts as a contact point for the neutral wire and ensures a solid electrical connection.
6. Green terminal: The green terminal is where the ground wire is connected. It provides a secure connection for the ground wire and helps to protect against electrical hazards.
7. Insulation: The insulation is the protective covering that surrounds the wires and terminals. It prevents electrical shock and ensures that the wires do not come into contact with each other, reducing the risk of short circuits and electrical fires.
A clear understanding of these components is essential for properly wiring an electrical socket. Following the wiring diagram will ensure a safe and efficient electrical installation.
Step-by-Step Guide to Reading an Electrical Socket Wiring Diagram
Reading an electrical socket wiring diagram is essential for understanding how the different components are connected and how the circuit functions. It allows electricians and DIY enthusiasts to troubleshoot electrical issues, make repairs, or install new sockets with confidence. While the specific layout and symbols may vary between diagrams, the basic principles remain the same. This step-by-step guide will help you navigate through an electrical socket wiring diagram and decode its meaning.
1. Identify the Parts
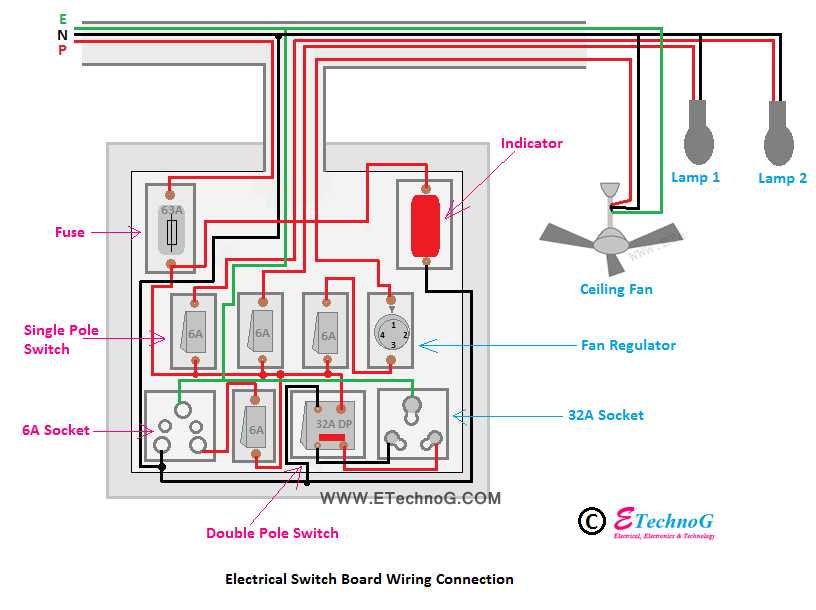
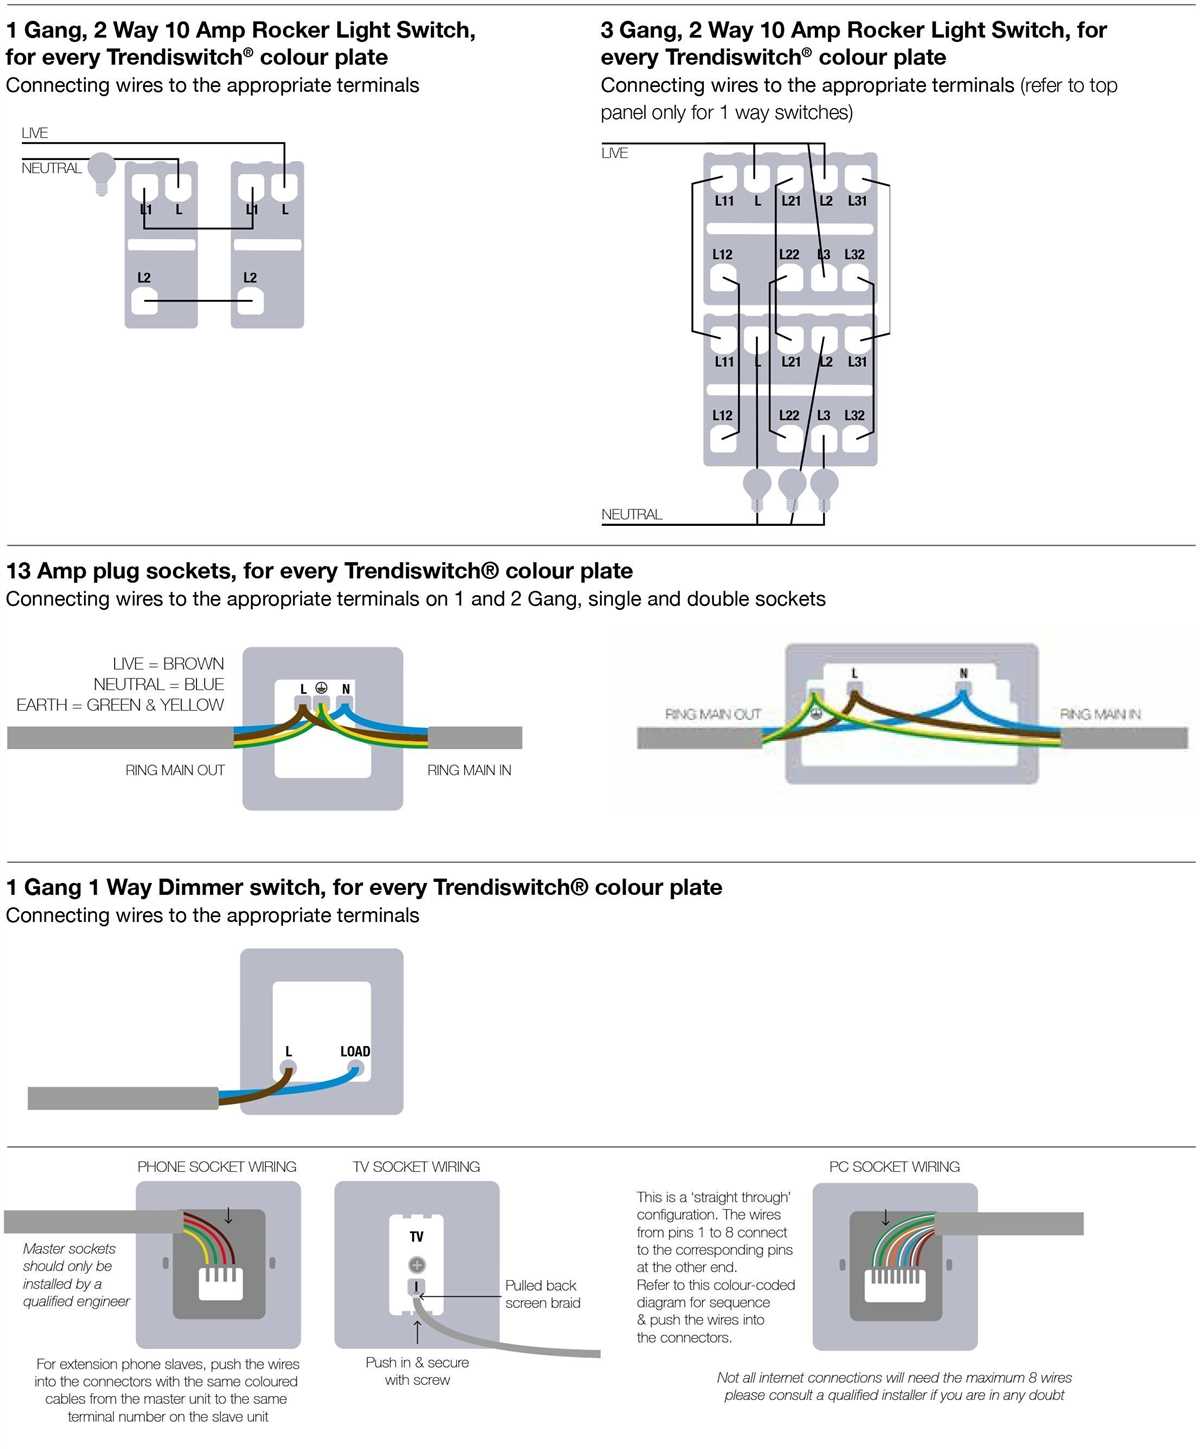
The first step is to familiarize yourself with the different parts of the electrical socket. This includes the live terminal (L), neutral terminal (N), and earth terminal (E). These terminals connect to the corresponding wires that carry the electrical current. Additionally, there may be symbols representing switches, fuses, or other components that are part of the socket’s circuit.
2. Understand the Wiring Connections
An electrical socket wiring diagram typically shows the connections between the socket terminals and the wires that make up the circuit. These connections may be represented by lines or symbols. A solid line represents a direct connection, while a dashed line indicates a hidden or indirect connection. By following the lines or symbols, you can trace the flow of electricity and understand how the socket is wired.
3. Interpret the Symbols
In addition to the terminal connections, electrical socket wiring diagrams often use symbols to represent specific components or actions. For example, a switch may be represented by a circle with a line through it, while a fuse may be shown as a zigzag line. It’s important to refer to the diagram’s legend or key to understand the meaning of each symbol and how it relates to the socket’s circuit.
4. Consider the Circuit Layout
An electrical socket wiring diagram may also include other elements of the circuit, such as junction boxes, wires, or other sockets connected in series. Understanding the overall layout of the circuit can help identify potential issues or determine the best way to add or modify the wiring. Pay attention to how the wires are routed and connected throughout the diagram.
5. Follow Safety Guidelines
When working with electrical socket wiring diagrams or performing any electrical work, it’s crucial to prioritize safety. Always ensure the power is turned off before making any connections or modifications. Use appropriate safety equipment, such as insulated gloves and goggles, to protect yourself from electrical hazards. If you’re unsure or uncomfortable with any aspect of the wiring, it’s best to consult a qualified electrician.
By following this step-by-step guide, you’ll be able to effectively read and understand an electrical socket wiring diagram. This knowledge will empower you to confidently work with sockets, troubleshoot electrical issues, and make informed decisions when it comes to electrical installations and repairs.
Common Issues and Troubleshooting Tips
Electrical socket wiring can sometimes encounter common issues that can cause problems with the functionality of the socket. Understanding these issues and having some troubleshooting tips can help you identify and fix the problem.
1. Loose Wiring
One of the most common issues with electrical sockets is loose wiring. This can lead to intermittent power, sparks, or even electrical shocks. To troubleshoot this issue, start by turning off the power to the socket. Then, remove the faceplate and check for any loose or disconnected wires. Secure any loose wires and ensure they are properly connected to the appropriate terminals.
2. Overloaded Circuit
Another common issue is an overloaded circuit. This occurs when too many devices are plugged into the same circuit, causing the circuit to exceed its maximum capacity. To troubleshoot this issue, start by unplugging some devices from the circuit and see if the problem persists. If the socket works fine with fewer devices, consider redistributing the devices across multiple circuits or using power strips with built-in circuit breakers.
3. Faulty Socket or Outlet
If you have checked the wiring and the circuit but the socket still doesn’t work, it could be due to a faulty socket or outlet. Over time, sockets can wear out or become damaged, leading to issues with connectivity and power flow. To troubleshoot this issue, try plugging a working device into the socket to ensure it is the socket and not the device causing the problem. If the socket is indeed faulty, it is recommended to replace it with a new one.
4. Tripped Circuit Breaker
In some cases, a tripped circuit breaker can cause a socket to stop working. Circuit breakers are designed to trip when there is a surge in electrical current, protecting the circuit from overheating or damage. To troubleshoot this issue, check the circuit breaker panel and look for any tripped breakers. If you find a tripped breaker, reset it by flipping it back to the ‘on’ position. If it trips again immediately or frequently, consult a professional electrician to diagnose the underlying issue.
5. Wiring Faults
In rare cases, there may be hidden wiring faults that cause issues with the electrical socket. These faults could include short circuits, damaged wires, or faulty connections. If you have exhausted all other troubleshooting steps and the socket still doesn’t work, it is advisable to seek the assistance of a qualified electrician. They will have the necessary tools and expertise to diagnose and repair any hidden wiring faults.
By being aware of these common issues and following the troubleshooting tips, you can effectively identify and resolve problems with electrical socket wiring.
Upgrading and Installing Electrical Sockets Safely
The proper installation and upgrading of electrical sockets is essential for maintaining a safe and functional electrical system in your home or building. By following the necessary guidelines and precautions, you can ensure that your electrical sockets are installed correctly and up to code.
1. Obtain the necessary permits
Before starting any electrical work, it is important to check with your local authorities to determine if you need a permit for the installation or upgrade of electrical sockets. Permits help ensure that the work is performed by a qualified professional and meets the required safety standards.
2. Hire a licensed electrician
Unless you are a trained electrician, it is strongly recommended to hire a licensed professional to install or upgrade your electrical sockets. Electricians have the knowledge and experience to safely handle electrical wiring and ensure that the installation is up to code.
3. Plan the placement and number of sockets
Before installation, carefully plan where you want your electrical sockets to be located. Consider the number of devices you will be plugging in and their power requirements. Make sure there are enough sockets to meet your needs without overloading the circuit.
4. Turn off the power
Prior to starting any electrical work, always turn off the power to the circuit you will be working on. This can be done by switching off the circuit breaker or removing the fuse from the electrical panel. Use a voltage tester to double-check that the power is indeed off before proceeding.
5. Follow safety precautions
When working with electricity, safety should be a top priority. Wear personal protective equipment, such as insulated gloves and safety glasses, to protect yourself from potential hazards. Additionally, use insulated tools and avoid working in wet conditions to reduce the risk of electrical shock.
6. Properly connect the wiring
When installing or upgrading electrical sockets, it is important to follow the wiring diagram and make sure the connections are properly made. Avoid using excessive force when tightening screws and ensure that all wire connections are tight and secure.
7. Test the installation
Once the installation is complete, it is essential to test the functionality of the electrical sockets. Use a plug-in tester or a multimeter to verify that the wiring is correct and that the sockets are properly grounded. If any issues are detected, contact a professional electrician to make the necessary repairs.
By following these guidelines and taking the necessary precautions, you can upgrade or install electrical sockets safely. Remember, if you are not qualified or experienced in electrical work, it is best to hire a licensed professional to ensure the job is done correctly and safely.
Q&A:
What is the first step to safely upgrade or install electrical sockets?
The first step is to turn off the power to the area where you will be working. This can be done by flipping the corresponding circuit breaker in your electrical panel.
Why is it important to turn off the power before upgrading or installing electrical sockets?
Turning off the power ensures that you will not be exposed to electrical currents and reduces the risk of electric shock. It also prevents any potential damage to the wiring or the new socket during the installation process.
What tools are needed to upgrade or install electrical sockets?
Some common tools include a screwdriver, wire strippers, wire cutters, a voltage tester, and a socket tester. It is important to use the correct tools for the job to ensure a safe and successful installation.
What precautions should be taken when working with electrical sockets?
Some precautions include wearing rubber gloves and safety glasses, ensuring the area is well-lit, and avoiding contact with any exposed wires or connections. It is also important to follow the manufacturer’s instructions and to have a basic understanding of electrical wiring.
What are some signs that it may be time to upgrade electrical sockets?
Some signs include loose or cracked sockets, flickering lights when using the socket, or the socket not holding a plug securely. If you notice any of these signs, it is advisable to upgrade the socket to avoid any potential electrical hazards.
What safety precautions should be taken when upgrading and installing electrical sockets?
When upgrading and installing electrical sockets, it is important to follow proper safety precautions. Firstly, be sure to turn off the power supply to the socket at the main circuit breaker before starting any work. This will prevent electric shock. Secondly, use insulated gloves and tools to protect yourself from electrical current. Additionally, ensure that the circuit is properly grounded before installing the new socket. It is also crucial to use the correct voltage socket that matches the electrical requirements of your appliances. Lastly, if you are unsure about any aspect of the installation process, it is best to seek the help of a professional electrician.