
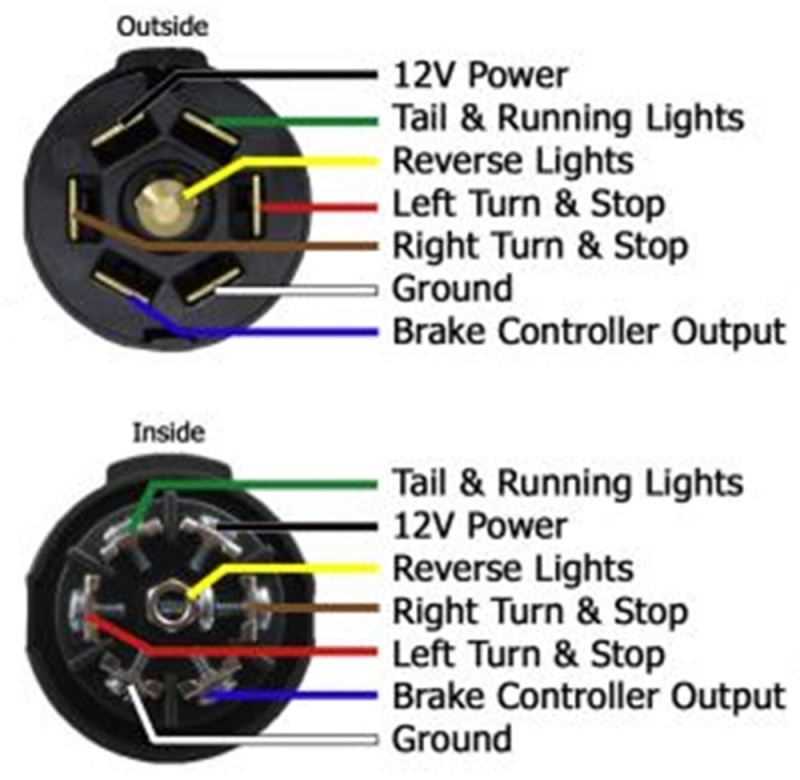
The Hopkins 7-way trailer plug diagram is a valuable resource for anyone who needs to connect a trailer to their vehicle. Whether you’re towing a boat, a camper, or a utility trailer, having the correct wiring and connections is essential for safety and functionality.
The diagram provides a visual representation of how the 7-way trailer plug should be wired, with each pin and color-coded wire labeled for easy reference. This allows you to easily identify and connect the corresponding wires from the trailer to the vehicle. With the Hopkins 7-way trailer plug diagram, you can ensure that your trailer’s lights, brakes, and other systems are properly connected and functioning.
Whether you’re a seasoned trailer owner or a novice, the Hopkins 7-way trailer plug diagram can help you navigate the sometimes confusing world of trailer wiring. By following the diagram and using the correct wiring connections, you can avoid potential electrical issues and ensure a safe and efficient towing experience.
What is a 7-way trailer plug?
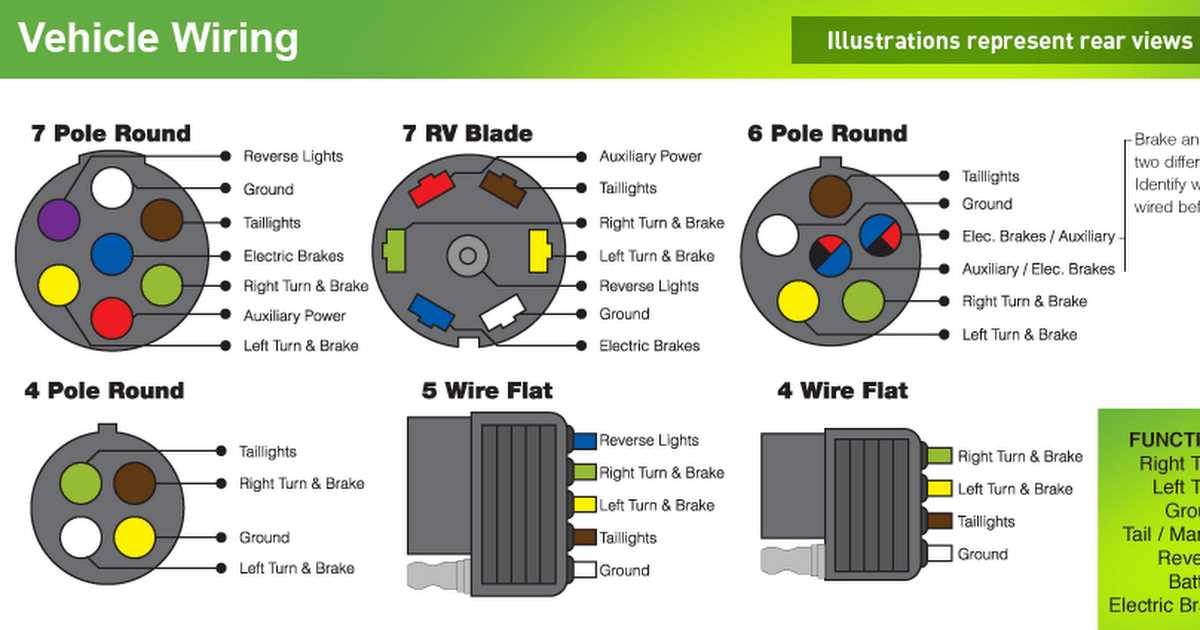
A 7-way trailer plug, also known as a 7-pin trailer plug, is a connector that is commonly used to provide the electrical connection between a towing vehicle and a trailer. It is designed to transfer power for various functions and accessories on the trailer, such as the trailer lights, brake lights, turn signals, and electric brakes.
Typically, a 7-way trailer plug consists of seven pins or terminals that correspond to different electrical functions. These pins are wired to specific circuits in both the towing vehicle and the trailer, allowing for the transmission of signals and power between the two.
- Ground: This pin provides a direct connection to the ground or chassis of both the towing vehicle and the trailer, ensuring a reliable and safe electrical connection.
- Tail Lights: This pin controls the trailer’s tail lights, which are essential for providing visibility to other drivers on the road.
- Left Turn and Brake Lights: This pin is responsible for activating the left turn signal and brake lights on the trailer.
- Right Turn and Brake Lights: This pin is responsible for activating the right turn signal and brake lights on the trailer.
- Electric Brake: This pin connects to the electric brake system on the trailer, allowing the towing vehicle to control the trailer’s brakes.
- Backup Lights: This pin controls the backup lights on the trailer, providing illumination when the vehicle is in reverse.
- Battery Charge: This pin provides power to charge the trailer’s battery while it is connected to the towing vehicle.
The 7-way trailer plug is a standardized connector in the United States, and most trailers and towing vehicles are equipped with this type of plug. It allows for a secure and efficient transfer of electrical signals and power between the towing vehicle and the trailer, ensuring safe and reliable operation while towing.
Why is a diagram needed?
In the world of trailers and towing, a diagram is an essential tool that helps individuals understand the wiring connections and functions of a 7-way trailer plug. This type of diagram is particularly important when dealing with the Hopkins 7-way trailer plug, as it provides a visual representation of the plug’s pin layout and the corresponding functions of each pin.
With a diagram, users can easily identify which pin corresponds to the left turn signal, right turn signal, tail lights, electric brakes, and other crucial components of a trailer’s electrical system. It allows them to make the correct connections and troubleshoot any wiring issues more effectively.
When dealing with a complex system like a 7-way trailer plug, a diagram provides a clear and concise reference point for anyone working with trailers or towing.
Having a visual representation of the wiring connections eliminates any guesswork and minimizes the risk of incorrect wiring that could lead to malfunctions or even accidents on the road. It also makes it easier for individuals to install or replace a 7-way trailer plug without the need for extensive electrical knowledge or expertise.
Furthermore, a diagram ensures consistency and standardization in trailer wiring. Different manufacturers may have slight variations in their 7-way trailer plug configurations, making a diagram indispensable for easily identifying the correct pin layout and avoiding wiring mistakes.
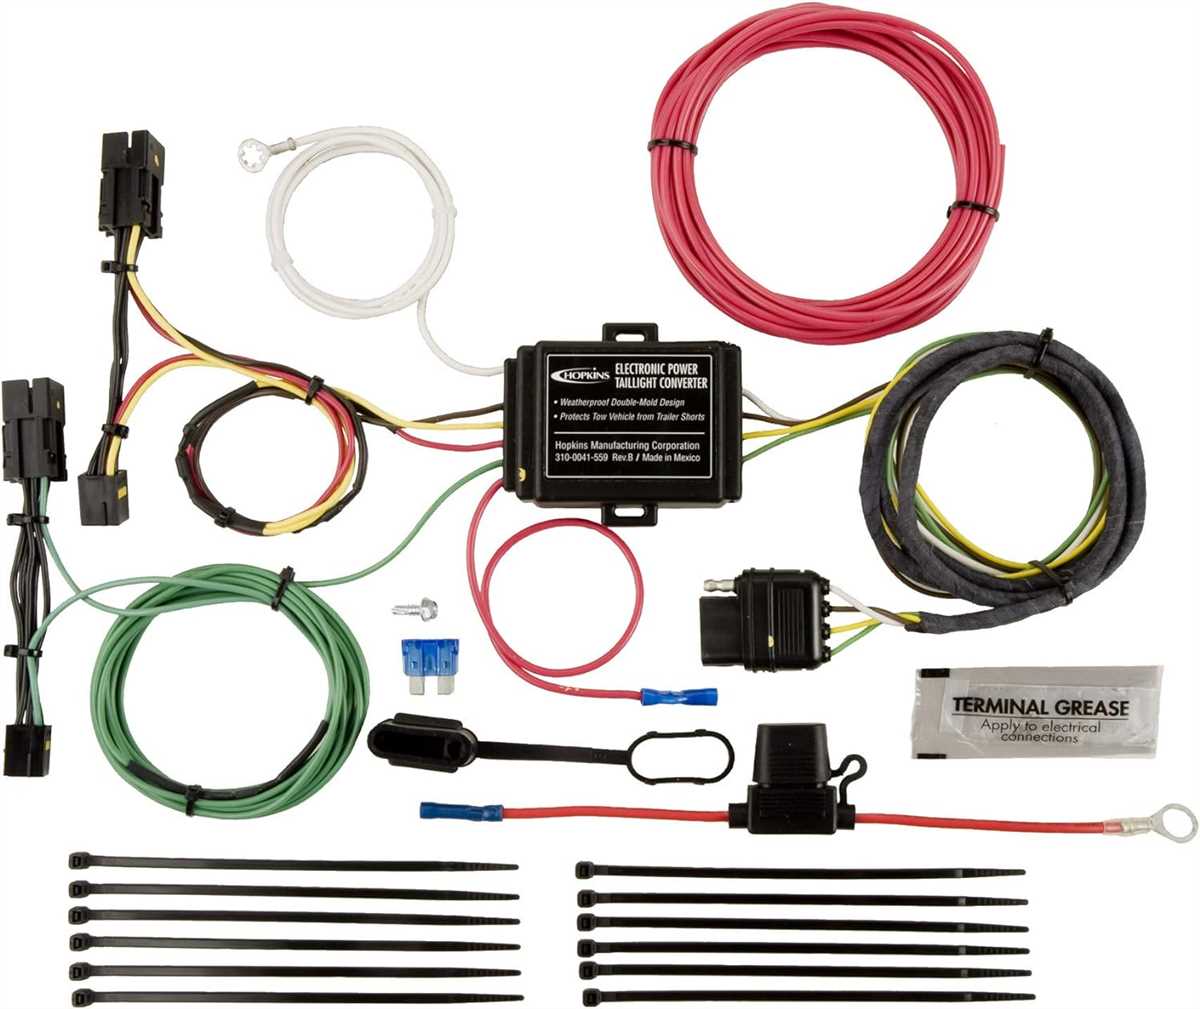
How to wire a 7-way trailer plug
Wiring a 7-way trailer plug requires connecting specific wires to corresponding pins in the plug. The 7-way trailer plug is used to connect a trailer to the towing vehicle and provides electrical signals for various functions such as brake lights, turn signals, and power supply for trailer brakes. It is important to follow the correct wiring diagram to ensure proper function and safety.
Step 1: Gather the necessary tools and materials:
- – 7-way trailer plug
- – Wiring harness
- – Wire cutter/stripper
- – Electrical tape
- – Wire connectors/crimps
Step 2: Understand the pin configuration:
Before starting the wiring process, it is crucial to understand the pin configuration of a 7-way trailer plug. The pins are numbered from 1 to 7 and each corresponds to a specific function. The Hopkins 7-way trailer plug diagram can be used as a reference guide for pin assignments.
Step 3: Strip and prepare the wires:
Using a wire cutter/stripper, remove the insulation from the ends of the wires in the wiring harness. Strip around 1/4 inch of insulation to expose the bare wire for connection.
Step 4: Connect the wires to the plug:
Refer to the wiring diagram and match the function of each wire to the corresponding pin on the 7-way trailer plug. Use wire connectors or crimps to securely attach the wires. It is important to make sure there are no loose connections or exposed wires to avoid any electrical issues.
Step 5: Test and secure the connections:
Once all the wires are connected, it is recommended to test the trailer plug using a trailer wiring tester or by connecting it to a trailer. Check all the functions such as brake lights, turn signals, and power supply to ensure everything is working correctly. Secure the connections with electrical tape or zip ties to prevent them from coming loose during travel.
Following these steps and using the appropriate wiring diagram, you can successfully wire a 7-way trailer plug for safe and reliable towing.
Troubleshooting Common Issues
When it comes to the Hopkins 7-way trailer plug, there are a few common issues that you may encounter. Here are some troubleshooting tips to help you resolve these problems:
No Power
If you connect the trailer and there is no power coming from the vehicle to the trailer, there are a few things you can check:
- Make sure the vehicle’s battery is fully charged.
- Check the fuse box for any blown fuses related to the trailer wiring.
- Inspect the wiring connections for any loose or damaged wires.
Intermittent Power
If the power to the trailer is intermittent, meaning it comes and goes, there may be an issue with the plug or the wiring connections. Try the following:
- Inspect the plug for any damage or corrosion and clean or replace as necessary.
- Tightly secure the plug into the socket to ensure a proper connection.
- Check the wiring connections for any loose or damaged wires and repair as needed.
Inoperative Lights
If the trailer lights are not working properly, there are a few steps you can take to troubleshoot the issue:
- Check the bulbs in the trailer lights and replace any that are burnt out.
- Inspect the wiring connections for any loose or damaged wires and repair as necessary.
- Use a multimeter to test the continuity of the wiring to identify any breaks or shorts.
Summary
Troubleshooting the Hopkins 7-way trailer plug can help you quickly identify and resolve common issues. By checking the power source, inspecting the plug and wiring connections, and testing the functionality of the lights, you can often pinpoint the problem and make the necessary repairs. Remember to always prioritize safety when working with electrical connections and consult a professional if you are unsure or uncomfortable with any part of the troubleshooting process.