
If you have a Rockwell Sonicrafter, you know how useful it can be for a variety of DIY projects. Whether you’re cutting, sanding, or scraping, having a reliable power tool is essential. However, like any tool, parts can wear out or break over time. That’s why it’s important to have a good understanding of the Rockwell Sonicrafter parts diagram.
The Rockwell Sonicrafter parts diagram is a visual representation of all the different components that make up the tool. This includes everything from the motor and power switch, to the blades and accessories. By familiarizing yourself with the parts diagram, you’ll be better equipped to identify and replace any worn or damaged parts.
One of the most common parts that may need to be replaced is the blade. The Rockwell Sonicrafter uses a quick-change system, which makes it easy to switch between different blades for different tasks. The parts diagram will show you exactly how the blade attaches to the tool, and how to remove and replace it.
In addition to the blade, the Rockwell Sonicrafter also has various other accessories such as sanding pads, scraping blades, and cutting blades. The parts diagram will provide you with a clear visual guide on how to attach and remove these accessories, ensuring that you can get the most out of your tool.
Overall, the Rockwell Sonicrafter parts diagram is an essential tool for any owner of this versatile power tool. By understanding how all the different components fit together, you’ll be able to keep your Sonicrafter running smoothly and efficiently for years to come.
Rockwell Sonicrafter Parts Diagram
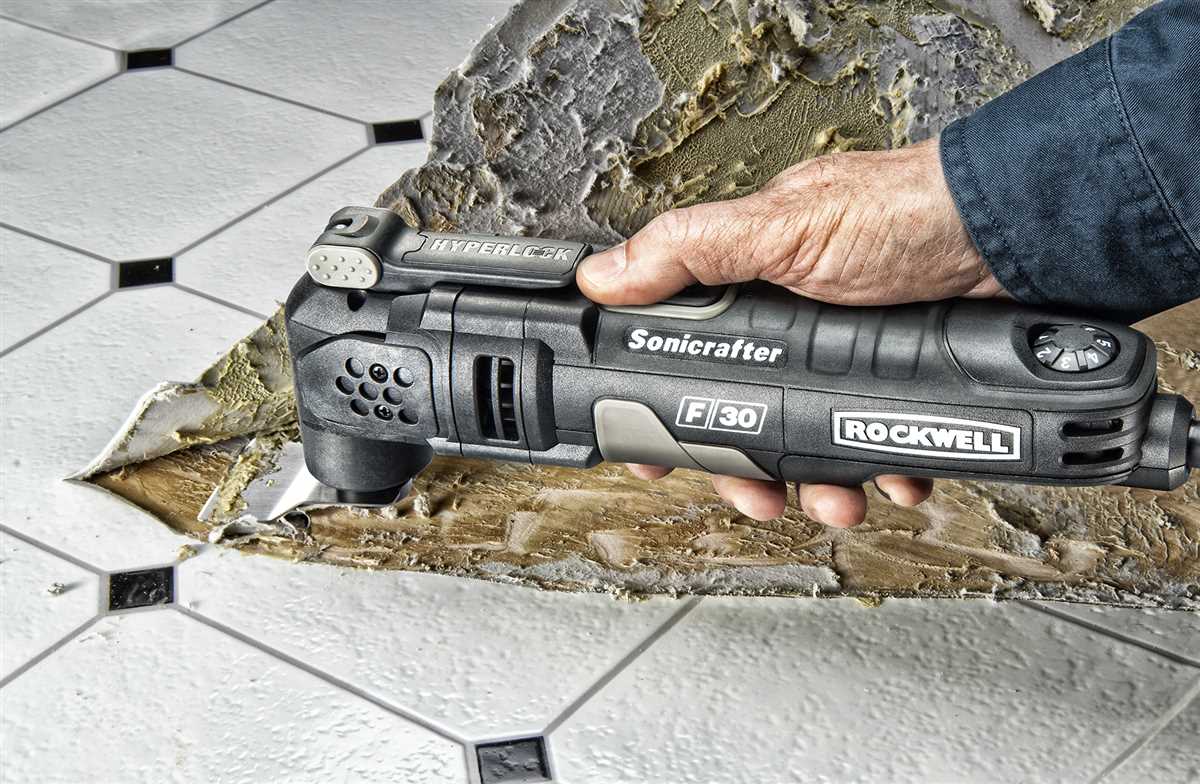
The Rockwell Sonicrafter is a versatile and powerful tool that is commonly used for cutting, sanding, scraping, grout removal, and a variety of other tasks. To understand how this tool works and how to fix any issues that may arise, it is helpful to have a parts diagram to reference. A parts diagram provides a visual representation of the tool’s components and their placement, making it easier to identify and replace any damaged or worn-out parts.
The Rockwell Sonicrafter parts diagram typically includes:
- Motor: This is the main component that powers the tool and drives the motion of the attachments.
- Front Housing: The front housing holds the motor and other internal components in place.
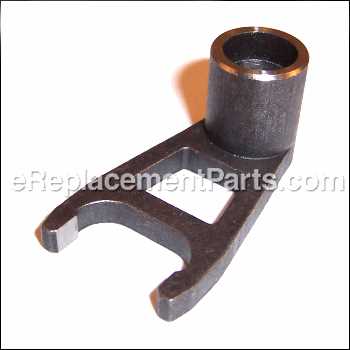
- Blade Clamp: The blade clamp securely holds the cutting or sanding attachment in place.
- Variable Speed Dial: This dial allows the user to adjust the speed of the tool to suit the task at hand.
- On/Off Switch: The on/off switch controls the power supply to the tool.
- Battery (if cordless): In cordless models, the battery provides the power source for the tool.
- Attachment Interface: The attachment interface is where various attachments can be connected to the tool.
- Trigger: The trigger is used to control the operation of the tool.
Having a parts diagram on hand can be particularly helpful when troubleshooting issues with the tool. For example, if the motor is not working, you can refer to the diagram to locate the motor and check for any loose connections or worn-out parts. Similarly, if the blade clamp is not holding the attachment securely, you can refer to the diagram to identify any damaged or broken parts that may need to be replaced.
Overall, a Rockwell Sonicrafter parts diagram is an invaluable resource for understanding the inner workings of the tool and for making any necessary repairs or replacements. Whether you are a DIY enthusiast or a professional contractor, having access to a parts diagram can help you keep your Sonicrafter in optimal working condition for years to come.
Understanding the Rockwell Sonicrafter
The Rockwell Sonicrafter is a versatile and powerful tool designed for various cutting and sanding tasks. This tool is widely used in woodworking, construction, and DIY projects due to its ability to provide precise cuts and smooth finishes. To fully understand the functionality and components of the Rockwell Sonicrafter, it is important to familiarize yourself with its parts diagram.
The parts diagram of the Rockwell Sonicrafter provides a detailed visual representation of the different components that make up this tool. It includes key parts such as the motor, blade clamp, depth adjustment lever, and speed control dial. By studying the parts diagram, users can easily identify and understand how each component contributes to the overall operation and performance of the Sonicrafter.
Motor
The motor is the heart of the Rockwell Sonicrafter, responsible for generating the power needed to perform cutting and sanding tasks. It is located at the main body of the tool and is connected to the blade clamp. The motor’s power and RPM (rotations per minute) can be adjusted using the speed control dial, allowing users to customize the tool’s performance based on the specific task at hand.
Blade Clamp
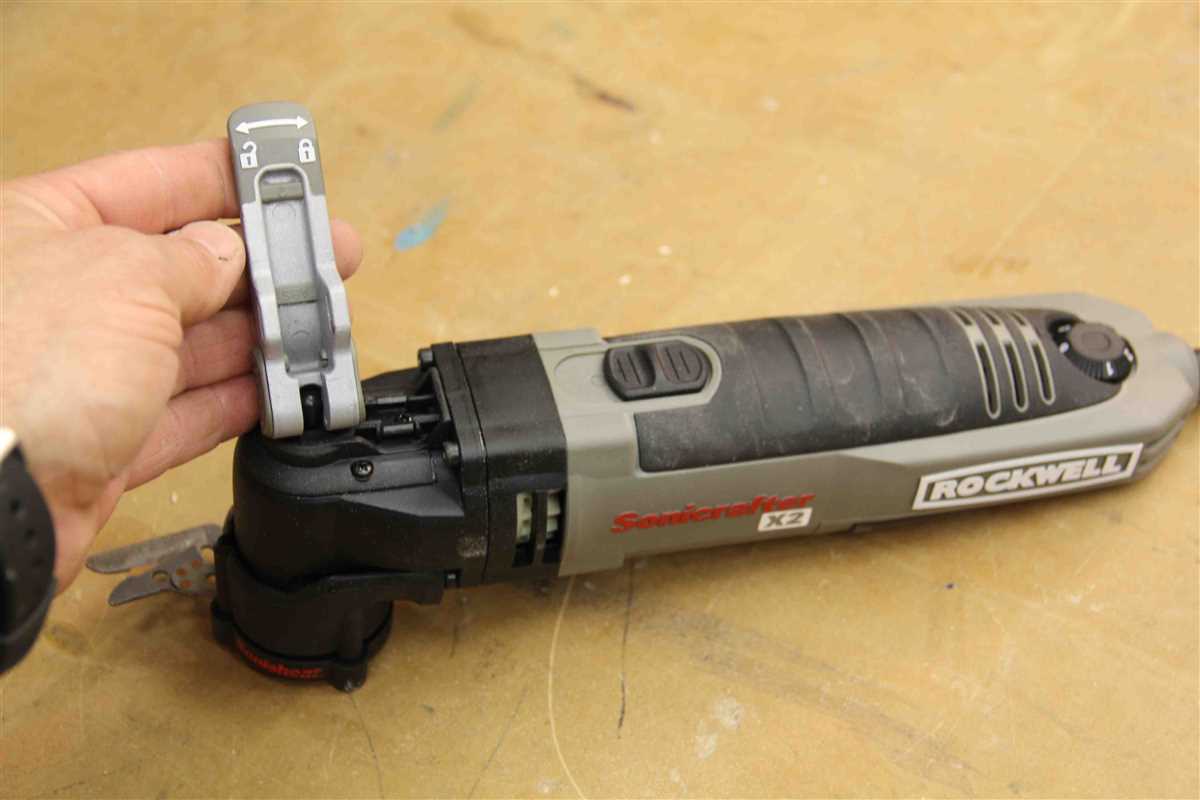
The blade clamp is designed to securely hold various types of blades or accessories in place. It features a quick-release mechanism that allows users to easily swap out blades without the need for additional tools. The blade clamp also provides stability and precision during cutting or sanding operations, ensuring accurate and efficient results.
Depth Adjustment Lever
The depth adjustment lever enables users to control the cutting or sanding depth of the Rockwell Sonicrafter. It can be adjusted to achieve different levels of material removal, allowing for versatile applications. This feature is particularly useful when working with different materials or when specific depth requirements need to be met.
Additional Features
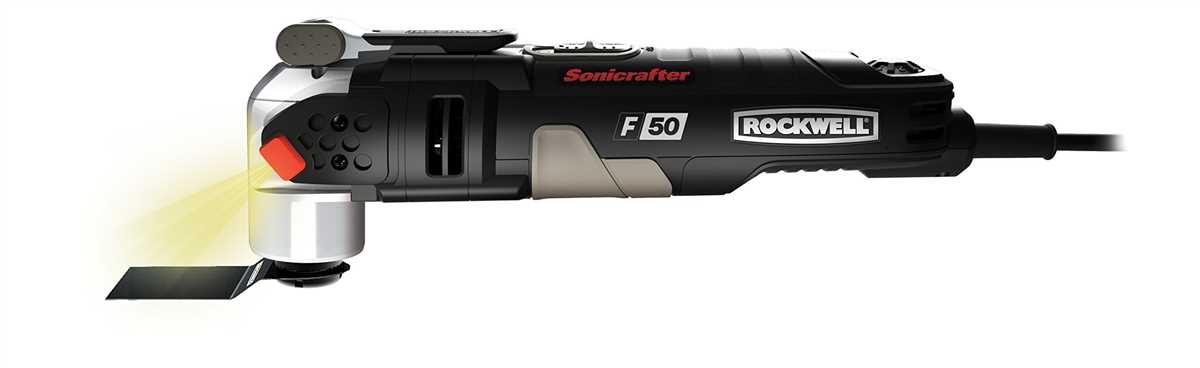
In addition to the main components mentioned above, the Rockwell Sonicrafter may also include other features such as LED lights for improved visibility, ergonomic handles for comfortable grip, and dust extraction ports for cleaner work areas. These additional features enhance the overall usability and functionality of the tool, providing users with a more efficient and enjoyable experience.
Overall, understanding the Rockwell Sonicrafter and its parts diagram is essential for maximizing the tool’s performance and ensuring safe operation. By familiarizing yourself with the various components and their functions, you can confidently use the Sonicrafter for a wide range of cutting and sanding tasks, making your woodworking or DIY projects easier and more efficient.
The Importance of Knowing Your Sonicrafter Parts
If you own or work with a Rockwell Sonicrafter, it is essential to have a good understanding of its various parts and components. This knowledge can greatly assist you in troubleshooting issues, making repairs, and maximizing the tool’s performance.
Familiarity with Parts Terminology:
One of the main benefits of knowing your Sonicrafter parts is that it allows you to effectively communicate with others about the tool. By understanding the terminology and names of different components, you can easily discuss repairs, replacements, or upgrades with fellow enthusiasts or professionals in the field.
Identifying and Replacing Worn Parts:
Over time, certain parts of your Sonicrafter may start to wear out or become damaged. Being able to recognize these issues and identify the specific parts involved can save you time and money. Instead of replacing the entire tool, you can simply replace the worn or damaged component, restoring your Sonicrafter to its full functionality.
Enhancing Performance:
Knowing your Sonicrafter parts can also help you maximize the tool’s performance. Different parts may have different features or specifications that can affect the overall performance of the tool. By understanding how these components work together, you can make informed decisions about which parts to use for specific tasks, resulting in improved efficiency and effectiveness.
Preventive Maintenance:
In addition to troubleshooting and repairs, knowing your Sonicrafter parts can also help you with preventive maintenance. Regularly inspecting and cleaning different parts can help prevent dirt, debris, or wear and tear from affecting the performance of your tool. By keeping your Sonicrafter in good condition, you can extend its lifespan and ensure consistent performance over time.
Conclusion:
Knowing the different parts of your Sonicrafter is crucial for effective communication, troubleshooting, repairs, and maintenance. It allows you to understand the tool’s inner workings, identify and replace worn components, enhance its performance, and ensure its longevity. So take the time to familiarize yourself with the parts of your Sonicrafter to make the most out of this versatile and powerful tool.
The Sonicrafter Parts Diagram
The Sonicrafter is a versatile and powerful tool that is commonly used for woodworking, carpentry, and other DIY projects. Understanding its parts and their functions is essential for anyone using this tool. The Sonicrafter parts diagram provides a visual representation of these components, making it easier to identify and locate specific parts.
One of the key components of the Sonicrafter is the blade or accessory. The parts diagram includes a detailed view of the various types of blades that can be used with the tool, such as the wood-cutting blade, metal-cutting blade, sanding pad, and grout removal blade. Each blade has a specific purpose and is designed to perform a specific task.
The Sonicrafter parts diagram also features the handle and trigger, which are essential for controlling the tool. The handle provides a comfortable grip, allowing users to maintain control and stability while operating the tool. The trigger, on the other hand, controls the speed and power of the Sonicrafter, allowing users to adjust the tool’s performance according to the task at hand.
Key Components of the Sonicrafter Parts Diagram:
- Blades and accessories
- Handle
- Trigger
- Motor
- Housing
- Depth adjustment
- Power cord
In addition to these key components, the Sonicrafter parts diagram may also include other features such as an LED light, dust extraction port, and blade changing mechanism. These features add to the functionality and convenience of the tool. Understanding the parts diagram can help users troubleshoot issues, make repairs, and maximize the performance of their Sonicrafter.
Overall, the Sonicrafter parts diagram is a valuable resource for anyone using this tool. It provides a clear visual representation of the various components and their functions, allowing users to better understand how the tool works and how to make the most of its capabilities.
How to Identify and Replace Broken Parts
If you’re experiencing issues with your Rockwell Sonicrafter and suspect that a part is broken, it’s important to correctly identify the faulty component before attempting any repairs. By following these steps, you can easily determine which part needs replacing and ensure that you have the correct replacement on hand.
Step 1: Examine the tool for visible damage. Inspect the housing, switches, and any visible components for cracks, chips, or other signs of wear and tear. Take note of any damaged areas.
Step 2: Consult the parts diagram. Rockwell provides a detailed parts diagram for each model and version of the Sonicrafter. Locate the diagram for your specific tool and compare it to the areas you identified as damaged in step 1. This will help you pinpoint which part you need to replace.
Step 3: Check for model and serial numbers. Some parts may be specific to certain model or serial numbers of the Sonicrafter. Look for any identifying numbers or letters on the tool itself and cross-reference them with the parts diagram to ensure that you’re ordering the correct replacement.
Step 4: Order the replacement part. Once you have identified the broken component and confirmed the model and serial number, you can order the replacement part from a Rockwell authorized dealer or from the Rockwell website. Be sure to provide all the necessary information, including the part number, to ensure you receive the correct item.
Step 5: Replace the broken part. When the replacement part arrives, carefully follow the instructions in the user manual or refer to online tutorials to properly remove the damaged component and install the new one. Take care to use the correct tools and techniques to avoid further damage to your Sonicrafter.
By following these steps and taking the time to accurately identify and replace broken parts, you can ensure that your Rockwell Sonicrafter continues to perform at its best. Remember to always prioritize safety and consult a professional if you’re unsure about any aspect of the repair process.
Where to Find Authentic Rockwell Sonicrafter Parts
When it comes to maintaining and repairing your Rockwell Sonicrafter power tools, it’s important to use authentic parts to ensure their optimal performance and longevity. While there may be many options available in the market, it is crucial to purchase the correct parts from reputable sources.
One of the best places to find authentic Rockwell Sonicrafter parts is directly from Rockwell themselves. The company offers a wide variety of replacement parts for their power tools, including the Sonicrafter. You can visit their official website and browse through their comprehensive catalog to find the specific parts you need for your Sonicrafter model.
Another reliable option is to check with authorized Rockwell dealers or distributors. These authorized sellers carry genuine Rockwell Sonicrafter parts and can provide expert advice on the best options for your specific needs. You can find a list of authorized dealers on Rockwell’s website or by contacting their customer service.
If you prefer the convenience of online shopping, there are several reputable websites that specialize in selling genuine Rockwell Sonicrafter parts. These websites often have a wide selection of parts, including hard-to-find or discontinued items. However, it is important to verify the authenticity and reliability of the website before making a purchase.
In conclusion, when in need of authentic Rockwell Sonicrafter parts, it is advisable to purchase them directly from Rockwell, authorized dealers, or reputable online sellers. Choosing genuine parts will ensure the proper functioning and prolonged lifespan of your Sonicrafter power tools, saving you time and money in the long run.
Tips for Maintaining Your Sonicrafter for Longevity
Maintaining your Sonicrafter properly is essential to ensure its longevity and optimal performance. Here are some tips to help you keep your tool in top shape:
- Clean and lubricate regularly: After each use, make sure to clean off any debris or dust that may have accumulated on the Sonicrafter. Use a soft cloth or brush to remove particles from the tool and its components. Additionally, applying a small amount of lubricant to the moving parts can help prevent rust and keep the tool operating smoothly.
- Replace worn-out parts: Over time, certain components of the Sonicrafter may wear out or become damaged. It is important to regularly inspect the tool for any signs of wear and tear. If you notice any issues, such as a dull blade or broken accessory, make sure to replace it promptly. Using a damaged tool can lead to poor performance and potential safety hazards.
- Store properly: When not in use, it is crucial to store your Sonicrafter in a clean and dry environment. Keep it away from excessive moisture, heat, or cold, as these conditions can cause damage to the tool. Additionally, storing the Sonicrafter in its original case or a designated storage box can help protect it from dust and impact.
- Follow proper usage guidelines: Read and understand the user manual that came with your Sonicrafter. Following the recommended operating procedures and safety guidelines will not only help prevent accidents but also extend the lifespan of your tool. Avoid applying excessive force or using the Sonicrafter for tasks it is not designed for, as this can strain the tool and cause premature wear.
By implementing these maintenance tips, you can increase the longevity of your Sonicrafter and ensure that it continues to perform at its best. Remember, proper care and attention to your tools will not only save you money in the long run but also help you achieve better results in your projects.