
A lighting contactor is an electrical device used to control and switch the power supply to lighting fixtures. It is commonly used in commercial, industrial, and even residential buildings. Wiring a lighting contactor is an essential step in the installation process to ensure the proper functioning of the lighting system.
The wiring process for a lighting contactor involves connecting various components, such as the power supply, control circuit, and the lighting fixtures. It requires careful attention to detail and adherence to electrical safety guidelines. Failure to properly wire a lighting contactor can result in malfunctioning or non-functional lighting fixtures.
When wiring a lighting contactor, one of the key considerations is the selection of the appropriate size and type of electrical wiring. This depends on several factors, including the power requirements of the lighting fixtures and the distance between the contactor and the fixtures. It is crucial to choose wiring that can handle the load and distance without causing any voltage drop or power loss.
In addition to selecting the right wiring, it is important to follow the manufacturer’s instructions and wiring diagrams. These diagrams provide a step-by-step guide on how to connect the various components of the lighting contactor. It is crucial to ensure that the connections are secure and properly insulated to prevent any electrical hazards.
In conclusion, wiring a lighting contactor requires careful planning and attention to detail. It is essential to choose the appropriate wiring size and type, follow the manufacturer’s instructions, and ensure secure and properly insulated connections. By following these steps, one can ensure the safe and proper functioning of the lighting system in any building.
Guide to Wiring a Lighting Contactor
Wiring a lighting contactor is an essential step in setting up an efficient lighting system. A contactor is an electrical device that controls the power supply to the lighting circuits. It acts as a switch, allowing the circuits to be turned on or off as needed.
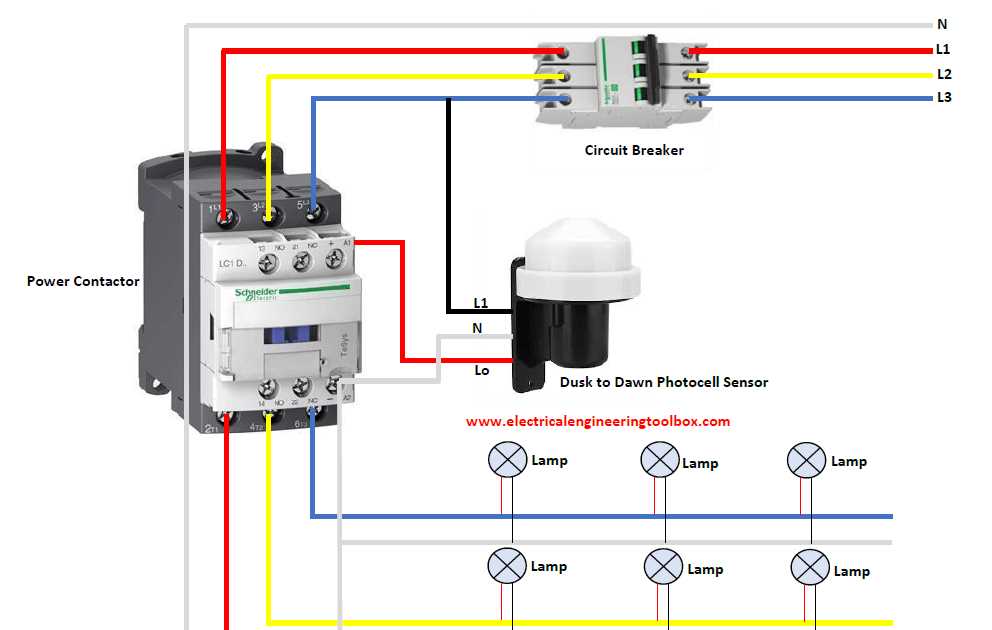
To wire a lighting contactor, you will need a few key components. These include the contactor itself, a power source, a control circuit, and the lighting circuits. The contactor is typically mounted on a DIN rail or a panel, and it is connected to the power source and control circuit using appropriate wiring connections.
When wiring the contactor, it is important to follow the manufacturer’s instructions and adhere to the electrical codes and regulations in your area. This ensures the safety and effectiveness of the system. The control circuit wiring should be properly sized and protected with appropriate fuses or circuit breakers. The lighting circuits should also be properly wired and protected to prevent any electrical hazards or failures.
Typically, the power source is connected to the contactor’s main power terminals, and the control circuit is connected to the contactor’s coil terminals. The lighting circuits are then connected to the contactor’s load terminals. It is important to ensure that the wiring connections are secure and insulated to prevent any loose connections or short circuits.
Once the wiring is complete, the lighting contactor can be tested to ensure that it is functioning properly. This can be done by turning on the power and activating the control circuit. The contactor should switch on and supply power to the lighting circuits. If there are any issues or malfunctions, it is important to troubleshoot and rectify the problem before the system is put into full operation.
In conclusion, wiring a lighting contactor is a crucial step in setting up a reliable lighting system. By following the appropriate guidelines and using the proper components, you can ensure the safety and efficiency of the system. Regular maintenance and inspections are also recommended to ensure that the contactor and wiring connections are in good condition.
Understanding the Basics of a Lighting Contactor
In electrical systems, a lighting contactor is a critical component that controls the operation of lighting circuits. It is designed to handle the high electrical loads associated with lighting fixtures, allowing for efficient and safe distribution of power. Understanding the basics of a lighting contactor is essential for ensuring the proper functioning of lighting systems in commercial and industrial buildings.
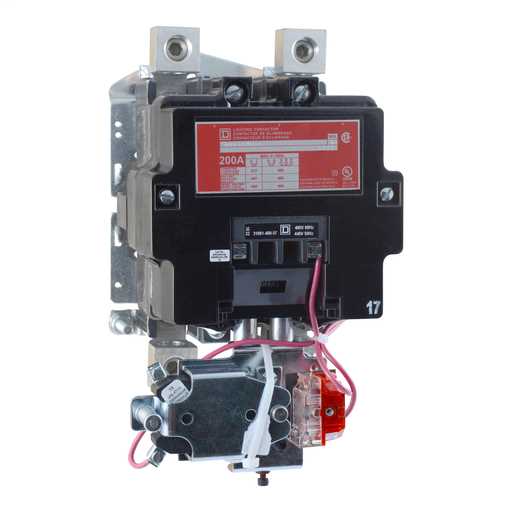
A lighting contactor is an electromechanical device that is typically installed in electrical switchboards or control panels. It consists of a coil, typically energized by a control signal, and a set of contacts that control the flow of electrical current to the lighting fixtures. When the coil is energized, it creates a magnetic field that pulls in the contacts, allowing electrical current to flow through the lighting circuit. When the coil is de-energized, the contacts open, interrupting the current flow and turning off the lights.
The main function of a lighting contactor is to provide a means of controlling large lighting loads. It allows for centralized control of multiple lighting circuits, enabling the lights to be turned on or off simultaneously from a single control point. This is especially useful in buildings with a large number of lighting fixtures, such as offices, warehouses, and retail establishments.
Lighting contactors are crucial for several reasons. Firstly, they help prevent overloads by distributing the load across multiple circuits. This prevents excessive current flow and minimizes the risk of overheating and circuit damage. Secondly, they improve energy efficiency by allowing for scheduled switching of lights, ensuring that they are only on when needed. Additionally, they provide a safety mechanism by automatically turning off the lights in the event of a power failure or emergency situation.
In conclusion, a lighting contactor plays a vital role in electrical systems by controlling the operation of lighting circuits. Its electromechanical design allows for efficient and safe distribution of power to lighting fixtures in commercial and industrial buildings. By understanding the basics of a lighting contactor, one can ensure the proper functioning of lighting systems and enhance energy efficiency and safety.
Choosing the Right Lighting Contactor for Your System
Introduction
When it comes to wiring a lighting contactor for your system, it’s important to choose the right one that meets your specific needs. A lighting contactor is an electrical switch that controls the lighting circuits in a commercial or industrial building. It helps in automating the switching of lights, making it more convenient and efficient.
There are a few key factors to consider when selecting a lighting contactor, such as the type of lighting system, the power requirements, and the control options available. By understanding these factors, you can make an informed decision and ensure that your lighting system operates smoothly and effectively.
Type of Lighting System
The type of lighting system you have will greatly influence the type of lighting contactor you need. There are three main types of lighting systems: incandescent, fluorescent, and LED. Each type has its own unique electrical requirements and characteristics.
For incandescent lighting systems, a standard lighting contactor with the appropriate voltage rating and ampere rating will suffice. However, for fluorescent and LED lighting systems, it’s crucial to choose a lighting contactor that is compatible with the ballasts or drivers used in these systems.
Power Requirements
Another important consideration is the power requirements of your lighting system. This includes the voltage and current rating. Lighting contactors are available in various voltage ratings, such as 120V, 240V, and 480V, to accommodate different power supplies. It’s essential to select a lighting contactor that matches the voltage rating of your system to ensure compatibility and safe operation.
In addition to voltage, you should also consider the current rating of the lighting contactor. This determines the maximum current that the contactor can handle without overheating or causing damage. It’s important to select a contactor with an ampere rating that can handle the total load of your lighting system to avoid any electrical issues.
Control Options
Lastly, consider the control options available for the lighting contactor. Depending on your specific needs, you may want a contactor that can be controlled manually, through a timer, or through an automated system. Some lighting contactors also offer additional features like photocell control or motion sensor integration.
By carefully considering the control options, you can ensure that your lighting system operates efficiently and according to your desired schedule. It’s important to choose a lighting contactor that provides the necessary control functionality for your specific application.
Conclusion
Choosing the right lighting contactor for your system is crucial to ensure proper operation and longevity. Consider the type of lighting system, power requirements, and control options available when making your decision. By taking these factors into account, you can select a lighting contactor that meets your specific needs and delivers optimal performance.
Gathering the Necessary Tools and Materials
Before starting the process of wiring a lighting contactor, it is important to gather all the necessary tools and materials. This will ensure that you have everything you need to complete the task efficiently and safely. Here is a list of the essential tools and materials you will need:
- Wire strippers: These are used to strip the insulation from the wires, allowing for easy connection.
- Wire cutters: These are used to cut the wires to the required length.
- Wire nuts: These are used to connect the wires together securely.
- Electrical tape: This is used to insulate and protect the connections.
- Screwdrivers: Both flathead and Phillips screwdrivers may be needed for removing and installing screws.
- Plastic cable ties: These are used to secure the wires and keep them organized.
- Electrical conduit: This is used to protect and route the wires.
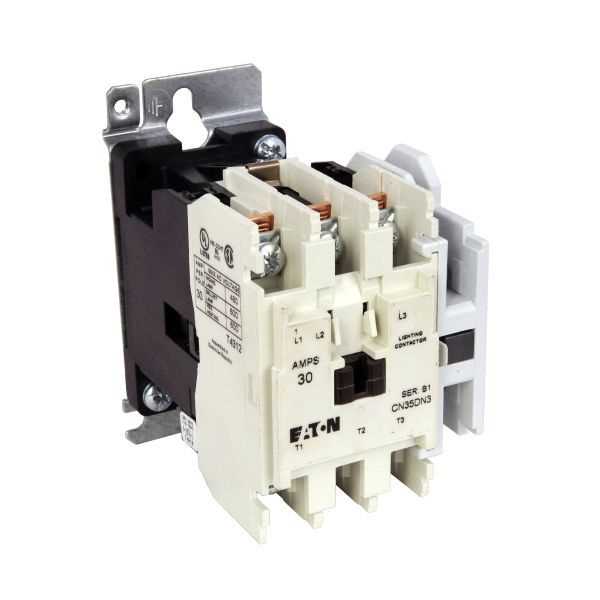
- Lighting contactor: This is the main component that will control the lighting circuit.
- Electrical panel: This is where the lighting contactor will be installed.
Before starting the wiring process, it is important to ensure that all tools and equipment are in good working condition. Inspect the tools for any damage or wear and tear and replace them if necessary. It is also important to have a clear understanding of the layout and design of the lighting circuit before beginning the installation. Taking the time to gather all the necessary tools and materials will make the wiring process run smoothly and efficiently.
Step-by-Step Instructions for Wiring a Lighting Contactor
In order to wire a lighting contactor, follow these step-by-step instructions:
- First, gather all the necessary tools and materials, including a lighting contactor, circuit breaker, wire nuts, electrical tape, and electrical wires.
- Next, turn off the power supply to the circuit by switching off the circuit breaker in the electrical panel.
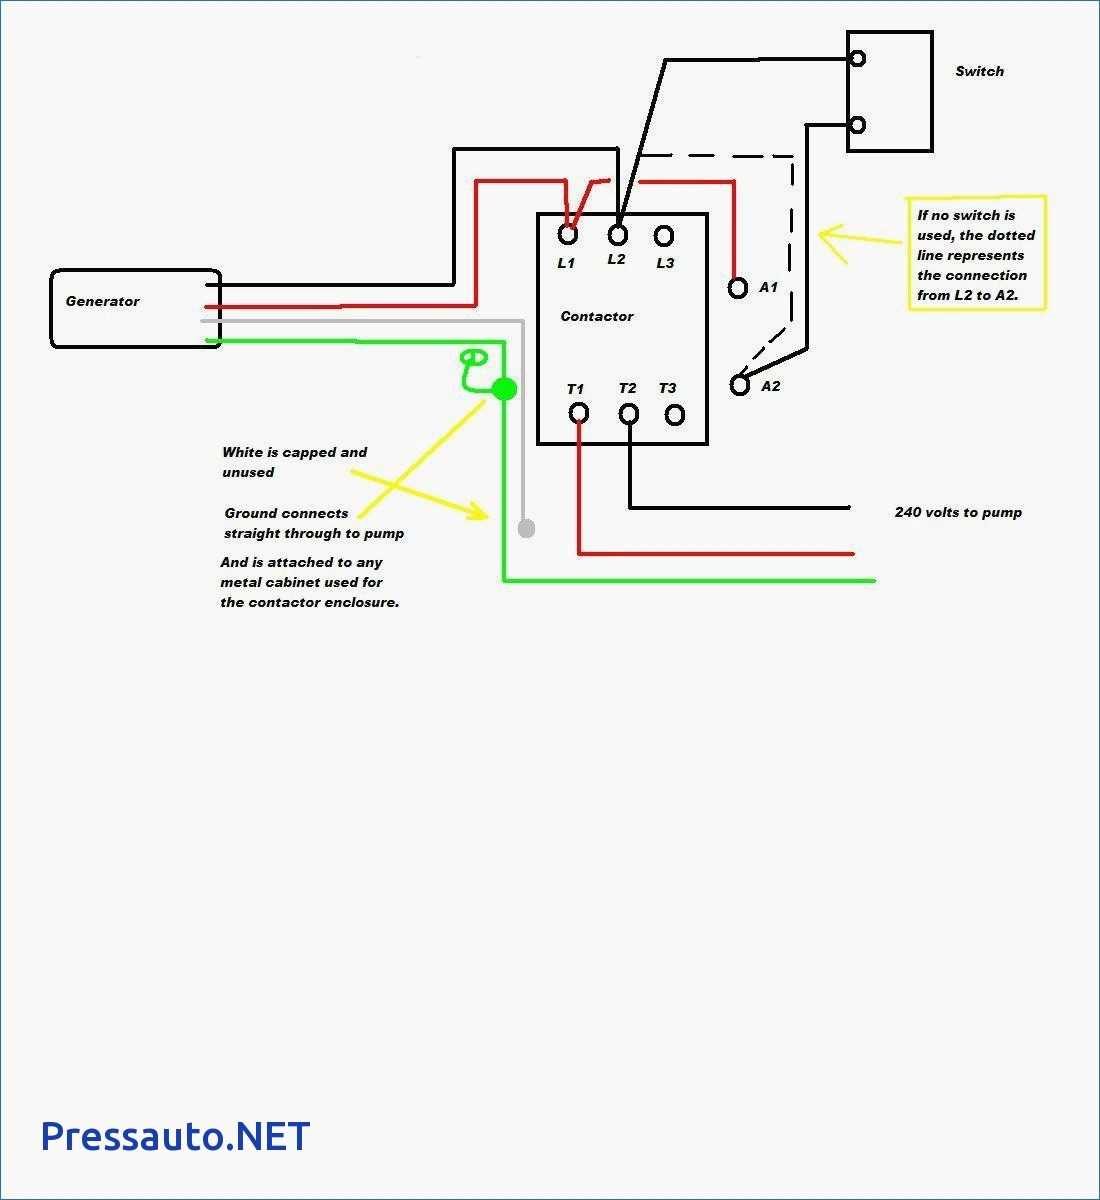
- Locate the outgoing wires from the circuit breaker that will connect to the coil terminals of the lighting contactor. These wires are typically labeled L1 and L2.
- Connect the L1 wire from the circuit breaker to the A1 terminal of the lighting contactor using a wire nut. Use electrical tape to secure the connection and prevent any accidental disconnections.
- Connect the L2 wire from the circuit breaker to the A2 terminal of the lighting contactor in the same manner as step 4.
- Now, locate the outgoing wires from the lighting contactor that will connect to the load. These wires are typically labeled T1 and T2.
- Connect the T1 wire from the lighting contactor to the first load wire using a wire nut. Use electrical tape to secure the connection.
- Connect the T2 wire from the lighting contactor to the second load wire in the same manner as step 7.
- Finally, turn on the power supply by switching on the circuit breaker in the electrical panel and test the lighting contactor to ensure it is functioning properly.
Following these step-by-step instructions should help you successfully wire a lighting contactor. Remember to always exercise caution when working with electricity and to double-check your connections to ensure safety and proper functionality.
Testing and Troubleshooting the Wiring Connection
When it comes to wiring a lighting contactor, it is important to test and troubleshoot the wiring connection to ensure that everything is properly installed and functioning correctly. One of the first steps in this process is to visually inspect the wiring connections for any loose or damaged wires. Look for any signs of wear or overheating, such as melted insulation or discoloration.
Next, you can use a voltage tester to check for the presence of electrical power in the wiring connections. Start by turning off the power supply and then carefully remove the cover of the lighting contactor. Use the voltage tester to check for voltage between the input and output terminals of the contactor. If there is voltage present, it indicates that the wiring connection is properly connected and receiving power.
However, if there is no voltage present, it is necessary to troubleshoot the wiring connection to determine the cause of the problem. Begin by checking the circuit breaker or fuse to ensure that it is not tripped or blown. If the breaker or fuse is in good condition, you can proceed to inspect the wiring for any loose or disconnected connections. Tighten any loose connections and reconnect any disconnected wires.
If the wiring connections appear to be intact and secure, you may need to test the contactor itself for any faults. This can be done by using a multimeter to check for continuity across the contactor terminals. If there is no continuity, it may indicate a faulty contactor that needs to be replaced.
In conclusion, testing and troubleshooting the wiring connection of a lighting contactor is an essential step in ensuring proper installation and functionality. By visually inspecting the wiring, using a voltage tester, and checking for continuity, you can identify and rectify any potential issues to ensure reliable operation of the lighting system.
Ensuring Safety and Compliance in Lighting Contactor Wiring
When it comes to wiring a lighting contactor, ensuring safety and compliance is of utmost importance. Here are some key points to remember to ensure a safe and compliant installation:
- Follow the manufacturer’s instructions: Always refer to the manufacturer’s instructions for proper installation and wiring of the lighting contactor. They will provide detailed guidelines on wiring connections, rating requirements, and safety precautions.
- Use appropriate wiring materials: Choose wiring materials that meet the required specifications and ratings. This includes the correct gauge of wires, insulation types, and connectors. Using substandard or improper wiring materials can compromise the safety and efficiency of the system.
- Properly size the contactor: Ensure the lighting contactor is properly sized and rated for the load it will be controlling. Oversized or undersized contactors can lead to inefficient operation and potential safety hazards.
- Implement proper grounding and bonding: Follow proper grounding and bonding techniques to ensure electrical safety. This includes connecting the grounding conductor and bonding jumper according to the recommended guidelines.
- Observe safety precautions: Take necessary precautions to protect yourself and others during the installation process. This includes using personal protective equipment (PPE) such as gloves and safety glasses, working in well-ventilated areas, and turning off power before making any electrical connections.
- Inspect and test the installation: After completing the wiring, conduct a thorough inspection to ensure all connections are secure and properly wired. Additionally, perform testing to verify that the lighting contactor is functioning correctly and all safety features are operational.
By following these guidelines and paying attention to safety and compliance, you can ensure a successful and secure wiring installation for your lighting contactor. Remember, electrical work should always be performed by qualified professionals who are knowledgeable about electrical codes and regulations.