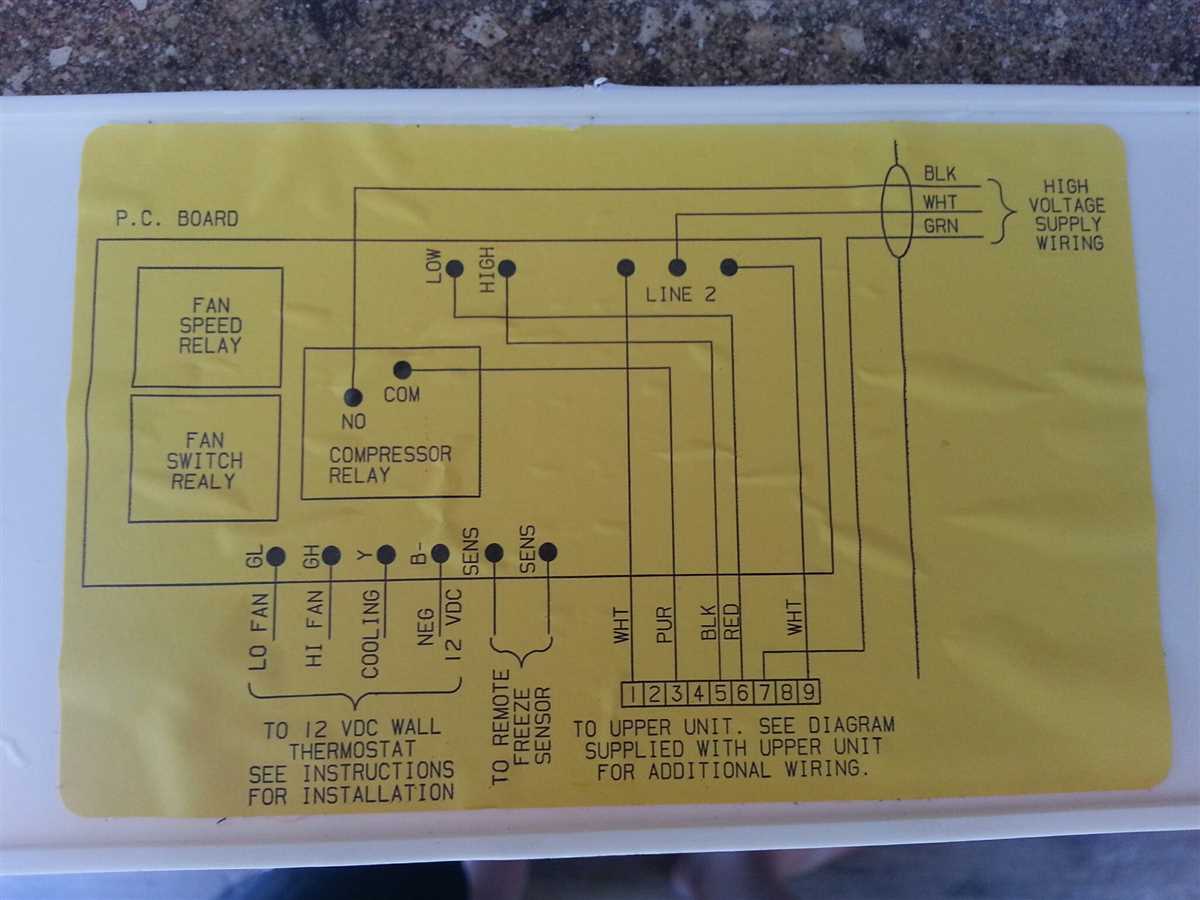
When it comes to controlling the temperature in your home, a thermostat plays a crucial role. It allows you to set the desired temperature and ensures that your HVAC system works efficiently to maintain that temperature. However, in order for your thermostat to communicate with your air conditioning unit, it needs to be properly wired.
Wiring a thermostat to an AC unit may seem like a daunting task, but with the right knowledge and tools, it can be a relatively straightforward process. Understanding the different wires and their functions is key to successfully connecting your thermostat to your AC unit.
There are several types of thermostats available, including programmable and smart thermostats. Depending on the type of thermostat you have, the wiring process may differ slightly. It is important to consult the manufacturer’s instructions for your specific thermostat to ensure proper installation.
How to Wire a Thermostat to an AC Unit
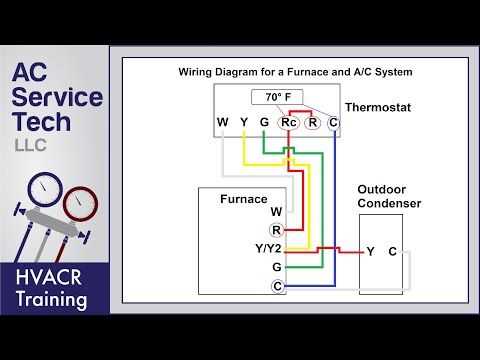
Wiring a thermostat to an AC unit is a relatively simple process that requires just a few basic tools and a basic understanding of electrical wiring. The thermostat serves as the control center for the AC unit, allowing you to set and adjust the temperature in your home. By properly wiring the thermostat to the AC unit, you can ensure efficient and effective cooling throughout your space.
If you are replacing your old thermostat with a new one, it is important to first turn off the power to your AC unit. This can usually be done by switching off the circuit breaker that controls the AC unit. Once the power is off, you can begin to remove the old thermostat from the wall. Take note of the existing wiring, as you will need to replicate this when wiring the new thermostat.
To wire the thermostat to the AC unit, you will need to identify the different wires and their corresponding terminals. Most thermostats have labels or color-coded wires that indicate where they should be connected. Common wire colors include red (power), white (heat), yellow (cooling), and green (fan). Consult the wiring diagram provided with your thermostat to ensure proper connection.
Before connecting the wires to the thermostat, it is important to strip the ends of the wires to expose the bare copper. This can be done using wire strippers or a knife. Insert each wire into the corresponding terminal on the thermostat, making sure to secure them tightly. Once the wires are connected, you can mount the thermostat back onto the wall and restore power to the AC unit.
After wiring the thermostat to the AC unit, it is essential to test the system to ensure proper functionality. Set the thermostat to the desired temperature and listen for the AC unit to kick on. If the unit does not turn on, double-check the wiring connections and consult the troubleshooting guide provided with your thermostat.
In conclusion, wiring a thermostat to an AC unit is a straightforward process that can be easily accomplished with some basic tools and knowledge of electrical wiring. By following the provided wiring diagram and properly connecting the wires, you can ensure efficient and effective cooling in your home.
Understanding the Thermostat Wiring Basics
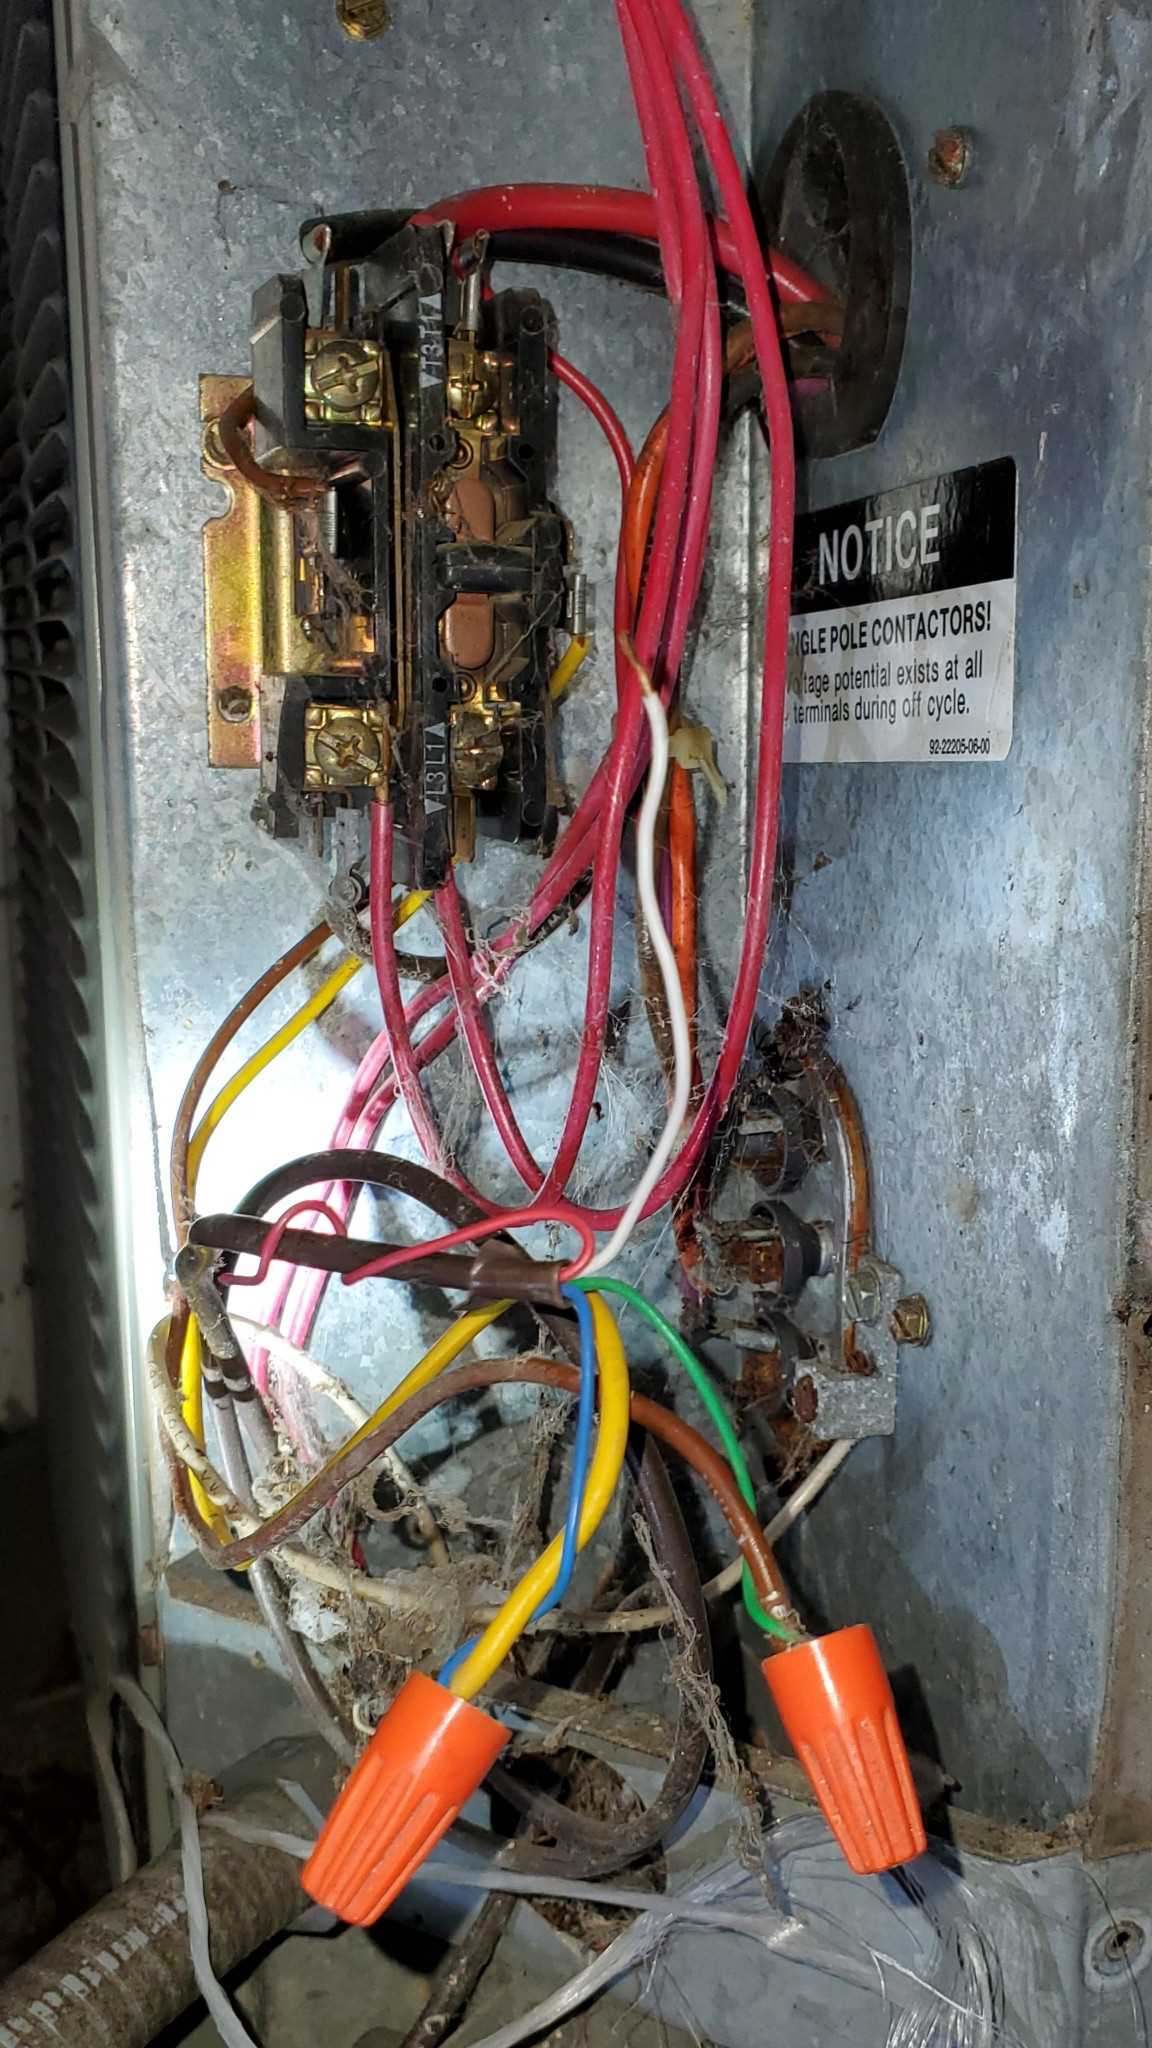
When it comes to wiring your thermostat to your AC unit, it is important to understand the basics of thermostat wiring. The thermostat is the device that controls the temperature in your home, and understanding how it is wired can help you troubleshoot any issues and make necessary adjustments.
Thermostats are typically connected to HVAC systems using a series of color-coded wires. Each wire has a specific function and is connected to a corresponding terminal on both the thermostat and the AC unit. It is important to understand which wire goes where in order to ensure that your thermostat is properly wired.
Here is a breakdown of the different wires commonly used in thermostat wiring:
- R – This wire provides power to the thermostat. It is typically a red wire.
- W – This wire is used for heating and is typically a white wire.
- Y – This wire is used for cooling and is typically a yellow wire.
- G – This wire is used to control the fan and is typically a green wire.
- C – This wire is the common wire and provides a return path for the power. It is typically a blue wire.
These wires are connected to their corresponding terminals on both the thermostat and the AC unit. It is important to note that the wiring configuration may vary depending on the specific HVAC system and thermostat model you have. Always refer to the manufacturer’s instructions or consult with a professional if you are unsure about the wiring.
Understanding the basics of thermostat wiring is essential for troubleshooting and making adjustments to your thermostat and AC unit. By familiarizing yourself with the different wires and their functions, you can ensure that your thermostat is properly wired and functioning correctly.
Gather the Necessary Tools and Materials
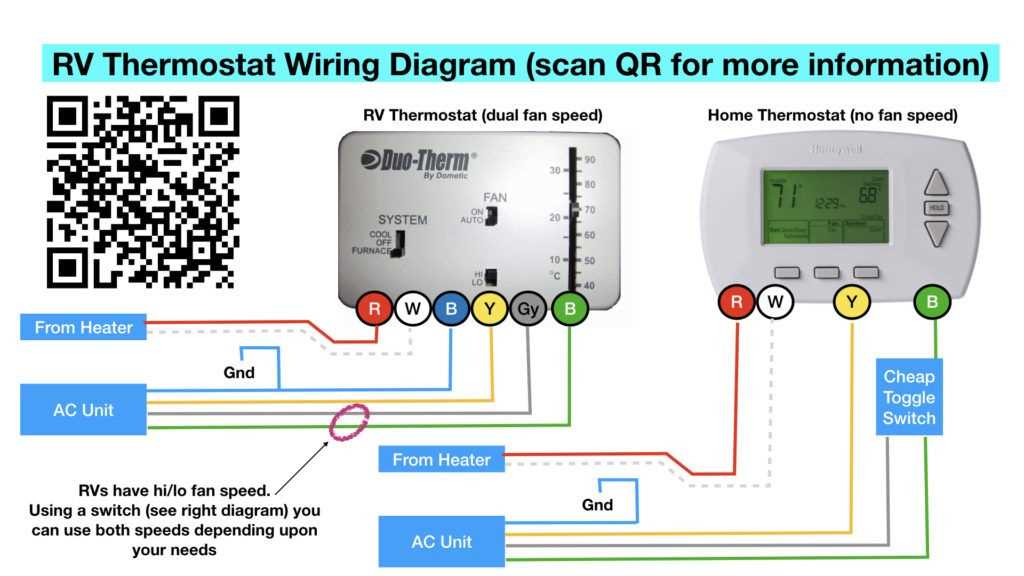
Before you can begin wiring your thermostat to your AC unit, it’s important to gather all the necessary tools and materials. Having everything you need on hand will make the installation process much smoother and ensure that you have everything you need to complete the job correctly.
Here is a list of tools and materials you will need:
- A thermostat
- A screwdriver (typically a Phillips-head)
- A voltage tester or multimeter
- Wire strippers
- Electrical tape
- Wire connectors or nuts
- Labels or tape for labeling wires
- A power drill (if necessary for mounting the thermostat)
Make sure to double-check that you have all the necessary tools and materials before starting the wiring process. Having everything organized and easily accessible will save you time and frustration as you work on connecting your thermostat to your AC unit.
Turn off the Power to the AC Unit
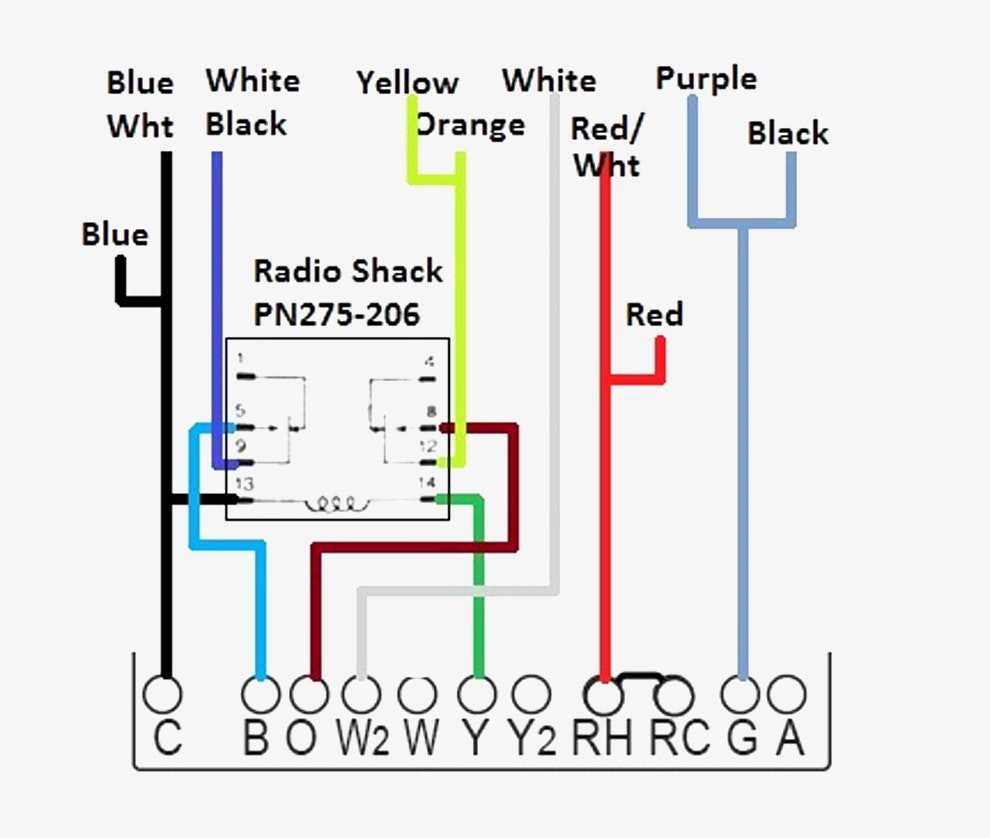
Before attempting to wire a thermostat to your AC unit, it is crucial to turn off the power. This is a necessary safety precaution that will prevent any accidents or electrical shocks. Make sure to locate the circuit breaker that controls the power supply to your AC unit and switch it off. If you are unsure which circuit breaker to turn off, consult the owner’s manual or contact a professional for assistance. It is better to be safe than sorry when working with electricity.
Once you have successfully turned off the power to your AC unit, you can proceed with wiring the thermostat. By doing this, you will ensure that there is no risk of electrical discharge while handling the wires. Remember to always handle electrical components with caution and respect. It is recommended to use tools with insulated handles and to wear protective gear, such as gloves and safety glasses. These precautions will minimize the chance of accidental injuries.
Connect the Thermostat Wires to the AC Unit
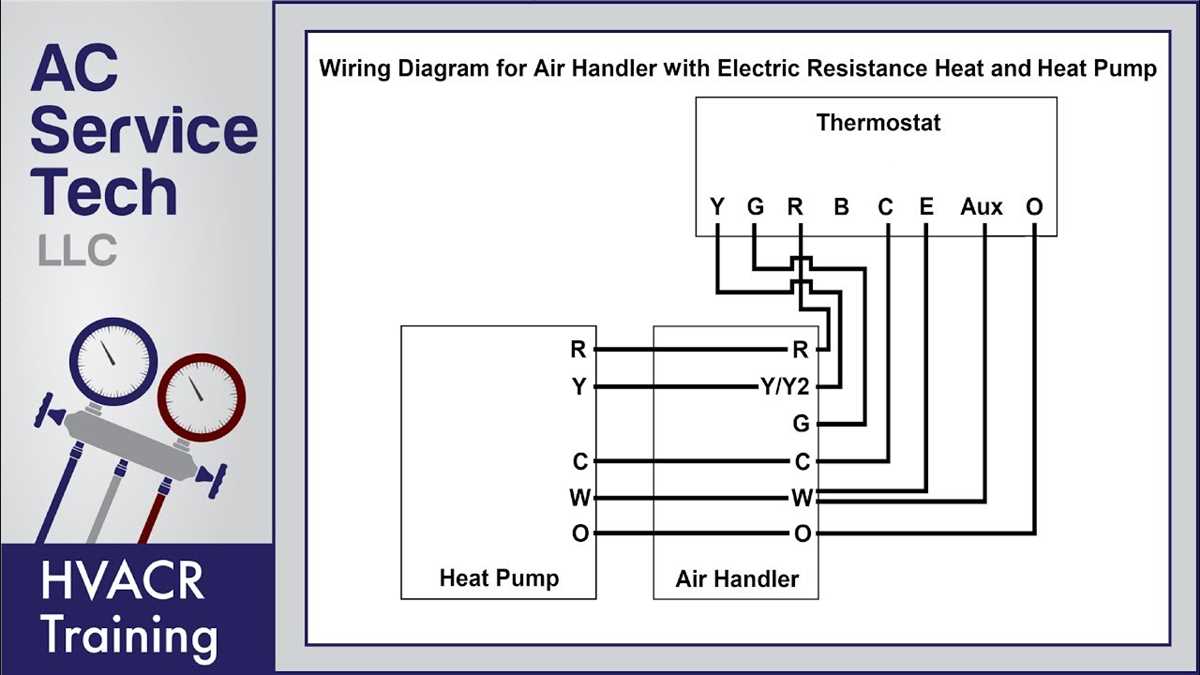
When it comes to wiring a thermostat to an AC unit, there are a few important steps to follow to ensure proper installation. One of these steps is connecting the thermostat wires to the AC unit. This process requires identifying the correct wires and matching them to the corresponding terminals on the AC unit.
Firstly, it is important to turn off the power to the AC unit before attempting any wiring. This can be done by shutting off the circuit breaker that supplies power to the unit. Once the power is off, the thermostat wires can be accessed safely.
To begin connecting the thermostat wires, start by identifying the individual wires and their corresponding functions. The most common wires are usually labeled with abbreviations such as R (for power), C (for common), Y (for cooling), W (for heating), and G (for fan). However, the labeling may vary depending on the specific thermostat and AC unit being installed.
Once the wires have been identified, match each wire to the corresponding terminal on the AC unit. The terminals are usually labeled with the same abbreviations as the wires. For example, the R wire should be connected to the R terminal, the C wire to the C terminal, and so on. It is important to ensure a secure and tight connection between each wire and its terminal to prevent any loose connections.
After all the wires have been properly connected to the AC unit, it is recommended to double-check the connections and ensure that everything is secure. Once confirmed, the power can be turned back on, and the thermostat can be programmed and tested to ensure proper functioning.
Connect the Thermostat Wires to the Thermostat
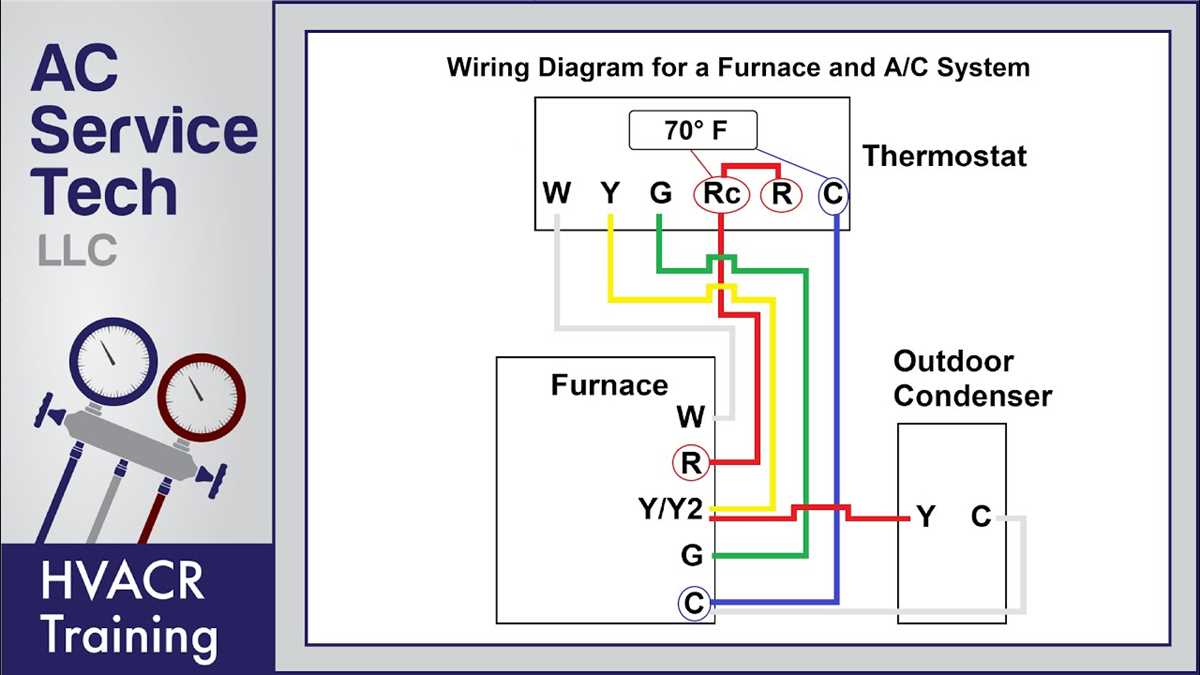
Once you have identified the different thermostat wires and their corresponding terminals on the AC unit, you can begin connecting them to the thermostat. This process requires precision and attention to ensure proper functionality.
Step 1: Begin by turning off the power to your AC unit at the breaker box to ensure safety during the installation process. This will prevent any accidental electrical shocks.
Step 2: Carefully remove the front cover of the thermostat to access the terminal screws. These screws are typically labeled with the corresponding letters or numbers that match the wire colors.
Step 3: Take each wire and connect it to the appropriate terminal screw on the thermostat. Use a small screwdriver to loosen the terminal screws, insert the wire, and then tighten the screws to secure the connection. Ensure that each wire is securely fastened and does not pull out easily.
Step 4: Double-check all the connections to make sure they are correct and properly tightened. Any loose or incorrect connections can lead to improper operation of the thermostat and AC unit.
Step 5: Once all the wires are connected, carefully place the thermostat cover back on, ensuring that it snaps into place securely. This will protect the internal components of the thermostat.
Step 6: Finally, turn the power back on at the breaker box and test the thermostat to make sure it is functioning correctly. Adjust the settings, such as temperature and fan speed, to see if the AC unit responds accordingly.
Test the Thermostat and AC Unit Connection
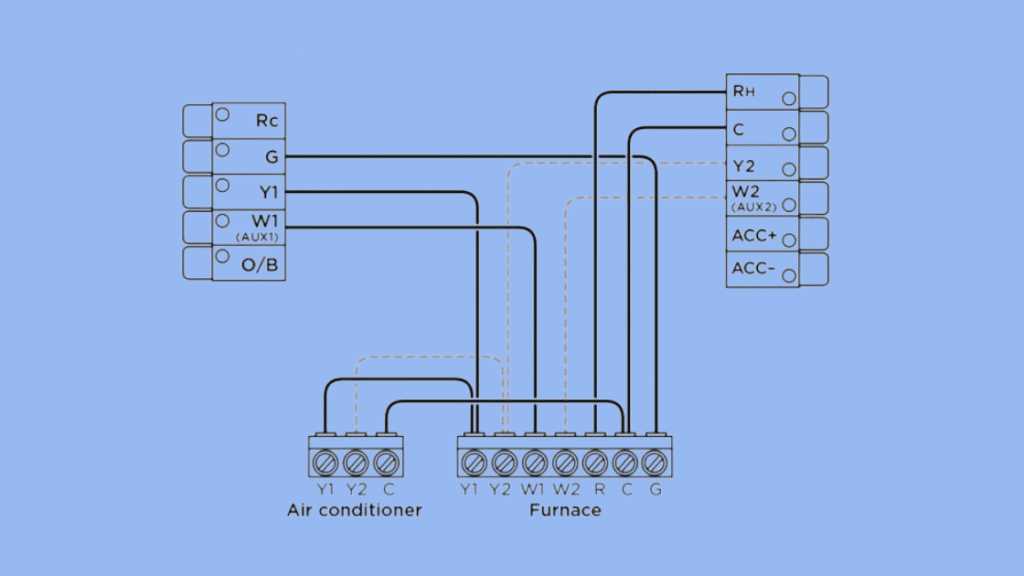
Once you have successfully wired the thermostat to the AC unit, it is important to test the connection to ensure everything is working correctly. Follow these steps to test the thermostat and AC unit connection:
- Turn on the power to the AC unit.
- Set the thermostat to the desired temperature.
- Wait for a few minutes and check if the AC unit turns on.
- If the AC unit turns on and starts cooling the room, the thermostat and AC unit connection is working properly.
- Adjust the temperature on the thermostat and check if the AC unit responds accordingly. This will confirm that the thermostat is communicating with the AC unit effectively.
It is important to note that if the AC unit does not turn on or does not respond to changes in temperature, there may be an issue with the wiring or the thermostat itself. In such cases, it is recommended to consult a professional HVAC technician for further assistance.
Testing the thermostat and AC unit connection is crucial to ensure your cooling system functions properly and efficiently. By following these steps and confirming the connection, you can enjoy a comfortable and controlled indoor environment.