
If you own a 2010 Toyota Tundra and are looking for a wiring diagram for the backup camera, you’re in the right place. Installing a backup camera in your vehicle can greatly improve your safety when reversing and parking. However, knowing how to properly wire the camera can be a bit tricky. That’s why we’ve put together this comprehensive guide to help you navigate the wiring process.
The first thing you’ll need is a wiring diagram specific to your 2010 Tundra model. This diagram will show you the exact connections and wire colors for the backup camera. It’s crucial to follow this diagram carefully to ensure that the camera functions properly and that you don’t cause any damage to your vehicle’s electrical system.
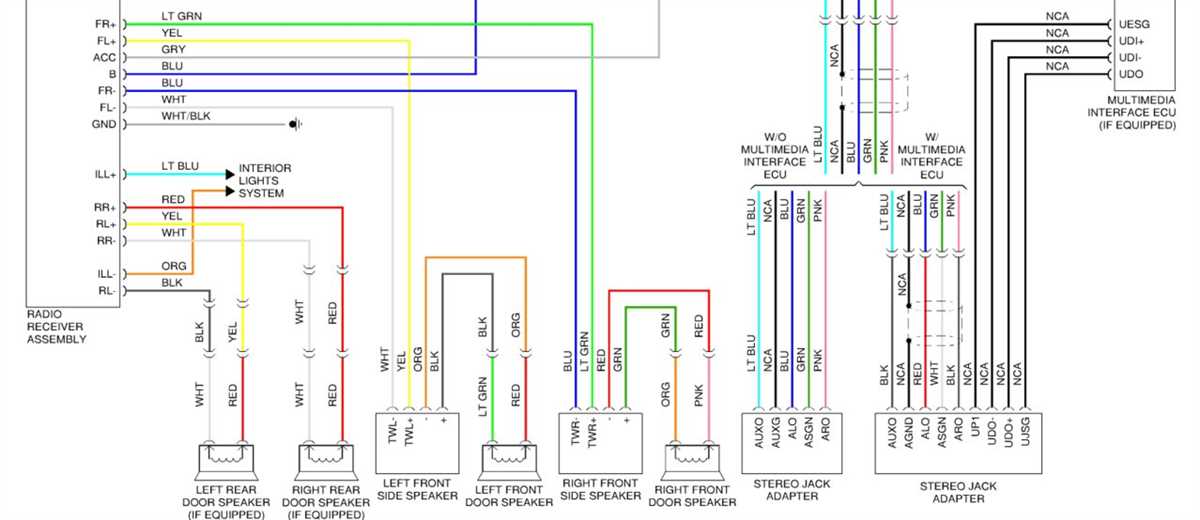
The wiring diagram will typically include information on the camera’s power source, ground wire, video signal wire, and any additional connections that may be required for features like night vision or parking lines. It may also provide instructions on how to access the necessary wires behind your vehicle’s dashboard or tailgate.
Before you begin the installation process, it’s important to gather all the necessary tools and materials. This may include a multimeter, wire strippers, electrical tape, wire connectors, and zip ties. Additionally, you may need to purchase additional wiring harnesses or adapters specific to your Tundra model.
Overall, with the help of a detailed wiring diagram and the right tools, installing a backup camera in your 2010 Toyota Tundra can be a manageable DIY project. Just remember to take your time, double-check all connections, and follow the instructions provided. With a little patience and effort, you’ll soon have a fully functional and reliable backup camera to enhance your driving experience.
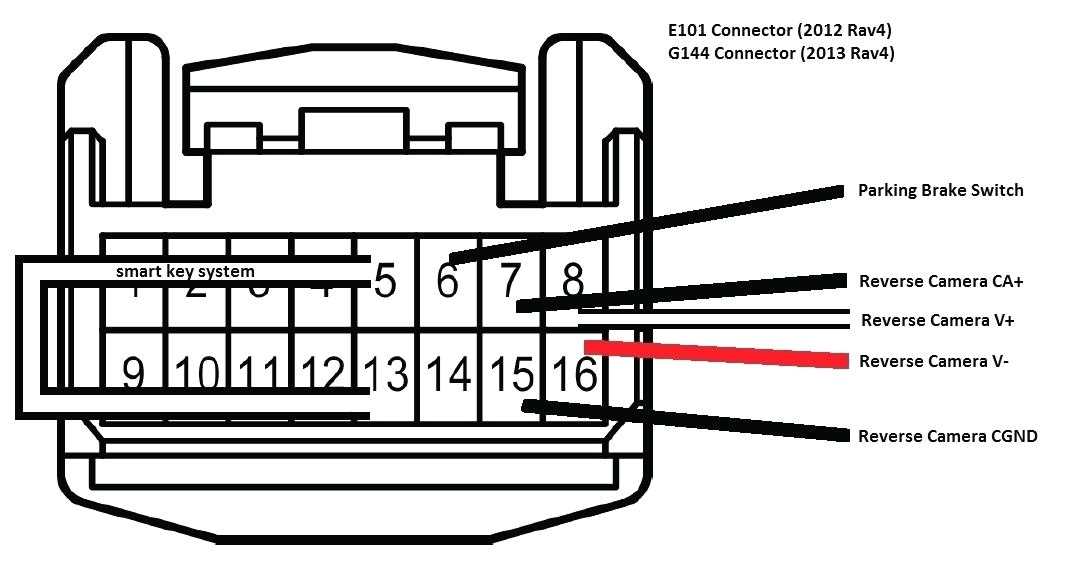
2010 Tundra Backup Camera Wiring Diagram
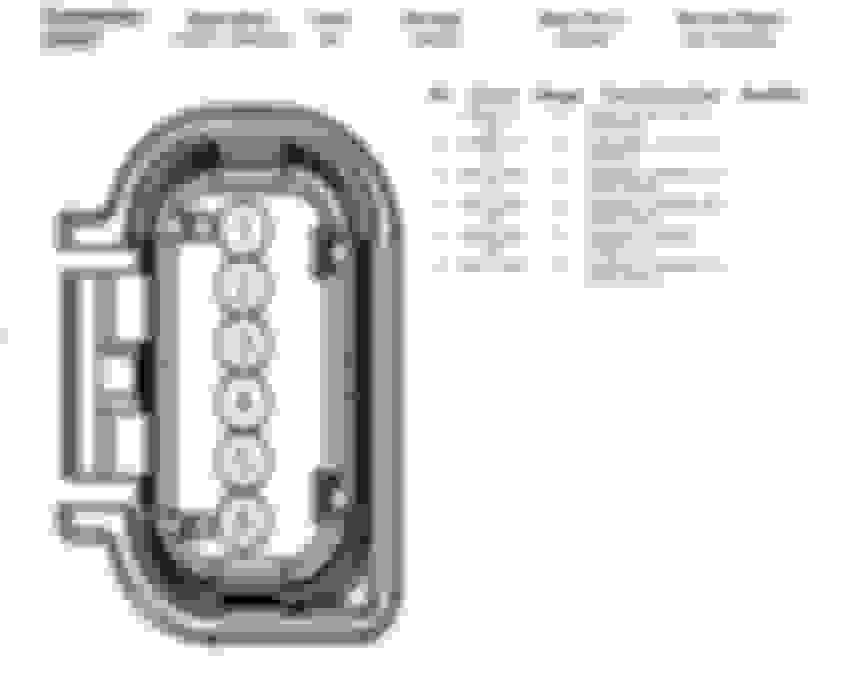
The 2010 Tundra backup camera wiring diagram provides a detailed overview of how the camera system is wired in the vehicle. It shows the various connections and components involved in the installation of the backup camera. Having a wiring diagram can be useful for troubleshooting and understanding the camera system’s functionality.
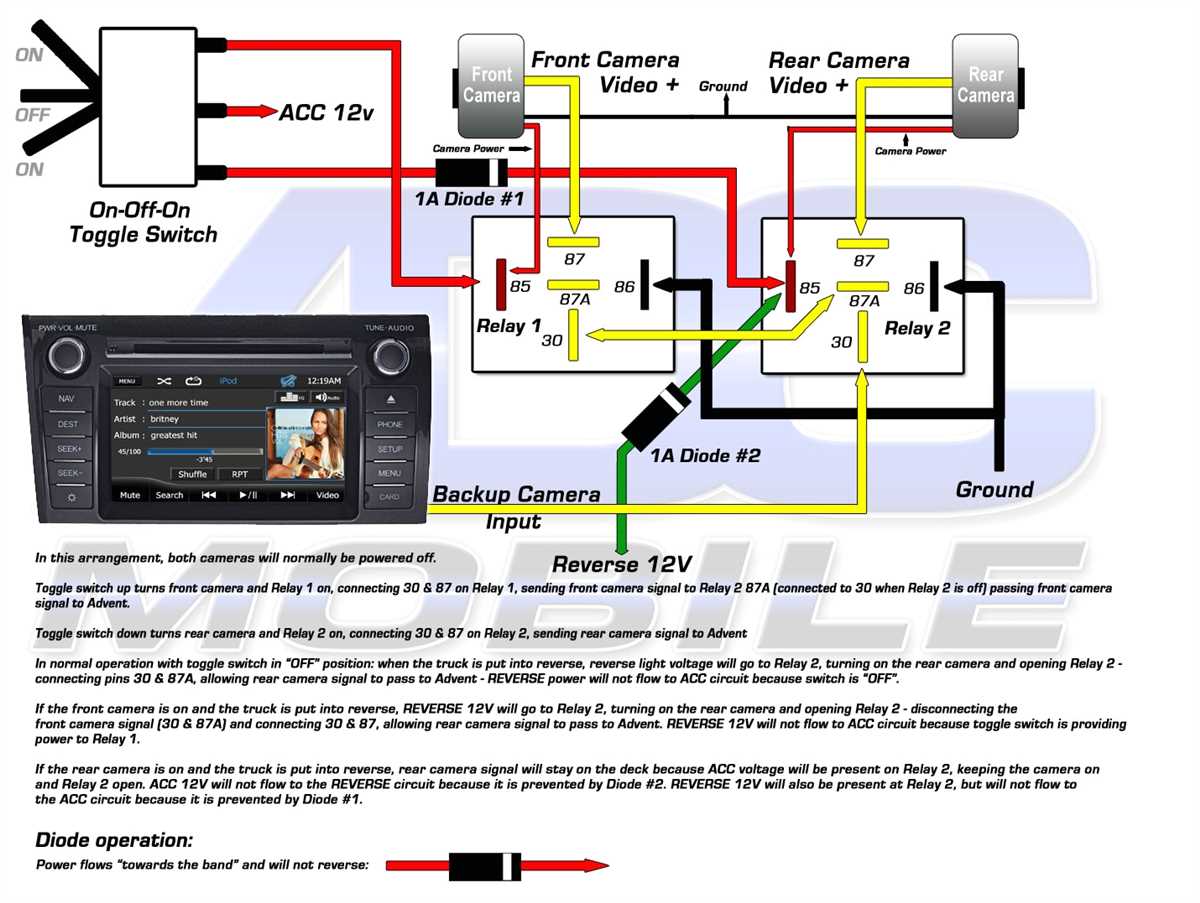
The wiring diagram typically includes information about the camera’s power source, video signal connection, ground connection, and any additional components like switches or relays. It illustrates the path of the wiring from the camera to the display monitor or other components in the vehicle.
One important aspect shown in the wiring diagram is the connection to the reverse lights. The camera system is often designed to activate automatically when the vehicle is put into reverse, and this is achieved by tapping into the power supply of the reverse lights. The wiring diagram will indicate the specific wire to connect to, ensuring that the camera system functions as intended.
Additionally, the wiring diagram may include information about the camera’s mounting location and any necessary drilling or routing of wiring through the vehicle. This can be helpful for both installation and troubleshooting purposes, allowing owners to understand the physical layout of the camera system.
In summary, the 2010 Tundra backup camera wiring diagram provides a comprehensive guide to the wiring and installation of the camera system in the vehicle. It is a valuable resource for owners and technicians alike, ensuring proper installation and functionality of the backup camera.
Overview of Tundra Backup Camera
The backup camera is an essential feature in the 2010 Tundra, providing drivers with a clear view of what is behind their vehicle while backing up. It enhances safety and convenience, making parking and maneuvering in tight spaces much easier.
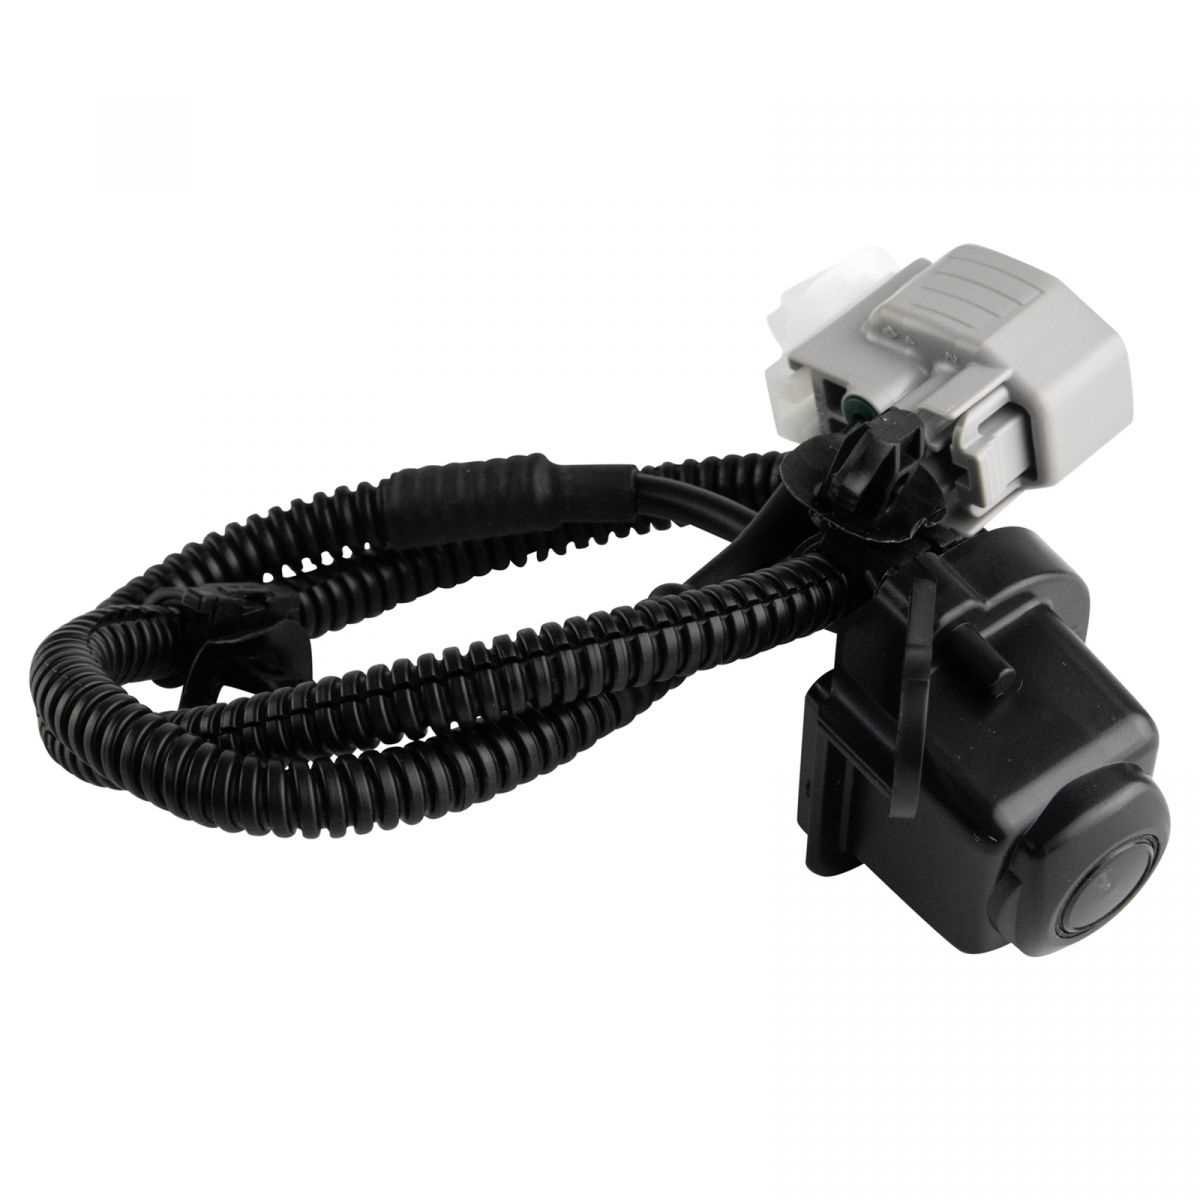
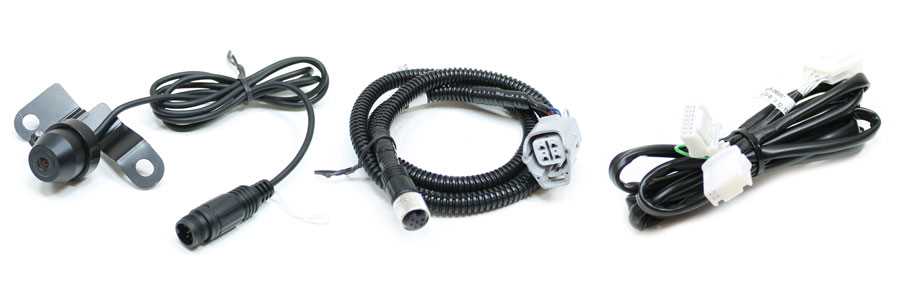
Installation: The backup camera is typically installed on the rear bumper or tailgate handle of the Tundra. It is connected to the vehicle’s electrical system and integrated with the infotainment system or rearview mirror display. The wiring diagram provides a guide on how to connect the camera to the appropriate wires for power and video signal transmission.
Components: The backup camera system consists of several components. These include the camera itself, a control module, and a display unit. The camera captures the view behind the vehicle, while the control module processes the video signal and sends it to the display unit. The display unit is usually located in the center console or rearview mirror, providing the driver with a live view of what the camera sees.
Functionality: When the driver engages the reverse gear, the backup camera is activated and starts transmitting a video feed to the display unit. The display unit shows the live view, providing guidelines or markers to assist with parking and maneuvering. Some backup camera systems also include features like distance measurements, trajectory lines, and object detection alerts.
Benefits: The Tundra backup camera offers several benefits for drivers. It improves safety by reducing blind spots and providing a clear view of obstacles, pedestrians, or other vehicles behind the vehicle. It also helps prevent accidents, especially in busy parking lots or when backing out of driveways. Additionally, the backup camera enhances convenience, making it easier for drivers to park accurately and navigate tight spaces.
In conclusion, the backup camera in the 2010 Tundra is a valuable feature that enhances safety and convenience. Its installation involves connecting the camera to the vehicle’s electrical system, and it consists of components like the camera, control module, and display unit. The functionality includes providing a live view of the area behind the vehicle, with various features to assist with parking and maneuvering. Overall, the Tundra backup camera offers several benefits, making it an essential addition for any Tundra owner.
Benefits of Installing a Backup Camera on a 2010 Tundra

Installing a backup camera on a 2010 Tundra can provide several benefits that can greatly enhance the safety and convenience of the vehicle. By improving visibility and reducing blind spots, a backup camera can help prevent accidents and make parking much easier.
One of the main advantages of a backup camera is that it allows the driver to have a clear view of the area behind the vehicle. This is especially useful when parallel parking or maneuvering in tight spaces. The camera provides a live feed of the rear view on a screen inside the vehicle, making it easier to see any obstacles or pedestrians that may be in the way.
Furthermore, a backup camera can help to eliminate blind spots that are common in larger vehicles like the 2010 Tundra. The camera provides a wide-angle view, allowing the driver to see areas that may not be visible from the side mirrors alone. This additional visibility can help prevent accidents and make lane changes much safer.
In addition to improving safety, a backup camera can also make the process of reversing and parking much more convenient. Instead of relying solely on mirrors and guesswork, the camera provides a precise view of the rear view, making it easier to align the vehicle and avoid hitting obstacles. This can save both time and frustration, especially in crowded parking lots or when hitching trailers or carrying large cargo.
In conclusion, installing a backup camera on a 2010 Tundra can provide numerous benefits, including improved safety, enhanced visibility, and added convenience. It is an investment that can greatly enhance the overall driving experience and reduce the risk of accidents or damage to the vehicle.
Required Tools and Materials
When installing a backup camera in a 2010 Tundra, it is important to have the right tools and materials on hand. This will ensure a smooth and successful installation process. Here are some of the items you will need:
- Wire cutter/stripper: This tool is essential for cutting and stripping the wires of the backup camera. It allows for clean and precise cuts, ensuring a proper connection.
- Soldering iron: A soldering iron is used to create a strong and reliable connection between the wires of the backup camera and the wiring harness of the Tundra. This ensures a secure and long-lasting installation.
- Heat shrink tubing: Heat shrink tubing is used to protect the soldered connections from moisture, corrosion, and other environmental factors. It provides insulation and enhances the durability of the installation.
- Electrical tape: Electrical tape is an important tool for insulating and securing the wiring connections. It helps to prevent any short circuits or electrical issues.
- Power drill: A power drill is necessary for drilling holes to mount the camera and run the wiring through the vehicle. It allows for a clean and professional-looking installation.
- Mounting brackets: Mounting brackets are used to securely attach the backup camera to the vehicle. They provide stability and ensure the camera stays in place while driving.
- Wiring harness adapter: A wiring harness adapter is needed to connect the backup camera to the existing wiring system of the Tundra. It simplifies the installation process and ensures compatibility.
- Camera monitor or display: You will need a camera monitor or display to view the live feed from the backup camera. This can be a standalone monitor or integrated into the existing multimedia system of the Tundra.
- User manual and wiring diagram: It is important to have the user manual and wiring diagram for both the backup camera and the Tundra. These documents provide instructions and guidance for the installation process.
By having these tools and materials ready, you can ensure a successful installation of a backup camera in your 2010 Tundra. It is important to follow the instructions provided by the manufacturer and take necessary safety precautions during the installation process.
Step-by-Step Guide for Wiring the Backup Camera
Installing a backup camera in your 2010 Tundra can be a valuable addition to your vehicle, providing you with added safety and convenience. Here is a step-by-step guide to help you wire the backup camera correctly.
Materials Needed:
- Backup camera unit
- Wiring harness
- Power drill
- Electrical tape
- Wire strippers
- Wire connectors
- Fuse tap
- Fuse
- Screwdriver
Step 1: Mount the Camera
Start by finding a suitable location to mount the backup camera on the back of your Tundra. Ensure that it provides a clear view of the area behind the vehicle. Use a power drill to make holes for the camera and secure it in place using screws or adhesive.
Step 2: Connect the Camera to the Wiring Harness
Take the wiring harness that came with the backup camera and connect it to the camera unit. Make sure the connections are secure and use electrical tape to protect them from moisture and damage.
Step 3: Route the Wiring Harness

Next, route the wiring harness from the camera to the interior of your Tundra. Look for existing wire channels or openings to thread the wire through, ensuring it is hidden and protected along the way.
Step 4: Connect the Wiring Harness to the Reverse Light
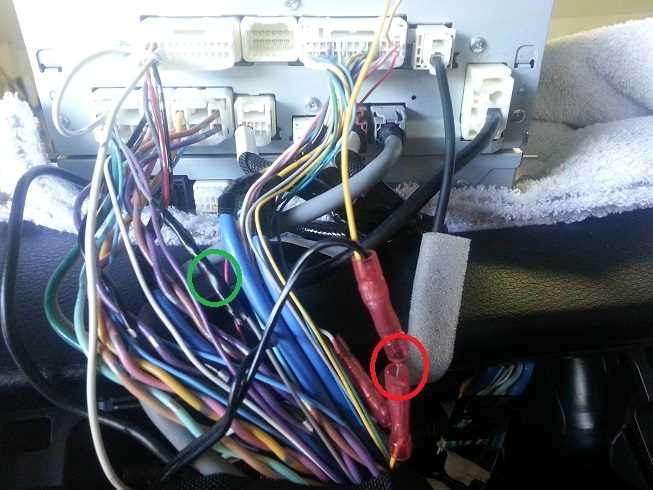
Locate the reverse light wiring in your Tundra’s tailgate. Use a wire stripper to expose a section of the wires, and then use wire connectors to connect the camera’s wiring harness to the reverse light wiring. This will allow the camera to activate when you put your vehicle in reverse.
Step 5: Connect the Wiring Harness to the Power Source
Locate a suitable power source for the backup camera, such as the fuse box or the vehicle’s battery. Use a fuse tap to connect the camera’s wiring harness to the power source and ensure it has a fuse for protection against electrical faults.
Step 6: Test and Adjust
Once everything is connected, test the backup camera by putting your vehicle in reverse. Adjust the camera angle if necessary to ensure a clear view of the area behind your Tundra. Make any final adjustments or tighten any loose connections if needed.
Following these step-by-step instructions will help you successfully wire your backup camera in your 2010 Tundra. Enjoy the added safety and convenience that it brings to your vehicle!
Tips for Troubleshooting and Common Issues
When it comes to troubleshooting and resolving common issues with the backup camera wiring on a 2010 Tundra, there are a few tips to keep in mind. These tips can help you identify and fix any problems you may encounter with your backup camera system.
1. Check the connections
One of the most common issues with backup camera wiring is loose or faulty connections. Before diving into more complex troubleshooting, make sure all connections are secure and properly connected. This includes checking the wiring harness, camera connections, and any connectors in between.
2. Inspect the wiring
Inspect the wiring for any visible signs of damage, such as fraying or cuts. Damaged wiring can cause issues with the backup camera system. If you notice any damage, it’s important to repair or replace the wiring as soon as possible.
3. Test the camera
If the connections and wiring appear to be in good condition, the next step is to test the camera itself. Use a multimeter to check for proper voltage and continuity. This will help determine if the camera is functioning correctly or if it needs to be replaced.
4. Check the monitor

If the camera is functioning properly, the issue may lie with the monitor. Test the monitor by connecting it to another camera or device to see if it displays properly. If the monitor is not receiving the camera feed, it may need to be replaced.
5. Consult a professional
If you have tried the above troubleshooting steps and are still experiencing issues with your backup camera wiring, it may be best to consult a professional. They will have the expertise and tools necessary to diagnose and repair any complex issues that may be causing the problem.
Overall, troubleshooting backup camera wiring on a 2010 Tundra requires careful inspection of connections and wiring, testing the camera and monitor, and seeking professional help if needed. By following these tips, you can resolve common issues and ensure your backup camera system is functioning properly.