
Installing an Auto Meter tachometer in your vehicle can provide valuable information about your engine’s performance and help you monitor its RPMs accurately. However, before you can start enjoying the benefits of this device, you need to know how to wire it correctly.
When it comes to Auto Meter tach wiring, it’s essential to follow a step-by-step guide to ensure a successful installation. The wiring process may vary depending on your vehicle’s make and model, but the basic principles remain the same. This article will walk you through the process, giving you the knowledge you need to tackle this project with confidence.
First and foremost, you need to gather all the necessary tools and materials for the job. This includes the Auto Meter tachometer, wiring harness, electrical connectors, wire strippers, crimping tool, electrical tape, and a wiring diagram specific to your vehicle. Having these items on hand will make the installation process much smoother and help prevent any frustration along the way.
Once you have everything you need, the next step is to locate the appropriate wires in your vehicle’s wiring harness. This can be a bit tricky, but the wiring diagram will be your best friend during this process. Take your time and double-check each wire before making any connections. It’s crucial to connect the tachometer’s power, ground, and signal wires correctly to ensure accurate readings and prevent any damage to the device or your vehicle’s electrical system.
By following these steps and referring to the wiring diagram, you can successfully wire an Auto Meter tachometer in your vehicle. Remember to take your time, double-check your connections, and ensure that all wires are properly insulated. With a little patience and attention to detail, you’ll be enjoying the benefits of your new tachometer in no time.
What is Auto Meter Tach Wiring?
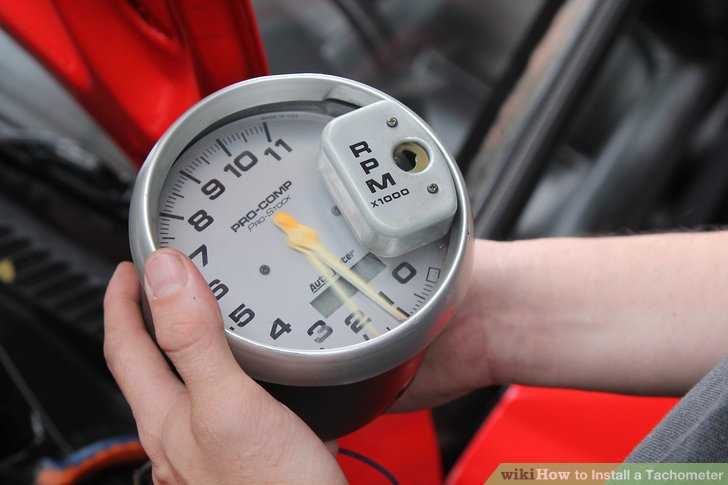
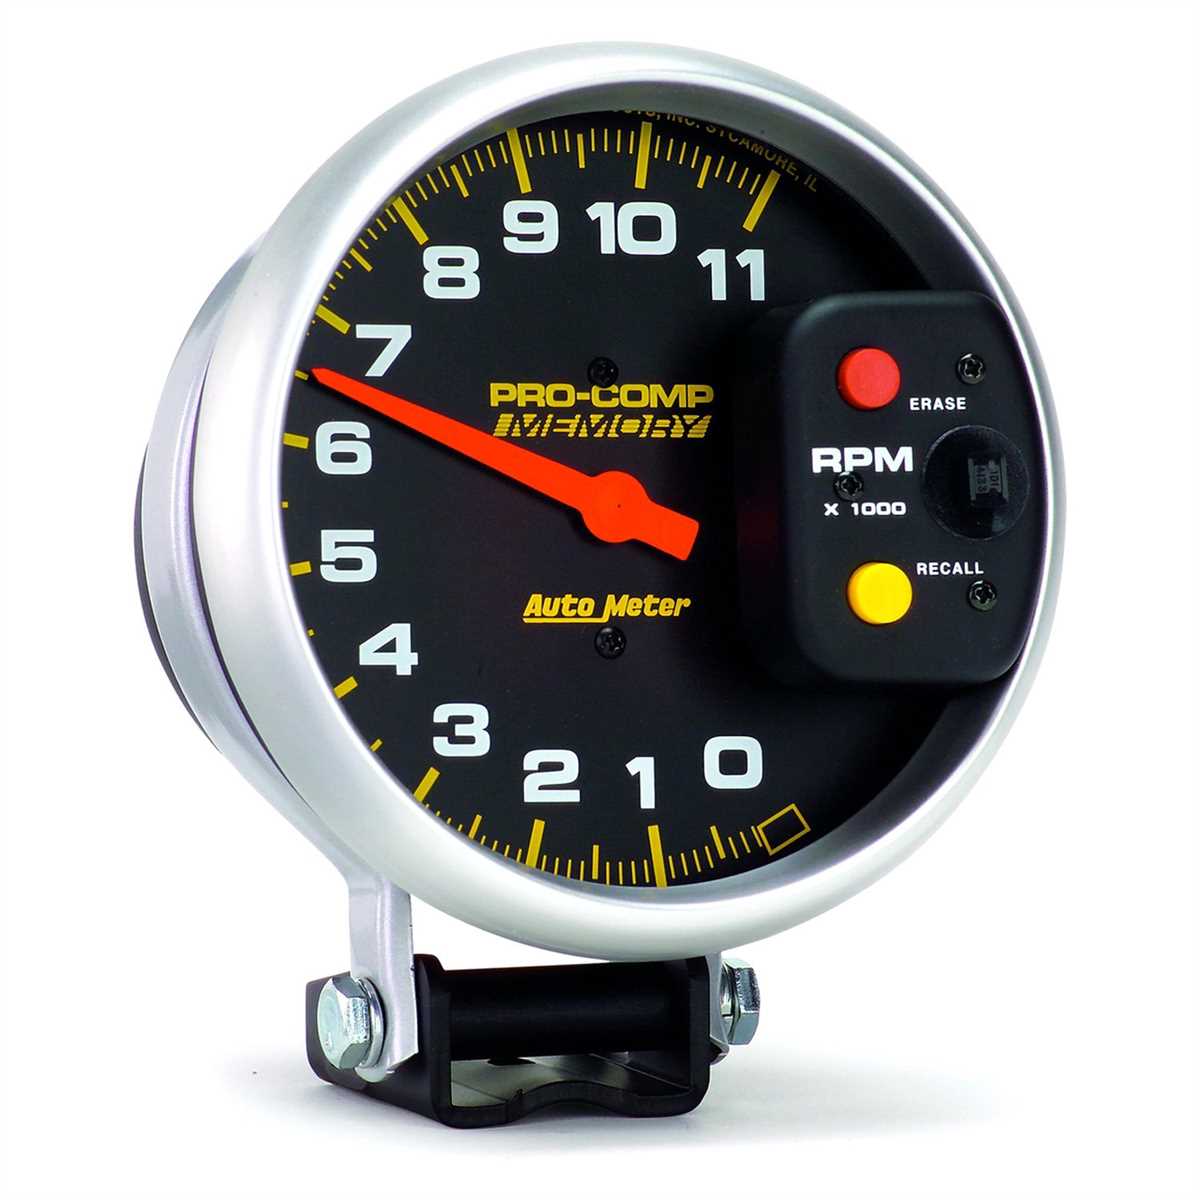
Auto Meter tach wiring refers to the process of connecting an Auto Meter tachometer to a vehicle’s electrical system. A tachometer, or tach for short, is a device that measures the rotational speed of the engine’s crankshaft. It provides the driver with valuable information about the engine’s performance, such as the RPM (revolutions per minute) at which the engine is running. Auto Meter is a well-known brand that manufactures high-quality tachometers and other automotive gauges.
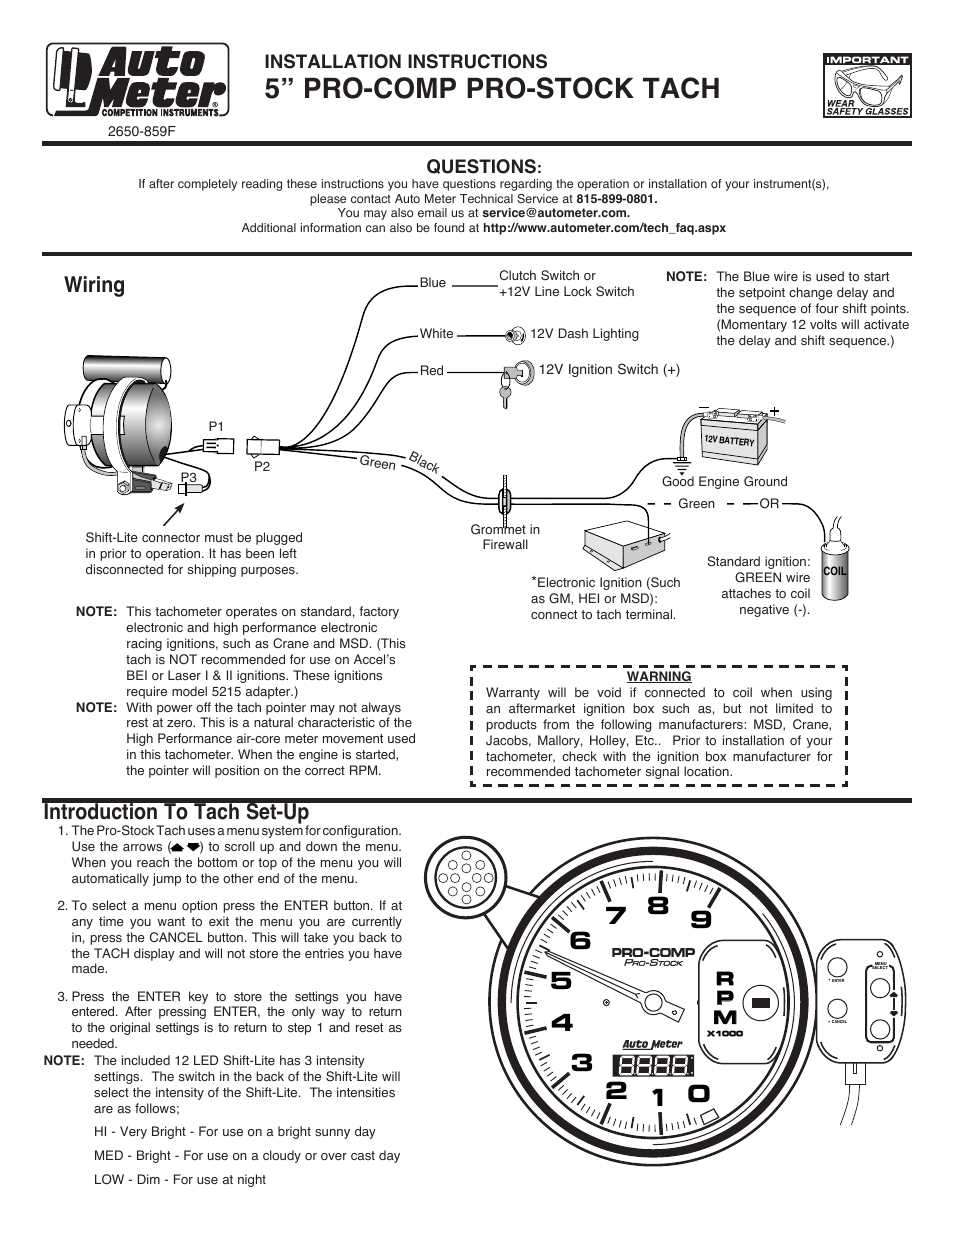
The wiring process for an Auto Meter tachometer involves connecting the necessary wires from the tachometer to the vehicle’s electrical system. This typically includes connections to the ignition coil or ignition module, as well as a power source and ground. The specific wiring instructions may vary depending on the make and model of the vehicle, as well as the specific tachometer being installed.
It is important to follow the wiring instructions provided by Auto Meter to ensure proper installation and operation of the tachometer. Incorrect wiring can result in inaccurate readings or damage to the tachometer or the vehicle’s electrical system. It is also important to ensure that the wiring connections are secure and properly insulated to prevent any electrical issues.
Overall, Auto Meter tach wiring is the process of connecting an Auto Meter tachometer to a vehicle’s electrical system in order to monitor the engine’s RPM. It is a crucial step in installing a tachometer and requires careful attention to detail to ensure proper functionality.
The Importance of Auto Meter Tach Wiring
Auto Meter tachometers are used in vehicles to measure the engine’s RPM (revolutions per minute). They provide crucial information to drivers and mechanics, allowing them to monitor the engine’s performance and make adjustments as necessary. Proper wiring of an Auto Meter tachometer is essential for its accurate and reliable operation.
When installing an Auto Meter tachometer, it is important to follow the manufacturer’s instructions for wiring. This ensures that the tachometer receives the correct signals from the vehicle’s ignition system. The wiring should be done in a way that minimizes interference and ensures a stable and consistent reading on the tachometer.
Key Points:
- Proper wiring of an Auto Meter tachometer is essential for accurate and reliable operation.
- Following the manufacturer’s instructions is crucial for correct wiring.
- Wiring should be done in a way that minimizes interference and ensures a stable reading.
- An incorrectly wired tachometer may give inaccurate readings or fail to work altogether.
- Regular testing and maintenance of the tachometer wiring is important to prevent any issues.
Incorrectly wiring an Auto Meter tachometer can lead to various problems. It may result in inaccurate readings, where the tachometer display does not match the actual RPM of the engine. This can be misleading and prevent drivers and mechanics from accurately assessing the performance of the engine.
In some cases, if the tachometer is not wired correctly, it may fail to work altogether. This can be frustrating and may lead to additional troubleshooting and repair work. To avoid these issues, it is crucial to carefully follow the manufacturer’s instructions and ensure that the wiring is done correctly.
Regular testing and maintenance of the tachometer wiring is also important. This helps to identify any potential issues or malfunctions early on and allows for timely repairs or adjustments. It is recommended to consult a professional or refer to the tachometer’s user manual for specific instructions on testing and maintenance procedures.
In conclusion, proper Auto Meter tach wiring is of utmost importance for accurate and reliable readings of the engine’s RPM. Following the manufacturer’s instructions, minimizing interference, and conducting regular testing and maintenance are key to ensuring the tachometer functions correctly and provides valuable information to the driver and mechanics.
How to Install Auto Meter Tach Wiring
Installing an Auto Meter tachometer in your vehicle can provide valuable information about your engine’s RPM and help you monitor its performance. Proper wiring is crucial for the tachometer to function correctly. Here are the steps to follow when installing Auto Meter tach wiring:
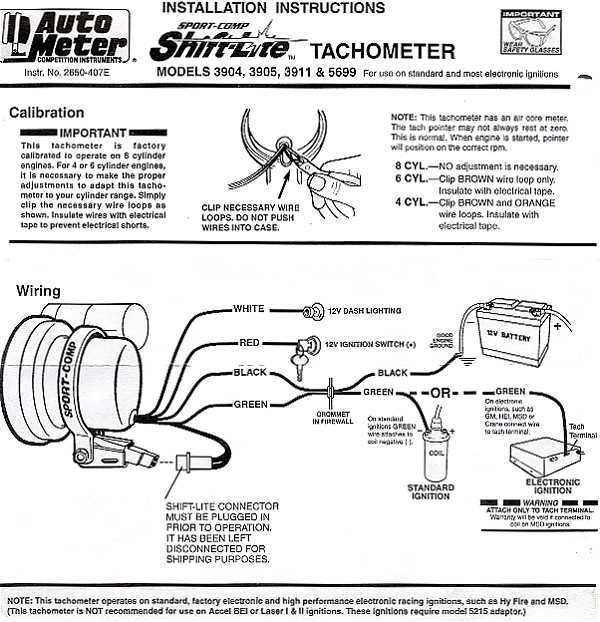
- Locate a Suitable Power Source: Before beginning the installation, find a power source that will provide a 12V power supply when the ignition is turned on. This can be a fuse box, ignition switch, or any other appropriate electrical source in your vehicle.
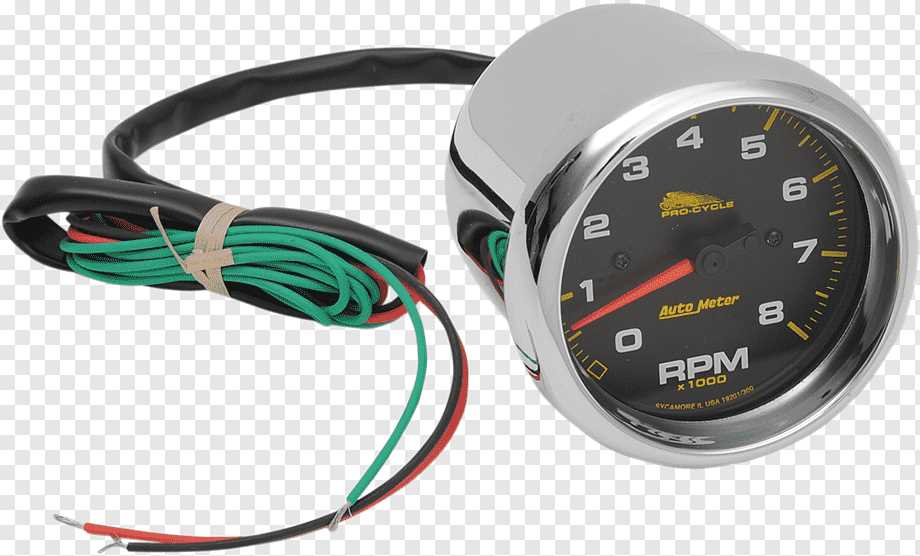
- Connect the Red Wire: Take the red wire from the Auto Meter tachometer and connect it to the chosen power source. Use a wire tap or splice connector to ensure a secure connection. Make sure to use the appropriate gauge wire for the power supply to handle the tachometer’s current requirements.
- Ground the Black Wire: Connect the black wire from the tachometer to a suitable ground location on the vehicle. This can be a bolt or screw on the vehicle’s chassis. Ensure a solid connection to avoid any electrical issues.
- Connect the Green Wire: The green wire is for the tachometer signal input. It needs to be connected to the negative side of the ignition coil or any other suitable location that provides a reliable tach signal. Refer to your vehicle’s manual or wiring diagram to locate the appropriate connection point.
- Secure the Wiring: After connecting all the wires, make sure to secure them properly to prevent any interference or damage. Use zip ties or electrical tape to bundle and route the wires away from any heat sources or moving components.
Following these steps will ensure a proper installation of Auto Meter tachometer wiring in your vehicle. Always refer to the manufacturer’s instructions for specific details and consult a professional if you are unsure about any wiring procedures.
Common Issues with Auto Meter Tach Wiring
When it comes to installing and wiring an Auto Meter tachometer, there are a few common issues that enthusiasts may encounter. These issues can range from simple wiring mistakes to more complex technical problems. Understanding these common issues can help troubleshoot and resolve any problems that may arise during the installation process.
One common issue with Auto Meter tachometer wiring is incorrect connections. It is crucial to follow the manufacturer’s instructions and wiring diagrams carefully to ensure that the tachometer is connected to the correct power and ground sources. Additionally, it is important to ensure that the tachometer is receiving a signal from the ignition coil or the vehicle’s electronic control unit (ECU) for accurate RPM readings.
Another common issue is improper grounding. A solid and clean ground connection is essential for the proper functioning of the tachometer. It is recommended to use a dedicated ground wire and connect it to a clean, bare metal surface on the vehicle’s chassis. This will help prevent any electrical interference or erratic readings that can occur with a poor ground connection.
Furthermore, compatibility issues with aftermarket ignition systems can also pose challenges in Auto Meter tachometer wiring. Some aftermarket ignition systems may require additional wiring or modifications to work properly with the tachometer. It is essential to consult both the tachometer and ignition system manufacturer’s instructions to ensure compatibility and proper installation.
In conclusion, common issues with Auto Meter tachometer wiring can include incorrect connections, improper grounding, and compatibility issues with aftermarket ignition systems. By following the manufacturer’s instructions and double-checking all connections, enthusiasts can avoid these common issues and enjoy accurate RPM readings from their tachometers.
How to Troubleshoot Auto Meter Tach Wiring
If you’re experiencing issues with your Auto Meter tachometer not working properly, it’s important to troubleshoot the wiring to identify and resolve the problem. Here are some steps you can follow to troubleshoot the wiring of your Auto Meter tachometer.
1. Check the Power Source
Start by checking the power source to ensure that the tachometer is receiving power. Use a multimeter to test the voltage at the power wire of the tachometer. If there is no voltage, make sure that the power wire is properly connected to a reliable power source, such as the ignition switch or a fuse box. If the power wire is connected properly and there is still no voltage, check the fuse for the tachometer and replace it if necessary.
2. Inspect the Ground Connection
The ground connection is essential for the proper functioning of the tachometer. Ensure that the ground wire is securely connected to a clean and unpainted metal surface. Use a multimeter to test the continuity between the ground wire and the metal surface. If there is no continuity, clean the connection or find a new grounding point.
3. Verify the Signal Wire
Next, verify the signal wire, which connects the tachometer to the ignition system. Use a multimeter to test the continuity between the signal wire and the ignition coil. If there is no continuity, check for any loose connections or damaged wiring along the signal wire. Repair or replace the wiring as necessary.
4. Check for Interference
Interference from other electrical components or devices can cause issues with the tachometer. Check for any nearby devices or wires that may be causing interference, such as spark plug wires or ignition coils. If necessary, reroute the wiring or shield it to minimize interference.
By following these troubleshooting steps, you can identify and resolve any wiring issues with your Auto Meter tachometer. If the problem persists, it may be necessary to seek professional assistance or contact Auto Meter for further support.
Tips for Maintaining Auto Meter Tach Wiring
Proper maintenance of your Auto Meter tachometer wiring is crucial to ensure accurate and reliable performance. Here are some tips to help you keep your tach wiring in top shape:
1. Regularly Inspect the Wiring
Periodically check the wiring of your Auto Meter tachometer for any signs of damage or wear. Look for frayed or exposed wires, loose connections, or any other issues that may affect the functionality of the tachometer. If you notice any problems, address them promptly to prevent further damage.
2. Keep the Wiring Clean and Dry
It is important to keep the wiring of your Auto Meter tachometer clean and dry to prevent corrosion and other electrical issues. Avoid exposing the wiring to moisture or contaminants, and clean it regularly with a dry cloth or compressed air to remove any dirt or debris that may have accumulated.
3. Secure the Wiring Properly
Ensure that the wiring of your Auto Meter tachometer is secured properly to prevent it from coming loose or getting entangled with other components. Use zip ties or other appropriate fasteners to secure the wiring in place, taking care not to put excessive strain on the wires that may cause damage.
4. Follow the Wiring Diagram
Refer to the wiring diagram provided by Auto Meter for your specific tachometer model and follow it carefully during installation and maintenance. Using the correct wiring connections and routing will help ensure the proper functioning of your tachometer and prevent any potential issues.
5. Seek Professional Help if Needed
If you are unsure about any aspect of maintaining your Auto Meter tachometer wiring or if you encounter any problems that you cannot resolve on your own, it is advisable to seek professional help. A qualified technician or electrician with experience in automotive electrical systems can provide the necessary expertise and assistance.
By following these tips and staying proactive in maintaining your Auto Meter tachometer wiring, you can enjoy accurate and reliable performance from your tachometer for years to come.