
If you own a Ryobi blower, you may have encountered issues with its fuel line. The fuel line plays a crucial role in delivering fuel from the tank to the engine, and any blockages or leaks can affect the blower’s performance. In this article, we will provide you with a diagram of the Ryobi blower fuel line, helping you understand its layout and components.
Understanding the fuel line diagram is essential for troubleshooting and making repairs. It allows you to identify the different parts, such as the fuel tank, fuel filter, primer bulb, and carburetor. By visually mapping out the fuel line system, you can locate potential areas of concern and address them accordingly.
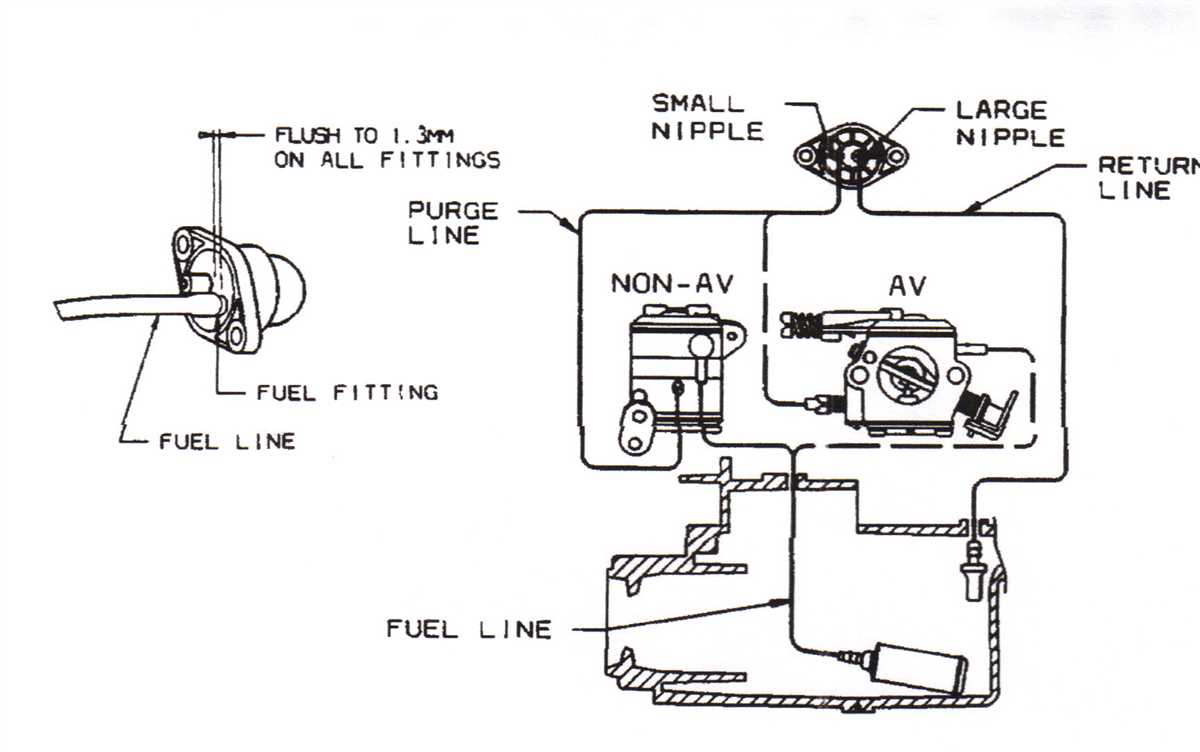
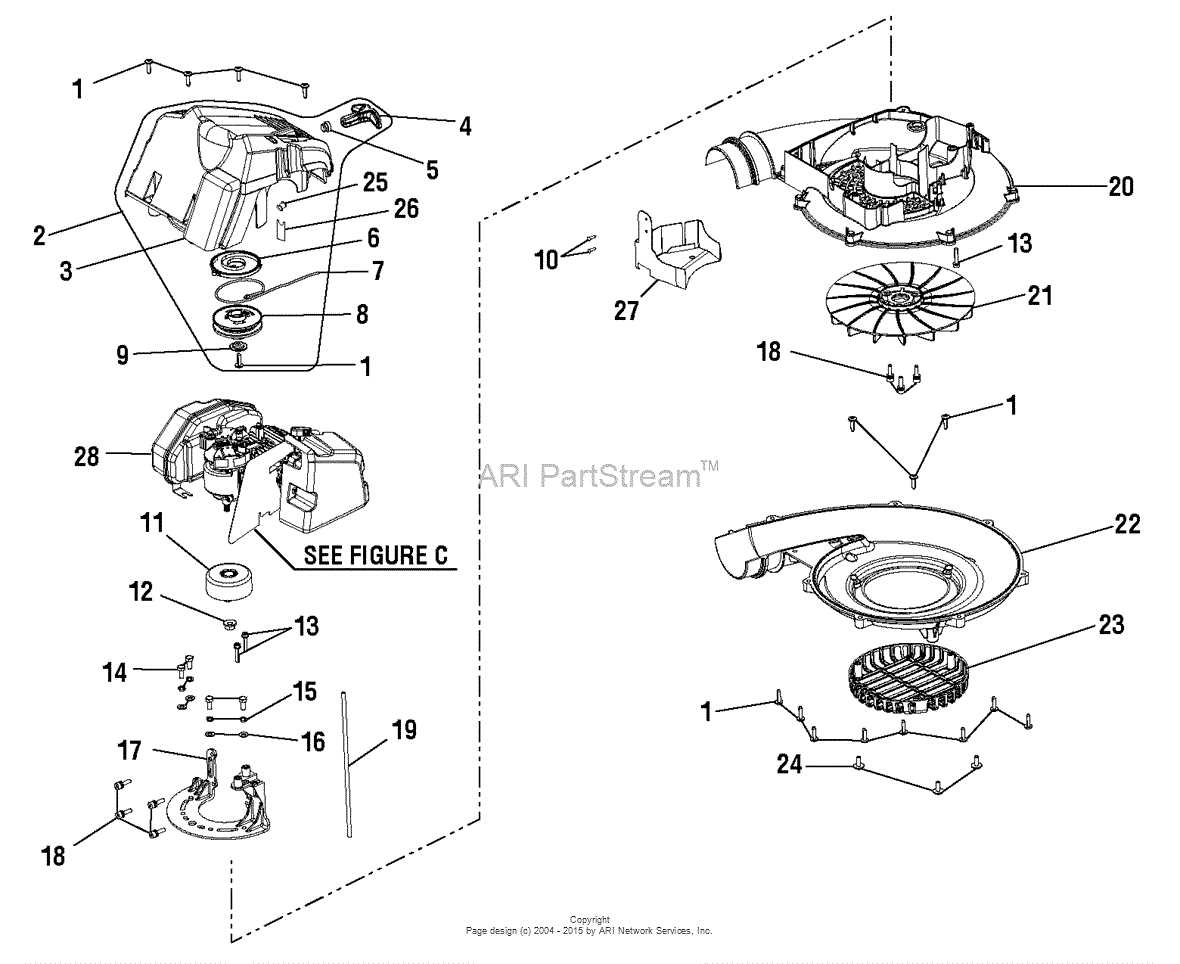
The Ryobi blower fuel line diagram typically shows the fuel line’s path and connections. It demonstrates how the fuel flows from the tank through the fuel filter and into the carburetor. Additionally, it illustrates how the primer bulb helps prime the fuel system and send fuel to the engine for ignition.
By referring to the Ryobi blower fuel line diagram, you can effectively troubleshoot and address any issues with the fuel line. Whether it’s a clogged fuel line, a faulty fuel filter, or a damaged primer bulb, understanding the layout and components will enable you to repair and maintain your Ryobi blower efficiently.
Understanding the Fuel System in a Ryobi Blower
The fuel system in a Ryobi blower is a crucial component that ensures the proper functioning of the machine. It is responsible for delivering fuel to the engine, ensuring a steady flow of gas for combustion. Understanding how the fuel system works can help troubleshoot and maintain the blower effectively.
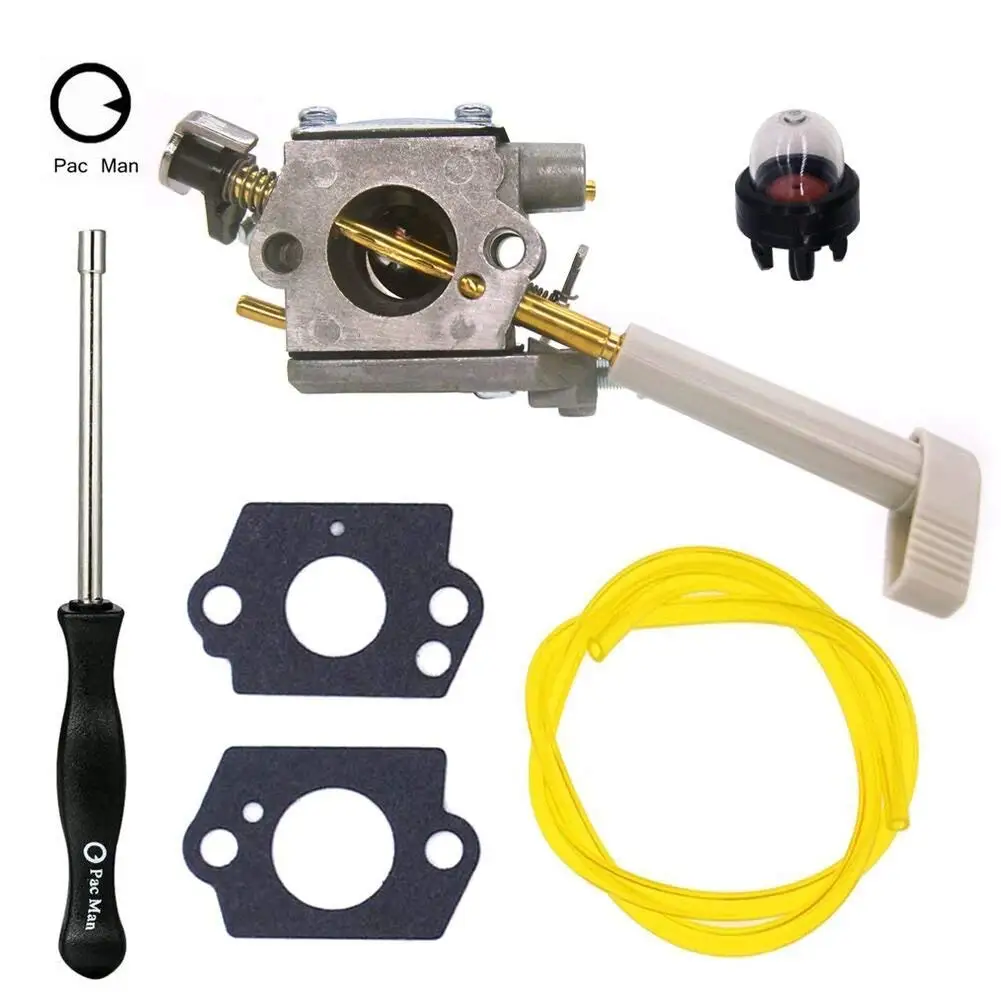
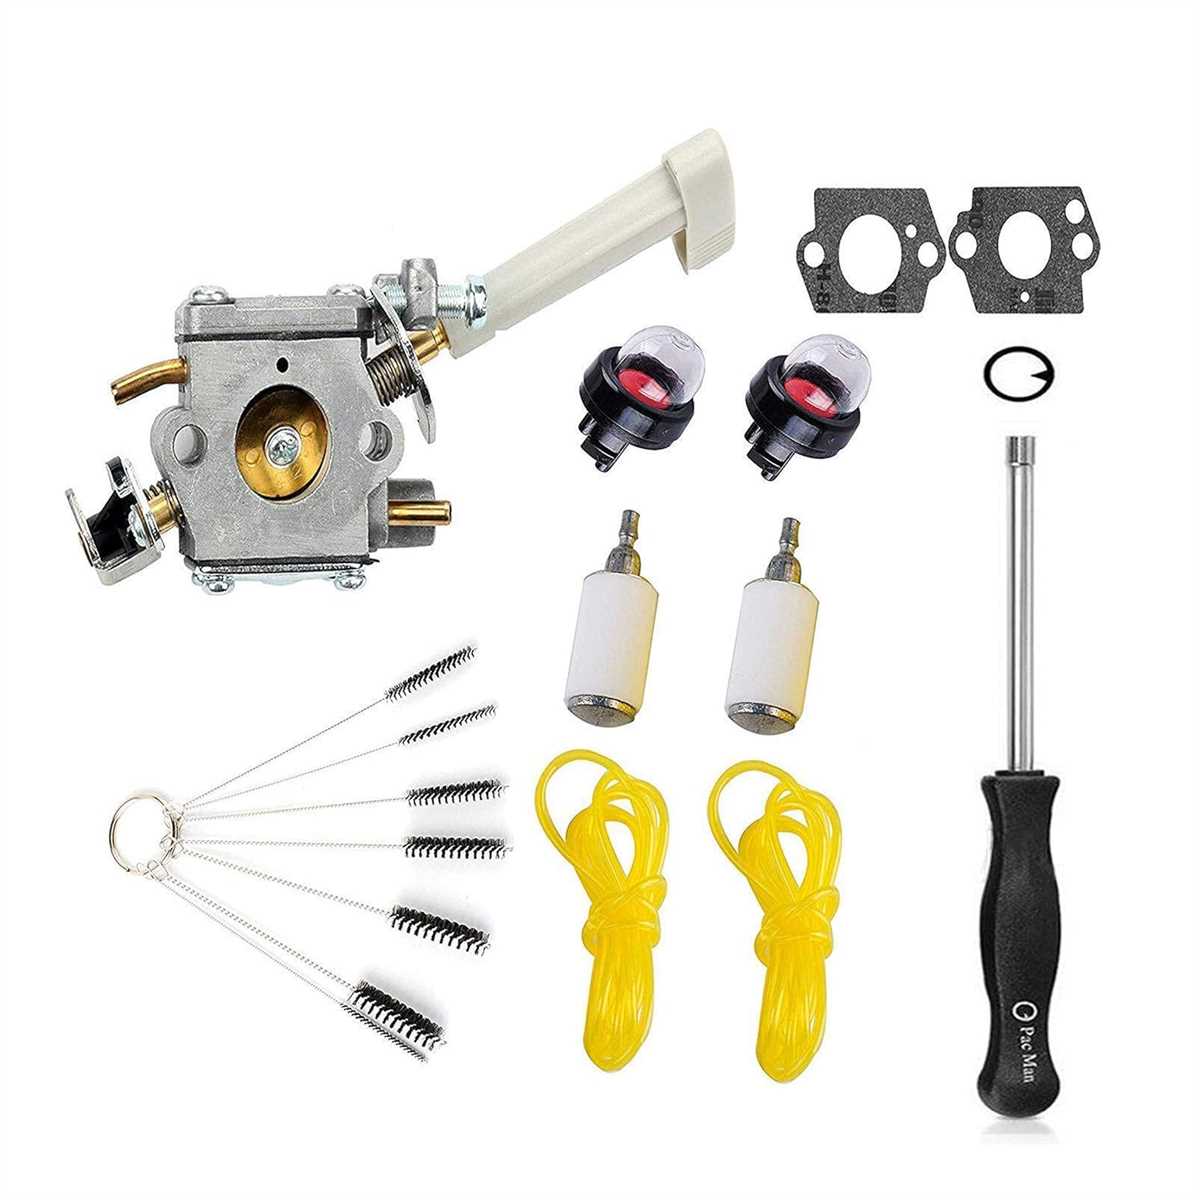
The fuel system consists of several key parts: the fuel tank, fuel filter, fuel line, carburetor, and primer bulb. Starting with the fuel tank, it holds the gasoline that powers the blower. The fuel filter is located inside the tank and prevents any debris or contaminants from entering the fuel line. It is essential to keep the fuel filter clean to ensure proper fuel flow.
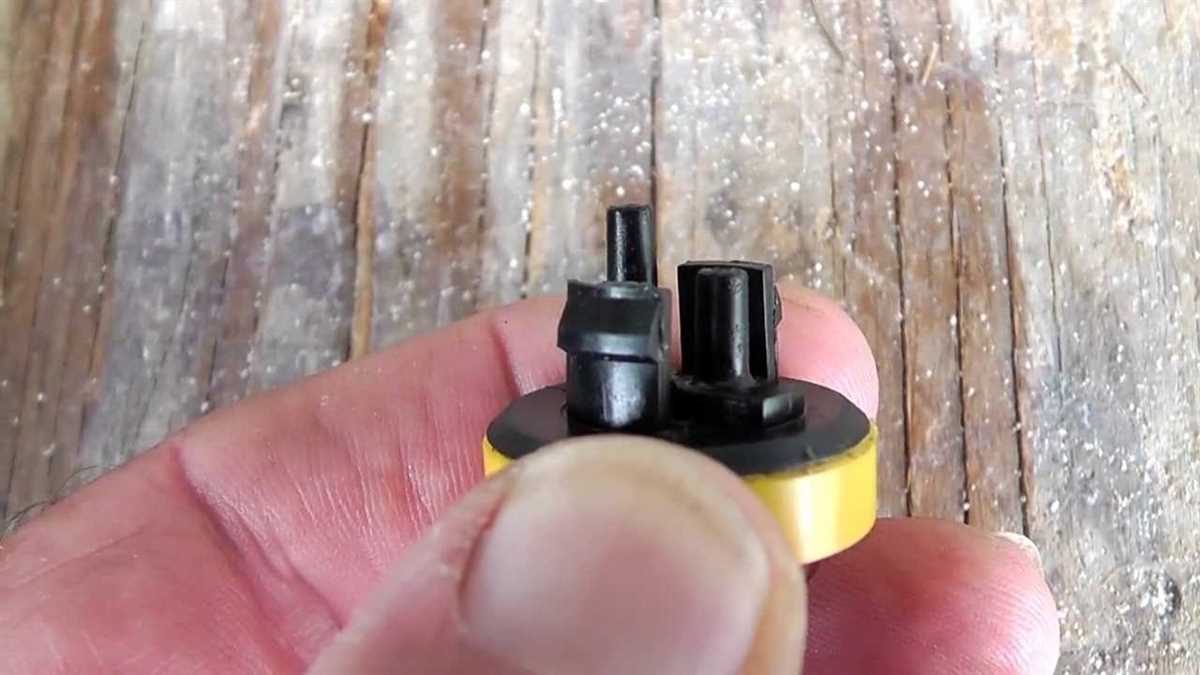
The fuel line is responsible for carrying the fuel from the tank to the carburetor. It is usually a flexible tube made of durable materials to withstand the pressure and ensure a steady fuel supply. The carburetor is the component that mixes air and fuel in the correct ratio before it enters the combustion chamber. The primer bulb, located on the carburetor, helps prime the fuel system by drawing fuel into the carburetor and expelling air.
Regular maintenance of the fuel system is essential to keep the blower running smoothly. This includes checking the fuel tank for any cracks or leaks, cleaning or replacing the fuel filter as needed, inspecting the fuel line for any damage or blockages, and cleaning the carburetor to remove any build-up. Following the manufacturer’s instructions and using high-quality fuel can also help maintain the fuel system’s performance.
Identifying the components in the fuel line system
In a Ryobi blower, the fuel line system is an important component that ensures the proper flow of fuel to the engine. Understanding the various components in the fuel line system is crucial for troubleshooting and maintenance.
The fuel line system consists of several key components:
- Fuel Tank: This is where the fuel is stored. It typically has a cap or lid that allows for easy refilling.
- Fuel Filter: Located inside the fuel tank, the fuel filter helps to remove any impurities or debris from the fuel to prevent clogging in the engine.
- Fuel Lines: These are the hoses or tubes that carry fuel from the tank to the carburetor. There are usually two fuel lines: a main fuel line and a return line.
- Carburetor: The carburetor is responsible for mixing air and fuel in the correct ratio before it enters the engine. It has a fuel inlet and outlet where the fuel lines are connected.
- Fuel Pump: Some Ryobi blowers may have a fuel pump, which helps to draw fuel from the tank and deliver it to the carburetor with the right pressure.
When troubleshooting fuel line issues, it is important to check each component for any signs of damage, clogs, or leaks. If a fuel line or filter is clogged or damaged, it may need to be cleaned or replaced. Additionally, checking the fuel level in the tank and ensuring that there is fresh fuel can also help in identifying fuel line problems.
Overall, understanding the components in the fuel line system of a Ryobi blower is essential for proper maintenance and troubleshooting. By keeping these components in good condition, you can ensure the optimal performance and longevity of your blower.
Step-by-step Fuel Line Replacement Guide for Ryobi Blowers
If you own a Ryobi blower and are experiencing issues with the fuel line, it may be time to replace it. The fuel line is an essential component that delivers fuel from the tank to the engine, ensuring proper operation and performance. In this step-by-step guide, we will walk you through the process of replacing the fuel line on your Ryobi blower.
1. Gather the necessary tools and materials
Before you begin, make sure you have all the required tools and materials for the fuel line replacement. You will need a new fuel line, a socket wrench set, needle-nose pliers, a flat-head screwdriver, and a pair of safety glasses. Additionally, it’s recommended to have a clean work area and some gloves to protect your hands.
2. Prepare the blower for repairs
To start the fuel line replacement, ensure that the blower is turned off and the engine is cool. Next, remove the spark plug wire to prevent the engine from accidentally starting. Secure the blower in a stable position, such as on a workbench or a flat surface, to have easy access to the fuel tank and fuel line.
3. Remove the old fuel line
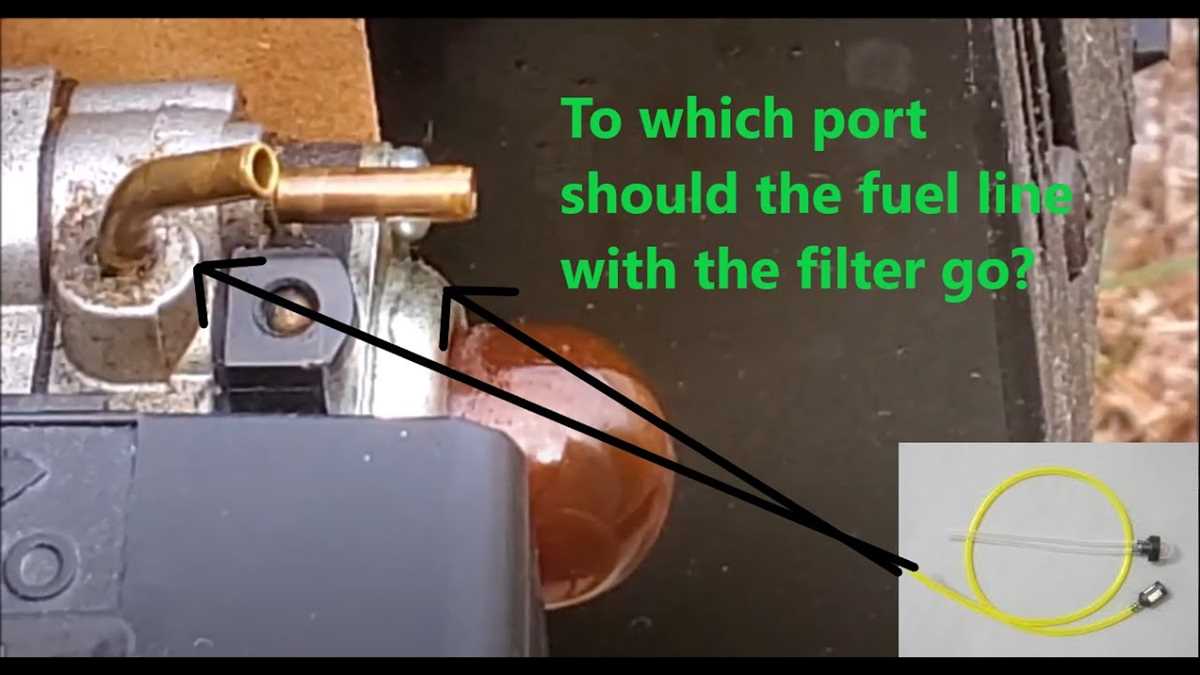
Using a socket wrench, detach the fuel tank from the blower’s body. Locate the fuel line connections on both the fuel tank and the carburetor. Use needle-nose pliers to carefully remove the retaining clips or clamps securing the fuel line. Gently pull the old fuel line out from the fuel tank and carburetor, taking note of the routing and connections.
4. Install the new fuel line

Insert one end of the new fuel line into the fuel tank, ensuring it is securely fitted through the hole. Route the fuel line along the same path as the old one, making sure it is not pinched or kinked. Connect the other end of the fuel line to the carburetor, ensuring it is tightly secured with the retaining clips or clamps.
5. Reassemble and test
Reattach the fuel tank to the blower’s body using the socket wrench. Double-check all connections to make sure they are secure. Once everything is reassembled, put on the safety glasses and gloves before reconnecting the spark plug wire. Start the blower and test its operation to ensure the new fuel line is functioning properly.
By following these step-by-step instructions, you can easily replace the fuel line on your Ryobi blower. Remember to always prioritize safety and take your time during the process. If you encounter any difficulties or are unsure about any steps, it’s recommended to consult the manufacturer’s manual or seek professional assistance.
Troubleshooting Common Fuel Line Issues in Ryobi Blowers
Fuel line issues can cause problems with the performance and functionality of Ryobi blowers. If you are experiencing issues with your blower, it is important to troubleshoot and diagnose the problem correctly. Here are some common fuel line problems that you may encounter and how to fix them.
1. Clogged Fuel Line
A clogged fuel line is a common issue that can occur in Ryobi blowers. This can happen when dirt, debris, or old fuel accumulates in the fuel line, preventing the flow of gasoline to the engine. To fix this, you will need to clean or replace the fuel line. Start by disconnecting the fuel line from the carburetor and using compressed air to blow out any obstructions. If the line is heavily clogged, it may need to be replaced entirely.
2. Leaking Fuel Line
A leaking fuel line can cause fuel to spill out and potentially create a fire hazard. This can happen if the fuel line is damaged, cracked, or improperly connected. Inspect the fuel line for any visible cracks or damage. If you find any, replace the fuel line immediately. Additionally, ensure that the fuel line is properly connected to the carburetor and fuel tank. Tighten any loose connections to prevent leaks.
3. Fuel Line Decay
Over time, fuel lines can deteriorate due to exposure to fuel and environmental factors. If you notice a decayed or brittle fuel line, it is necessary to replace it. This ensures proper fuel flow and prevents any potential fuel leaks. When replacing the fuel line, always use a compatible replacement that matches the original specifications of your Ryobi blower.
By addressing and resolving fuel line issues in your Ryobi blower, you can ensure optimal performance and prolong the lifespan of your equipment. Regular maintenance, including checking and cleaning the fuel line, will help prevent future problems. If you are unsure about any aspect of troubleshooting fuel line issues, consult the manufacturer’s manual or seek assistance from a professional technician.
Tips for maintenance and preventing fuel line problems
Proper maintenance of your Ryobi blower’s fuel line is essential to ensure its optimal performance and longevity. Here are some tips to help you maintain your fuel line and prevent any potential problems:
- Regular cleaning: Clean the fuel line and its components, such as the fuel filter and carburetor, regularly to remove any dirt, debris, or fuel deposits that may clog the line or affect its function.
- Fuel quality: Use clean and high-quality fuel to prevent any impurities or contaminants from entering the fuel line. Avoid using stale or old fuel that may cause blockages or damage to the line.
- Proper storage: When not in use, store your blower in a cool, dry place. Avoid storing it in extreme temperatures or exposing it to direct sunlight, as this can cause the fuel line to deteriorate over time.
- Inspect for leaks: Regularly inspect the fuel line for any signs of leaks or cracks. If you notice any damage, replace the fuel line immediately to avoid fuel leakage or potential fire hazards.
- Proper installation: When replacing the fuel line or any components, ensure they are correctly installed according to the manufacturer’s instructions. Incorrect installation can lead to fuel line problems and affect the performance of the blower.
By following these tips, you can maintain the fuel line of your Ryobi blower effectively and prevent any potential problems. Regular maintenance and care will ensure that your blower continues to perform optimally and provide you with efficient and hassle-free operation for years to come.
Q&A:
What are some tips for maintaining fuel lines?
Some tips for maintaining fuel lines include regularly inspecting the lines for any signs of damage or wear, ensuring that the lines are properly secured and not loose, and cleaning the lines on a regular basis to remove any dirt or debris that may have accumulated.
How often should fuel lines be inspected?
Fuel lines should be inspected at least once a year or more frequently if the vehicle is driven in harsh conditions or if there have been any issues with the fuel system. It’s important to catch any potential problems early to prevent more serious issues down the line.
What are some common signs of fuel line problems?
Common signs of fuel line problems include fuel leaks, a decrease in fuel efficiency, engine misfires, and a strong smell of gasoline. If any of these signs are present, it’s important to have the fuel lines inspected and repaired as soon as possible.
How can fuel line problems be prevented?
Fuel line problems can be prevented by using high-quality fuel, regularly inspecting and maintaining the fuel lines, and avoiding driving the vehicle with a low fuel level. It’s also important to be mindful of any changes in the vehicle’s performance or fuel consumption and address them promptly.
Is it possible to repair a damaged fuel line?
In some cases, a damaged fuel line can be repaired. However, it’s always best to consult with a professional mechanic to determine the best course of action. If the damage is extensive or if multiple sections of the fuel line are affected, it may be more cost-effective to replace the entire fuel line.
How often should fuel lines be inspected?
Fuel lines should be inspected at least once a year or as recommended by the manufacturer. Regular inspection helps identify any leaks, cracks, or other issues before they escalate into larger problems.