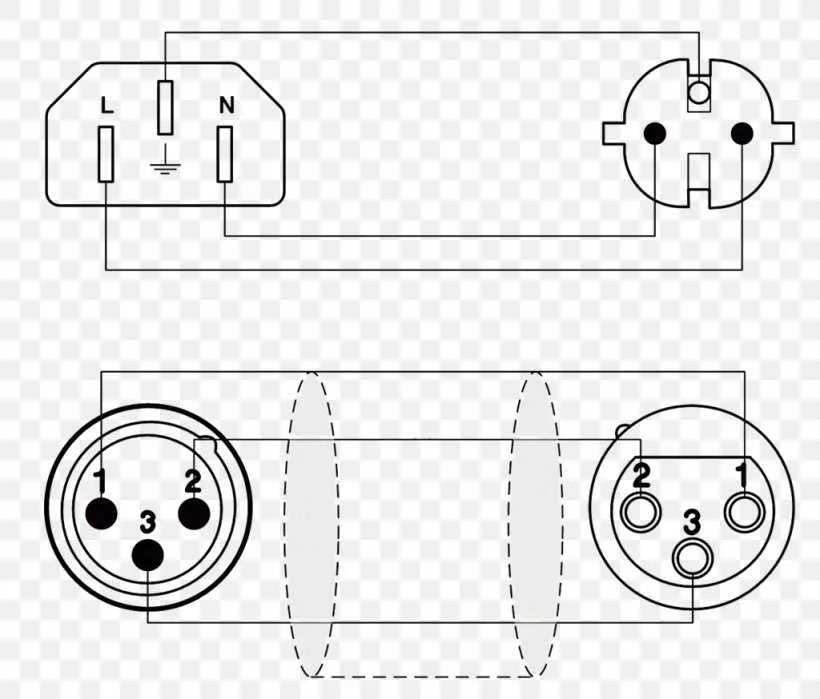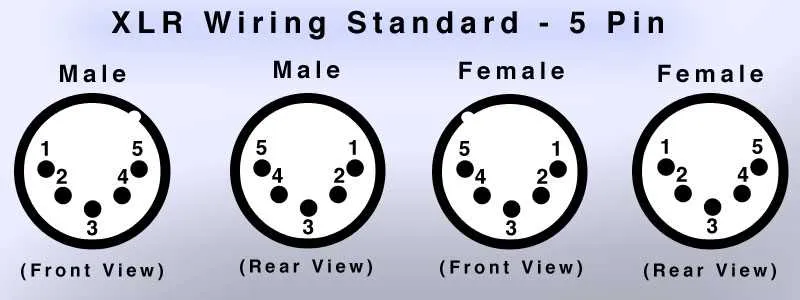
To ensure a reliable connection between audio equipment, start by using a balanced cable with two conductors and a ground. The connectors should be properly aligned to guarantee signal integrity, particularly when transmitting over long distances. When connecting devices like microphones or mixers, make sure to use male connectors at the source end and female connectors at the receiving end.
Pin 1 is typically for the ground, while Pin 2 carries the positive signal, and Pin 3 carries the negative. When constructing the cable, make sure that each pin is properly connected to its counterpart on the receiving end. Pay special attention to the orientation of the connectors to avoid any potential issues with signal transfer.
When testing the setup, ensure that there is no interference or hum. If any issues arise, check the grounding connections first, as poor grounding is often the cause of most signal problems in these connections.
Connection Guide for Balanced Audio Cables
For a professional audio setup, using a balanced connection between devices ensures signal integrity over long distances. To properly connect two devices using a three-pin cable, follow this pinout:
Pin 1: Ground (Shield) – This is the common reference point, typically connected to the outer metal casing of the connectors.
Pin 2: Positive (Hot) – This pin carries the positive phase of the audio signal and is crucial for proper phase alignment.
Pin 3: Negative (Cold) – This pin carries the inverted audio signal, which, when combined with the positive phase, cancels out noise or interference.
Ensure that the connections are properly shielded to prevent external noise from affecting the audio quality. Any loose connections may result in signal degradation or humming sounds in the audio.
How to Wire an XLR Cable for Audio Equipment

Start by stripping about 1 inch of the outer insulation from both ends of the cable, exposing the three internal wires. Each wire serves a specific function: the positive (hot), the negative (cold), and the ground. Use wire cutters to trim the wires to the necessary length, making sure they’re not frayed or damaged.
For each end of the cable, connect the three wires to the corresponding pins on the connector. The hot wire typically goes to pin 2, the cold wire to pin 3, and the ground wire to pin 1. Make sure that the connections are secure and well-soldered to prevent any issues with signal integrity.
After making the connections, double-check for any stray strands of wire that could cause a short circuit. Once everything is securely attached, carefully slide the metal casing over the connection, ensuring it’s tightly screwed to avoid any accidental disconnections.
Test the cable with the audio equipment before finalizing the process. This will help you ensure there are no issues with the wiring and that the signal is transmitted clearly. If necessary, recheck your connections to verify accuracy.
Common Mistakes to Avoid in Audio Cable Connections
Ensure correct pin alignment when connecting the cables. Incorrect pin assignments lead to distorted signals or complete failure in transmission.
Check grounding issues: A common problem arises when the grounding is not properly connected, causing hum or noise in the audio path. Always verify the connection of the shielded wire to the ground pin.
Avoid mixing balanced and unbalanced systems: Connecting a balanced cable to an unbalanced device without a proper adapter results in poor signal quality and possible damage to equipment.
Proper cable length: Avoid using unnecessarily long cables, as this can introduce noise. If the length exceeds the required distance, consider using a signal booster or a better-quality cable to maintain integrity.
Secure and solid connections: Loose or incomplete connections are a frequent cause of performance issues. Always ensure the connectors are firmly seated and locked in place to avoid intermittent sound dropouts.
Connector quality matters: Cheap connectors can cause signal degradation or faulty connections. Invest in high-quality connectors to ensure long-lasting and stable performance.
Avoid reversing polarity: Incorrectly wiring the positive and negative signals leads to phase issues that result in sound cancellation or distortion. Double-check the wiring before use.
Identifying Pinouts and Shielding in Audio Cables

When working with professional audio connections, correctly identifying pinouts and shielding is crucial for maintaining signal integrity and minimizing interference. Here’s how to ensure you connect your cables properly:
- Pin 1: Ground (Shield) – Always connect this to the shield of the cable. This prevents electrical noise from affecting the signal.
- Pin 2: Hot (Positive) – This carries the positive (live) signal. Ensure it’s wired to the correct pin on both ends for signal continuity.
- Pin 3: Cold (Negative) – The negative counterpart of the signal. It should be matched with pin 2 to maintain proper phase and polarity.
Pay special attention to the shield:
- Ensure the shield is securely connected to the ground, typically pin 1.
- Proper grounding will avoid hum, buzz, or other unwanted noise during transmission.
Check the cable’s physical integrity as well. A poorly shielded cable can still allow unwanted signals to leak into the system, even if the pinouts are correct.