
The Omron h3ds-ml is a versatile and reliable digital timer that is widely used in industrial automation systems. It is known for its user-friendly interface and precise timing capabilities. To ensure proper installation and operation of the h3ds-ml timer, it is important to understand its wiring diagram.
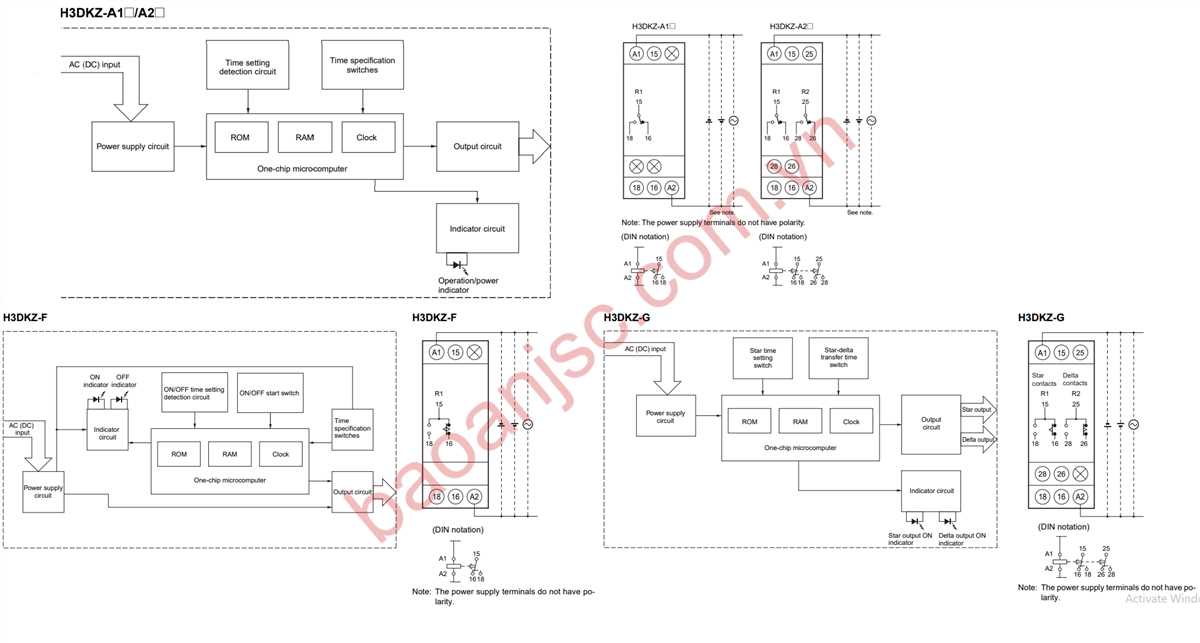
The wiring diagram provides a visual representation of how the different components of the timer are connected. It shows the electrical connections between the timer, power supply, control devices, and output devices. Understanding the wiring diagram is crucial for troubleshooting issues and ensuring the timer functions correctly.
The Omron h3ds-ml timer has several terminals, each serving a specific purpose. The wiring diagram clearly indicates the terminal numbers and their corresponding functions. For example, terminal 1 is typically used for the power supply input, while terminal 2 is used for external control input.
Additionally, the wiring diagram also shows how the output devices, such as relays or solenoids, are connected to the timer. This information is important for configuring and controlling the output devices based on the timer’s timing sequence.
What is Omron h3ds-ml?
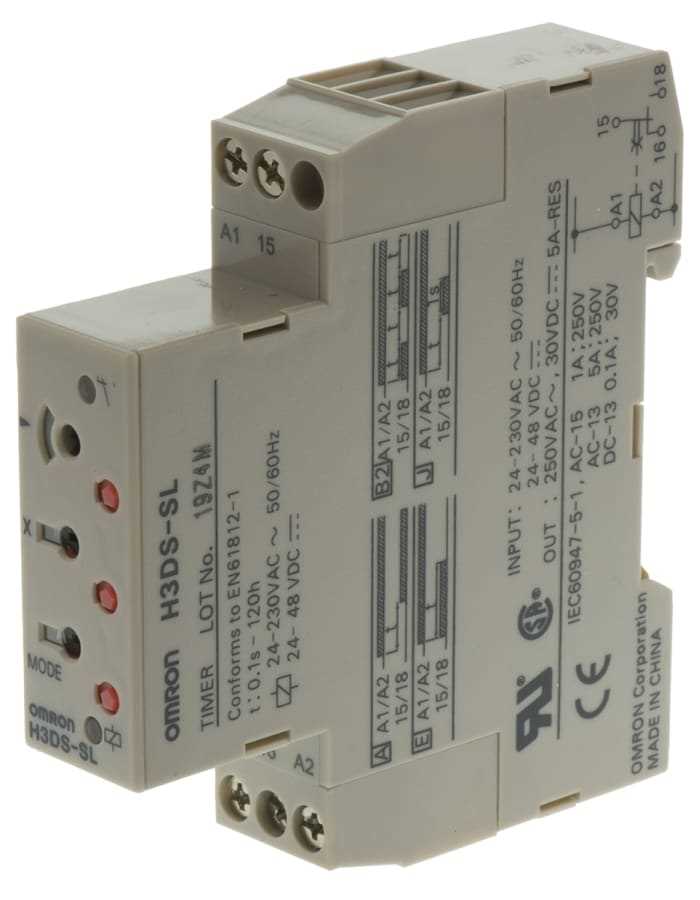
The Omron h3ds-ml is a type of timer relay manufactured by Omron Corporation, a leading provider of industrial automation solutions. The h3ds-ml model in particular is a versatile and highly reliable timer relay that is commonly used in various industrial applications.
This timer relay is designed to provide precise time control in automated systems, helping to optimize operation and improve productivity. It features multiple timing modes, allowing users to select the most suitable mode for their specific process requirements. The h3ds-ml also offers a wide range of time settings from microseconds to hours, giving users flexibility in their time control operations.
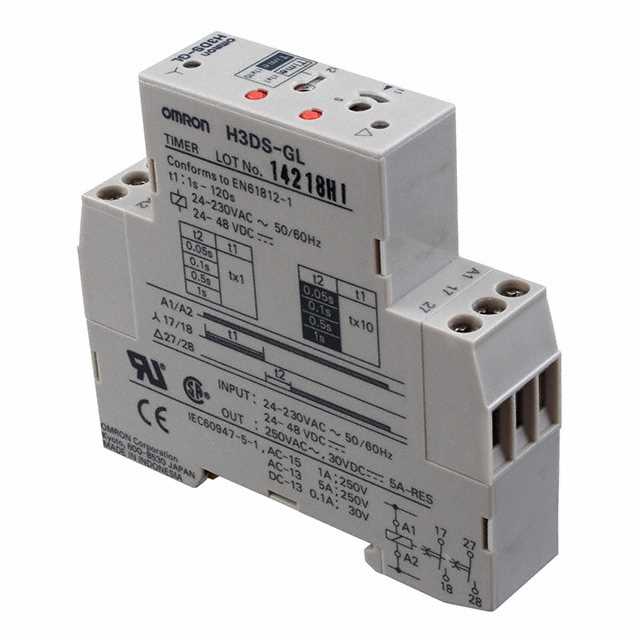
The wiring diagram for the Omron h3ds-ml is a visual representation of how the relay should be connected to other components in an electrical system. It provides clear guidance on the proper connection of input and output terminals, ensuring accurate and safe operation.
With its advanced features and robust construction, the Omron h3ds-ml timer relay is a reliable solution for time control applications in various industries, including manufacturing, automotive, and energy. Its versatility, accuracy, and ease of use make it an ideal choice for automation professionals looking to enhance their system performance.
Omron h3ds-ml Overview
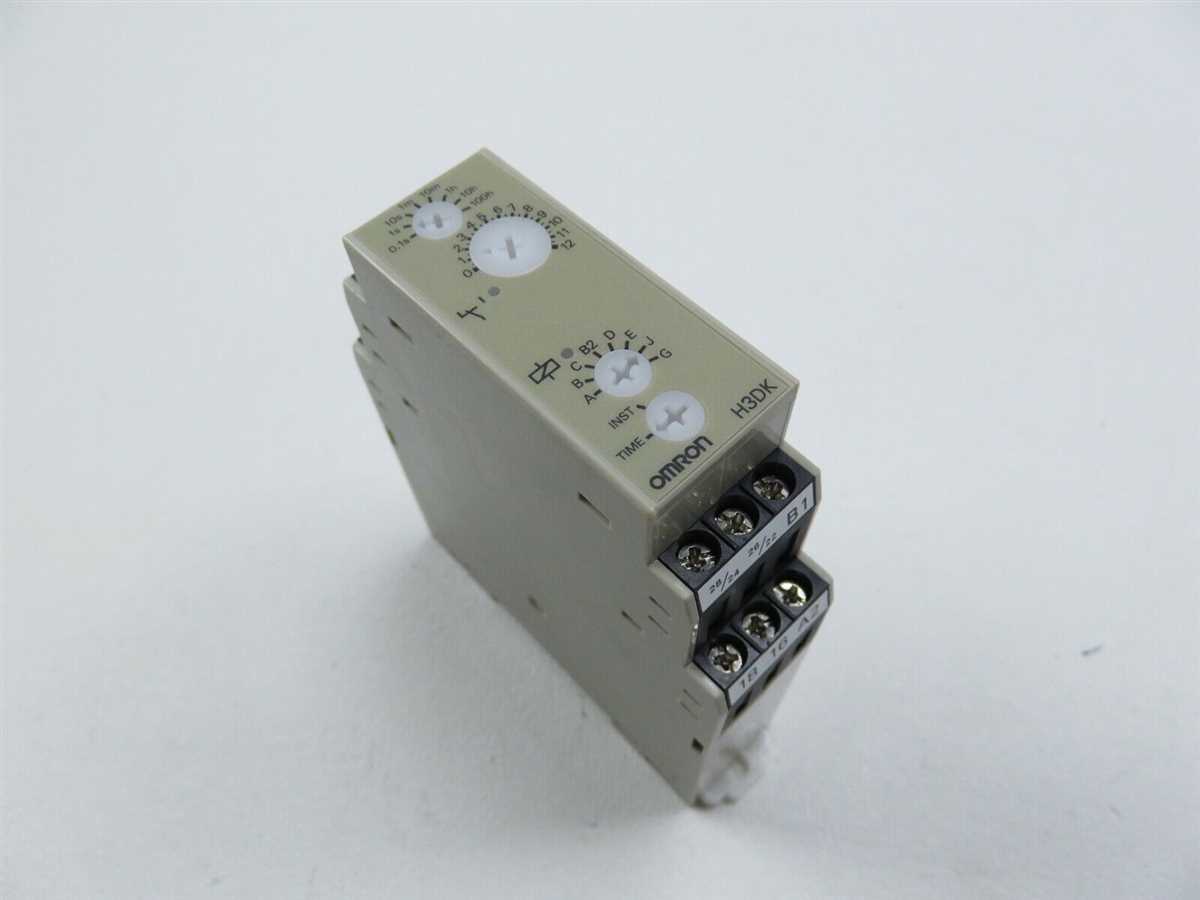
The Omron h3ds-ml is a programmable time relay that provides various timing functions for industrial applications. With its compact design and user-friendly interface, it is ideal for controlling time-based operations in a wide range of systems and processes.
This time relay offers multiple timing modes, including ON-delay, flicker OFF-ON delay, interval, and ON-OFF delay. Each mode can be easily configured and adjusted using the intuitive front panel buttons and display. The h3ds-ml also has a memory function that allows users to save and recall up to 10 different timing settings, making it convenient for repetitive tasks or complex timing sequences.
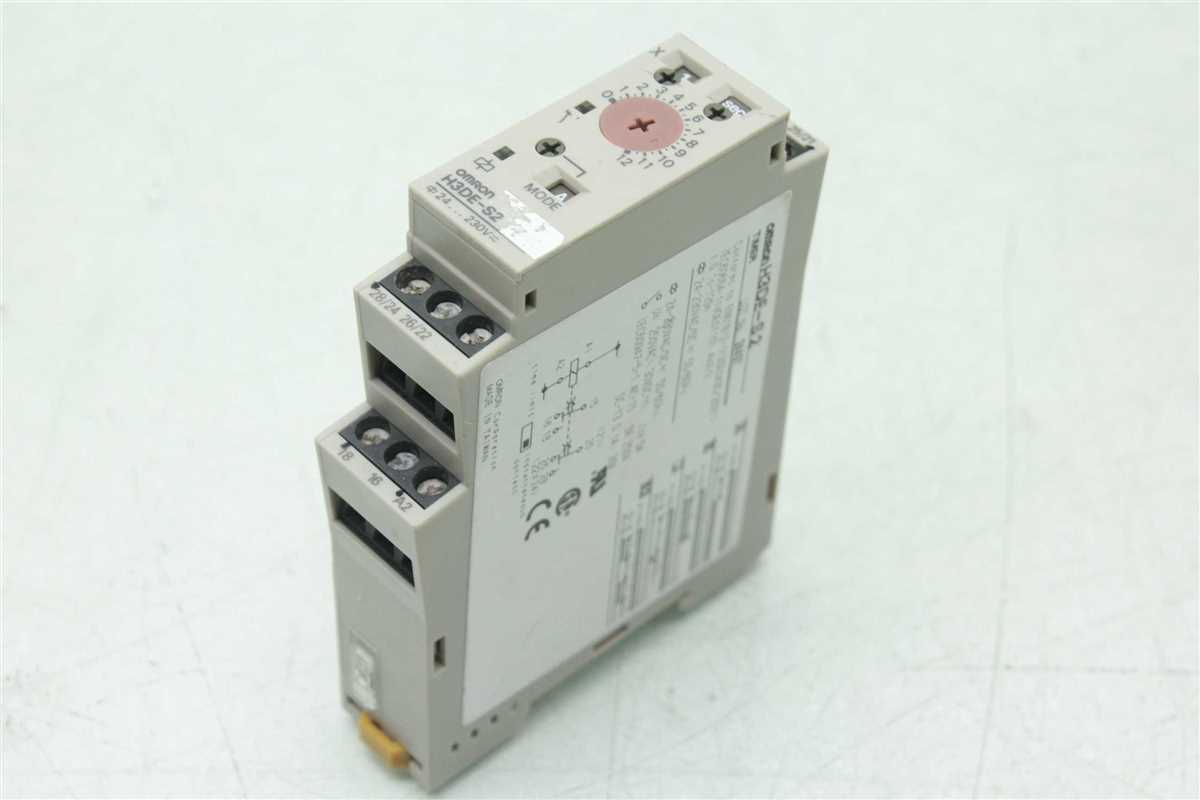
The h3ds-ml features a wide operating voltage range, from 24 to 230 volts AC/DC, allowing it to be used in various power supply systems. It also has a compact size, with dimensions of 48mm x 48mm x 59mm, making it easy to fit into control panels or equipment enclosures.
This time relay is equipped with screwless terminals for easy and secure wiring. The terminals accept wires with a cross-section of up to 2.5mm², ensuring compatibility with a wide range of wire sizes. Additionally, the h3ds-ml has LED indicators that provide visual feedback on its status and timing operation, allowing users to easily monitor its performance in real-time.
In conclusion, the Omron h3ds-ml is a versatile and reliable time relay that offers precise timing control in industrial applications. Its compact design, user-friendly interface, and wide range of timing modes make it an excellent choice for various time-based operations.
Identifying the components
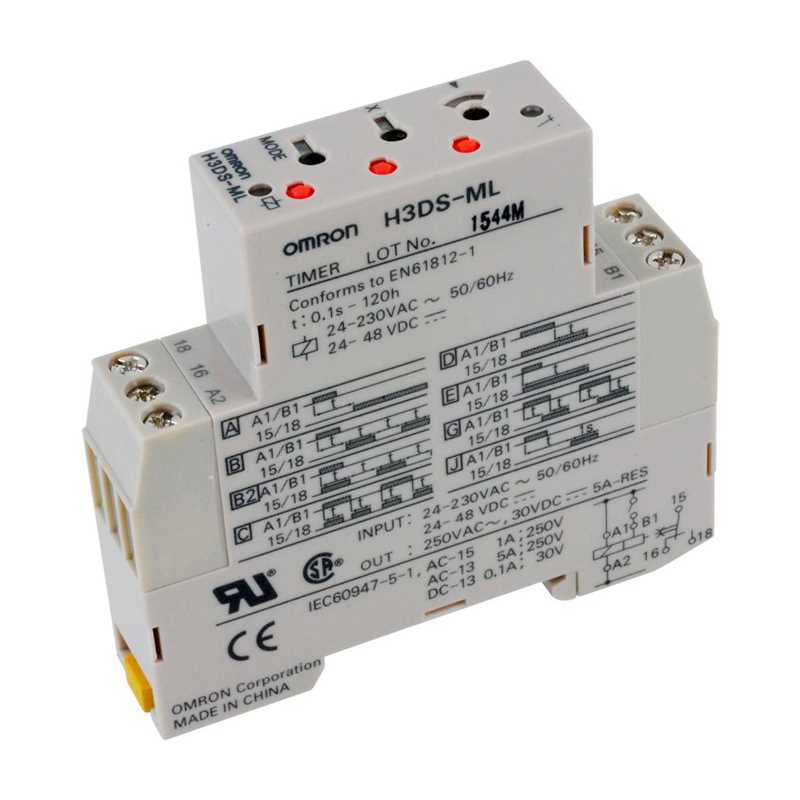
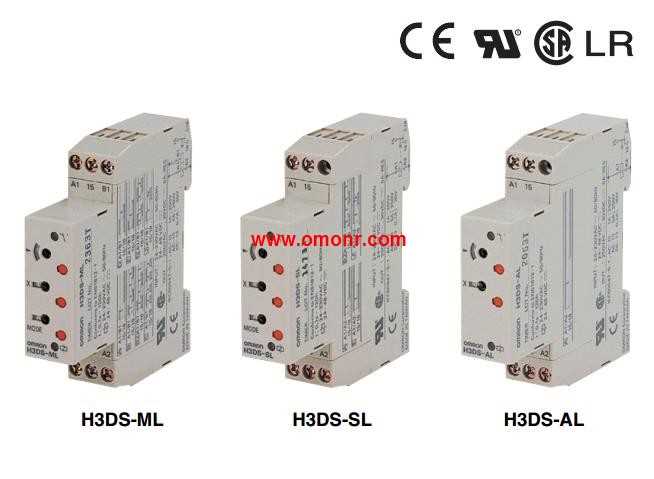
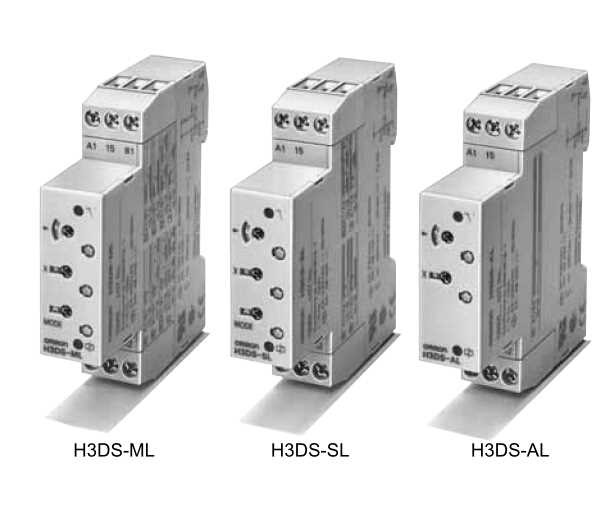
The Omron H3DS-ML is a multifunction electronic timer that is used in a variety of applications. It is important to be able to identify the different components of the timer in order to properly install and configure it.
1. Timer Display: The timer display is located on the front of the H3DS-ML and provides information about the current time settings and operating status. It is a digital display that shows numbers and symbols to indicate the timer’s mode, time setting, and countdown status.
2. Control Buttons: There are several control buttons located below the timer display that are used to program and operate the H3DS-ML. These buttons include functions such as setting the timer mode, adjusting the time settings, and starting or stopping the timer.
3. Terminal Blocks: The H3DS-ML has two terminal blocks located on the back of the timer. These terminal blocks are used for connecting various wires and devices to the timer. One terminal block is labeled “Input” and is used for connecting the input signal wires, while the other terminal block is labeled “Output” and is used for connecting the output signal wires. It is important to correctly wire the input and output signals to ensure proper operation of the timer.
4. Mode Select Switch: The mode select switch is located on the front of the timer and is used to select the desired timer mode. The available timer modes include ON delay, instantaneous, flicker, ON delay flicker, repeat cycle, and signal off-delay.
- ON delay: The timer starts counting when the input signal is received and activates the output after the set delay time.
- Instantaneous: The output is immediately activated when the input signal is received.
- Flicker: The output turns ON and OFF alternately at a set frequency when the input signal is received.
- ON delay flicker: The output turns ON after the set delay time and then turns ON and OFF alternately at a set frequency.
- Repeat cycle: The timer activates the output for a set ON time and then deactivates it for a set OFF time.
- Signal off-delay: The output activates when the input signal is received and deactivates after the set delay time.
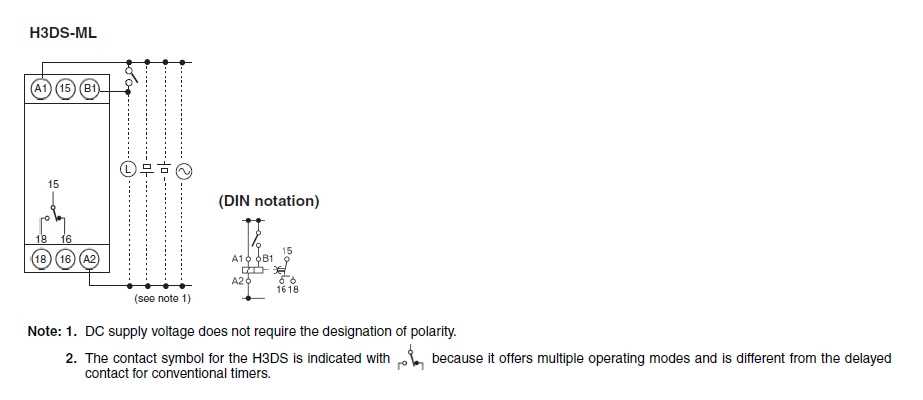
5. Wiring Diagram: The H3DS-ML comes with a wiring diagram that illustrates how to connect the timer to the input and output devices. It is important to refer to the wiring diagram and follow the instructions carefully to ensure proper installation.
By familiarizing yourself with these components, you will be able to effectively install and configure the Omron H3DS-ML timer for your specific application.
How to make connections
When wiring the Omron H3DS-ML timer, it is important to follow the correct procedures to ensure proper functioning. The wiring diagram provides a visual representation of how the connections should be made. Here are the steps to make the connections:
- Power supply: Connect the positive (+) terminal of the power supply to terminal 10 of the timer and the negative (-) terminal of the power supply to terminal 11 of the timer. Ensure that the power supply voltage matches the specifications of the timer.
- Control input: Connect the control input signal (e.g. a switch or sensor) to terminal 2 of the timer. This signal will be used to start or stop the timer.
- Output contacts: The timer has two output contacts, labeled ‘1a’ and ‘1b’. Connect the load (e.g. a motor or solenoid) to these contacts. The ‘1a’ contact is normally closed, meaning it is connected when the timer is not activated. The ‘1b’ contact is normally open, meaning it is disconnected when the timer is not activated.
- Reset: The timer has a reset function that can be used to manually reset the timing. Connect a switch or button to terminal 6 of the timer to enable the reset function.
It is important to double-check all the connections before applying power to the timer. Ensure that the wiring is secure and there are no loose connections. Following the correct wiring diagram and making proper connections will help ensure the reliable operation of the Omron H3DS-ML timer.
Common issues and how to solve them
When working with the Omron h3ds-ml timer, there are some common issues that you may encounter. Here are a few of these issues and how to solve them:
1. No power supply
If the Omron h3ds-ml timer is not receiving power, first check if the power source is properly connected and turned on. Make sure that the power supply matches the required voltage for the timer. If the power source is correct and the timer still does not receive power, it may be a problem with the wiring or the power supply unit. Double-check the wiring connections and if necessary, replace the power supply unit.
2. Incorrect wiring
Incorrect wiring is another common issue that can cause the Omron h3ds-ml timer to malfunction. Check the wiring diagram provided in the manual and make sure that all connections are made correctly. Pay attention to the wiring for the input and output terminals, as well as any auxiliary devices that may be connected. If the wiring is incorrect, correct it according to the diagram.
3. Timer not counting correctly
If the timer is not counting correctly, it could be due to various factors. First, check if the timer is set to the correct operating mode. The Omron h3ds-ml timer has several different modes, such as ON delay, interval, flicker, and more. Make sure that the timer is set to the appropriate mode for your application. If the mode is correct and the timer still does not count correctly, there may be a problem with the timer unit itself. In this case, consider replacing the timer unit.
4. Display not clear or not functioning
If the display on the Omron h3ds-ml timer is not clear or not functioning, it may be a problem with the display unit. Check if the display is properly connected to the timer unit. If it is, try adjusting the brightness or contrast settings, if applicable. If the display is still not clear or not functioning, it may be a faulty display unit. Consider replacing the display unit with a new one.
These are just a few of the common issues that you may encounter when working with the Omron h3ds-ml timer. Always refer to the user manual for troubleshooting steps and consult a professional if you are unsure about any aspect of the timer’s operation.
Maximizing the benefits of the wiring diagram
The Omron h3ds-ml wiring diagram is a valuable tool for understanding and troubleshooting the electrical connections in your system. By following the diagram, you can ensure that all the components are connected correctly and that there are no potential issues that could affect the performance or safety of your system.Here are some tips to help you maximize the benefits of the wiring diagram:
- Study the diagram: Take the time to thoroughly study the diagram and understand how the components are connected. Familiarize yourself with the symbols and labels used in the diagram to avoid any confusion or mistakes.
- Double-check the connections: Before making any connections, double-check the diagram to ensure that you are connecting the right components in the right way. This will help prevent any unnecessary damage or errors.
- Use the correct tools: When making the connections, use the appropriate tools and techniques recommended by the manufacturer. This will ensure that the connections are secure and reliable.
- Organize the wiring: Keep the wiring neat and organized to make it easier to troubleshoot and maintain. Use cable ties or clips to secure the wires and label them if necessary.
- Document changes: If you make any modifications or additions to the wiring, update the diagram to reflect the changes. This will help you and others understand the current configuration of the system.
The Omron h3ds-ml wiring diagram is a powerful tool that can save you time and effort in troubleshooting and maintaining your electrical system. By utilizing it effectively, you can ensure that your system operates efficiently and safely.