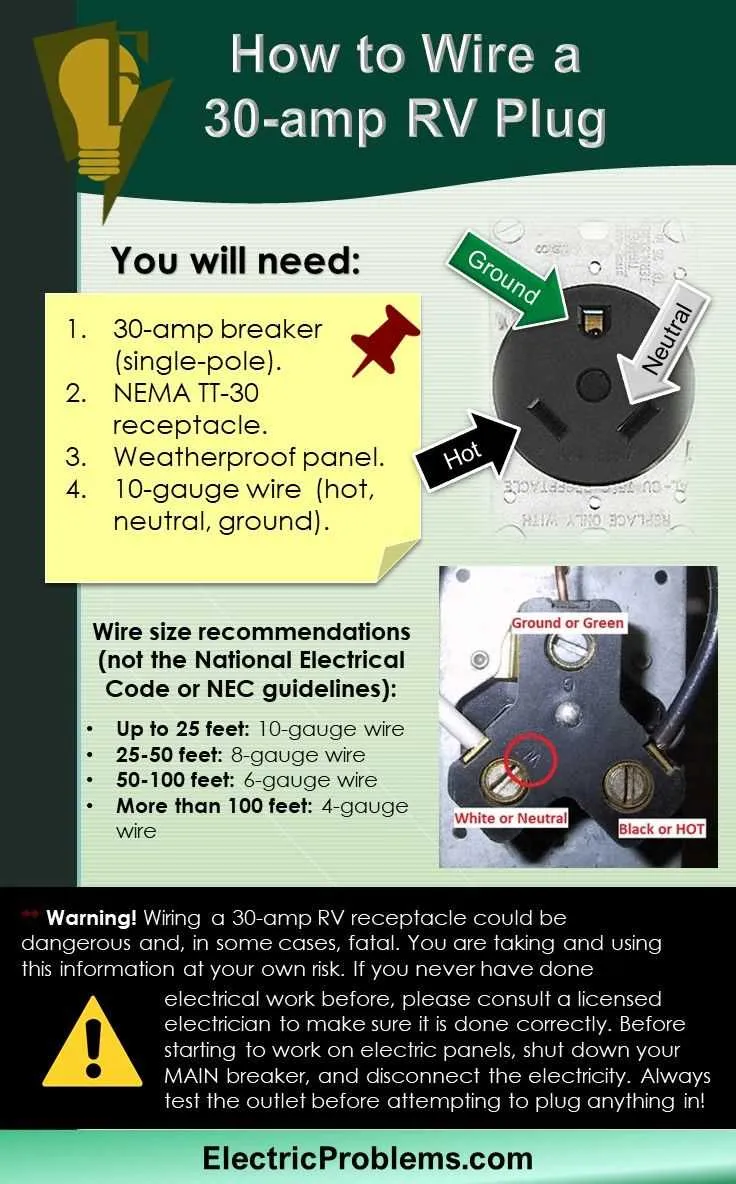
To correctly establish a safe connection between your RV and an external power source, follow these specific steps. Ensure you’re using the correct gauge wire: a 10 AWG wire is optimal for handling the current without risking overheating. For the three-pronged setup, the terminals should be properly identified as hot, neutral, and ground.
Start by attaching the live (hot) wire to the brass terminal, which provides the flow of electricity to the RV. The neutral wire should be connected to the silver terminal, while the ground wire attaches to the green terminal. It’s crucial to double-check the tightness of each screw to prevent any loose connections, which could result in power interruptions or fire hazards.
Before final installation, make sure all connections are secure and that the outer casing of the assembly is fully insulated. Additionally, a 30-amp breaker on the power source is necessary for overcurrent protection. Always use a high-quality, weather-resistant connector to withstand environmental conditions and ensure longevity.
Key Tip: Test the connection with a multimeter before connecting the RV to confirm that all terminals are correctly wired and functional. This step is vital for ensuring safe power transfer and avoiding electrical malfunctions.
Electrical Connections of a 30-Amp RV Socket

Ensure correct placement of each wire in the terminal connections:
Start by connecting the neutral wire to the designated slot. This is typically located on the left side. The neutral wire should be connected to the silver terminal, marked as “N” or with a similar label.
The live wire should be connected to the brass terminal on the right side. This connection is crucial as it carries the current that powers the RV’s appliances. Make sure the wire is securely tightened to avoid any potential heat buildup or electrical faults.
The ground wire must be attached to the green or bare copper terminal. Grounding helps prevent electrical shocks and provides a path for excess electricity to flow safely into the earth.
Use high-quality materials and tools for these connections to minimize wear and tear over time. Double-check all connections before powering up to ensure safety.
Understanding the Wire Colors and Their Functions

Always ensure the correct identification of each wire’s function before starting installation. Here are the common color codes and their corresponding roles in a 30A system:
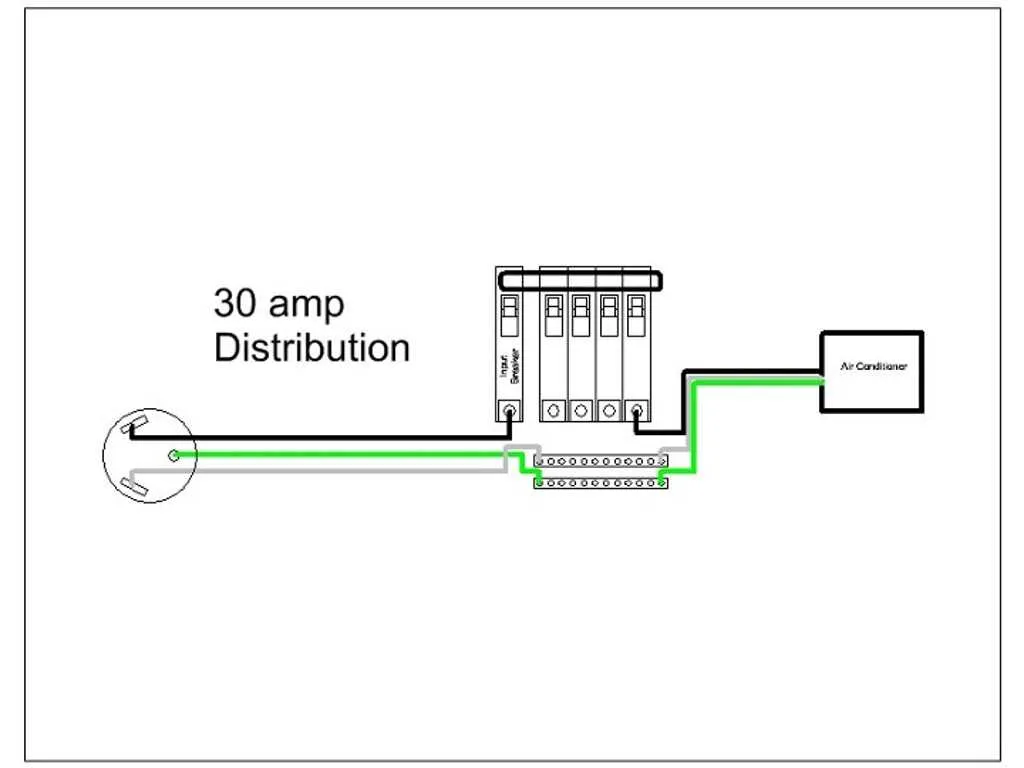
- Black: Typically the hot wire, carrying the current to the device.
- White: The neutral wire, completing the electrical circuit and providing a return path.
- Green or Bare: This is the ground wire, used for safety to direct excess electrical current to the earth.
Always confirm the integrity and proper connection of each wire, ensuring they are routed separately to avoid cross-contact or interference. Using the correct wire color helps reduce errors and increases safety during operation.
Step-by-Step Process for Installing a 30 Amp RV Connector
Begin by turning off the power at the main electrical panel to ensure safety. Select a suitable outdoor-rated outlet box and secure it in place. The terminal block inside should match the gauge of the wire you’re using, typically 10/3 or 6/3 gauge for this type of connection.
Next, prepare the wires by stripping off approximately 1 inch of insulation from the ends. Connect the black wire to the brass-colored terminal, which is for the hot wire. Attach the white wire to the silver terminal, designated for neutral. Finally, connect the green wire to the green terminal for ground.
Make sure that each connection is tight and secure, as loose terminals can lead to overheating. Once the connectors are in place, carefully screw the cover onto the box, ensuring the wires are neatly arranged to avoid any strain or contact with metal surfaces.
After everything is installed, test the outlet with a multimeter before connecting the RV to verify proper voltage and grounding. If the readings are correct, the setup is complete, and you’re ready to connect your RV.
Common Mistakes to Avoid When Setting Up a 30A Connection
Ensure that all connections are tight and properly secured to prevent overheating and potential fire hazards. Loose terminals or improper contact can cause voltage drops, resulting in equipment malfunction.
Always match the wire gauge with the required capacity. Using undersized cables increases resistance, leading to overheating. For a 30A setup, 10 AWG wire is typically recommended for the main line, while 12 AWG may be used for lower power circuits.
Check the ground connection thoroughly. A faulty ground can lead to dangerous electrical faults. Make sure the grounding conductor is connected to the proper terminal and bonded securely to the metal frame of the RV or electrical system.
Do not ignore polarity. Reversing the hot and neutral terminals will not only damage the equipment but also create an unsafe environment. Always verify that the terminals are connected according to their designated roles.
Never skip over using proper weatherproofing. Exposed connectors can lead to rust and corrosion, especially when the setup is located outdoors. Invest in waterproof covers or enclosures for the terminals.
Ensure the receptacle is rated for 30A and compatible with the electrical setup. Using an incompatible outlet can lead to overheating, sparking, or failure of the connection.